
Let’s get one thing straight immediately. If you put a wheel of melted cheese in front of me, I will consider it a personal challenge to finish the entire thing. We often pretend that baked brie with crackers is a fancy appetizer for sophisticated gatherings. We act like we make it for the guests. But deep down, we know the truth. We make it because eating a pound of warm, gooey cheese is the closest we can get to heaven without leaving the kitchen.
I absolutely adore this dish. It defies the laws of cooking effort versus reward. You spend maybe five minutes prepping, fifteen minutes waiting, and then you look like a culinary genius. It’s the ultimate party trick. Yet, despite its simplicity, I have seen people mess this up. I’ve seen burnt rinds, cold centers, and the tragic mistake of serving it with flimsy crackers that snap under the weight of the cheese.
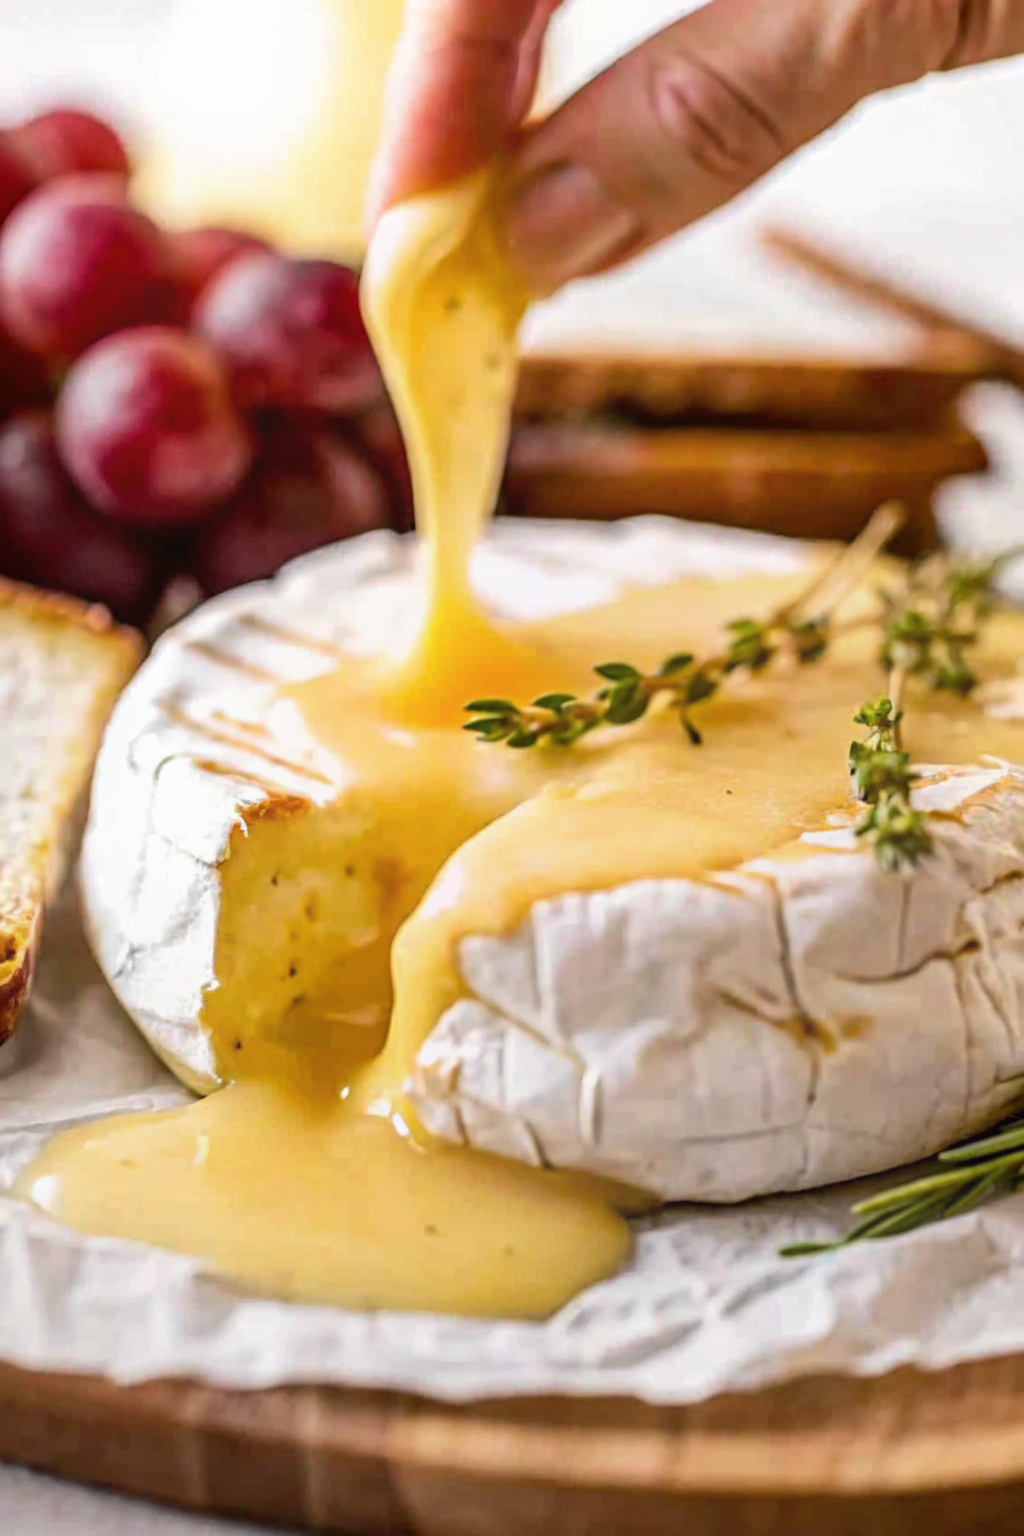
We need to fix that. If you want to master the art of the cheese pull and ensure your guests (or just you on a Friday night) have the best experience possible, you need to understand the mechanics of the melt. We are going to break down everything from the rind debate to the structural integrity of your dipping vessels.
The Cheese: Choosing Your Victim
You walk into the grocery store and stare at the wall of cheese. It’s intimidating. You see triple-cream, double-cream, wheels that cost five dollars, and wheels that cost thirty. Which one do you grab for baked brie with crackers?
Here is my hot take: Do not buy the most expensive Brie for baking.
When you bake cheese, you change its texture and flavor profile. You lose the subtle, funky nuances of a high-end, raw-milk French Brie once you blast it with heat and cover it in honey. Save the expensive stuff for a cheese board where you eat it at room temperature. For baking, a standard, mid-range wheel from the supermarket works perfectly. You want something labeled “Double Cream” if possible. It melts smoother and stays gooey longer than the leaner varieties.
To Scrape or Not to Scrape?
This brings us to the most controversial topic in the Brie universe: The Rind. Some people treat the snowy white rind like it’s a poisonous wrapper. Others eat it without hesitation.
IMO, you keep the rind on. Here is why: The rind acts as a structural container. If you cut it all off, you end up with a puddle of cheese soup that spreads across your baking sheet. If you keep it on, the cheese melts inside the casing, creating a delicious molten lava cake effect.
However, I usually slice off just the very top layer of the rind. This exposes the creamy center directly to the heat and allows your toppings (honey, nuts, herbs) to make direct contact with the cheese. It’s the best of both worlds. You get the structure of the sides and bottom, but the easy access of an open top.
The Vessel: Baking It Right
You can’t just throw the cheese on a bare metal pan and hope for the best. Well, you can, but you will regret it when you try to scrub that pan later.
I prefer using a small cast-iron skillet or a ceramic baker specifically designed for Brie. Ceramic holds heat exceptionally well. This matters because baked brie with crackers is a race against time. As soon as you pull that cheese out of the oven, it begins to cool and harden. A ceramic dish keeps the cheese molten for an extra 10 to 15 minutes.
If you don’t have a fancy cheese baker, simply use a piece of parchment paper on a baking sheet. The parchment allows you to lift the entire wheel off the pan and slide it onto a serving board without disaster striking.
The “Crackers” in Baked Brie with Crackers
We need to talk about the second half of the title. The cracker is not just a vehicle; it is a tool. And like any job, you need the right tool.
Have you ever tried to scoop thick, heavy cheese with a thin water cracker? It shatters. You end up with cracker shards stuck in your cheese and cheese stuck on your fingers. It’s a mess.
The Structural Integrity Test
When I shop for the perfect accompaniment, I look for density. You need a cracker that can withstand the “drag and scoop” motion.
- Sourdough Crisps: These are my gold standard. They have a hard crunch, a bit of height, and a salty finish that cuts through the rich fat of the dairy.
- Woven Wheat Crackers: You know the ones. They look like little baskets. They grip the cheese incredibly well because of the texture.
- Sliced Baguette: Okay, it’s not technically a cracker, but a toasted baguette slice (crostini) offers the best durability. Brush them with olive oil and toast them until golden.
Avoid the buttery, flaky club crackers for this specific application. They are delicious, but they are too soft. They crumble under pressure. You want a crunch that echoes across the room.
Flavor Profiles: Sweet vs. Savory
Brie is a blank canvas. It’s mild, creamy, and slightly earthy. You can take this in two completely different directions depending on your mood or the rest of your menu.
The Sweet Route
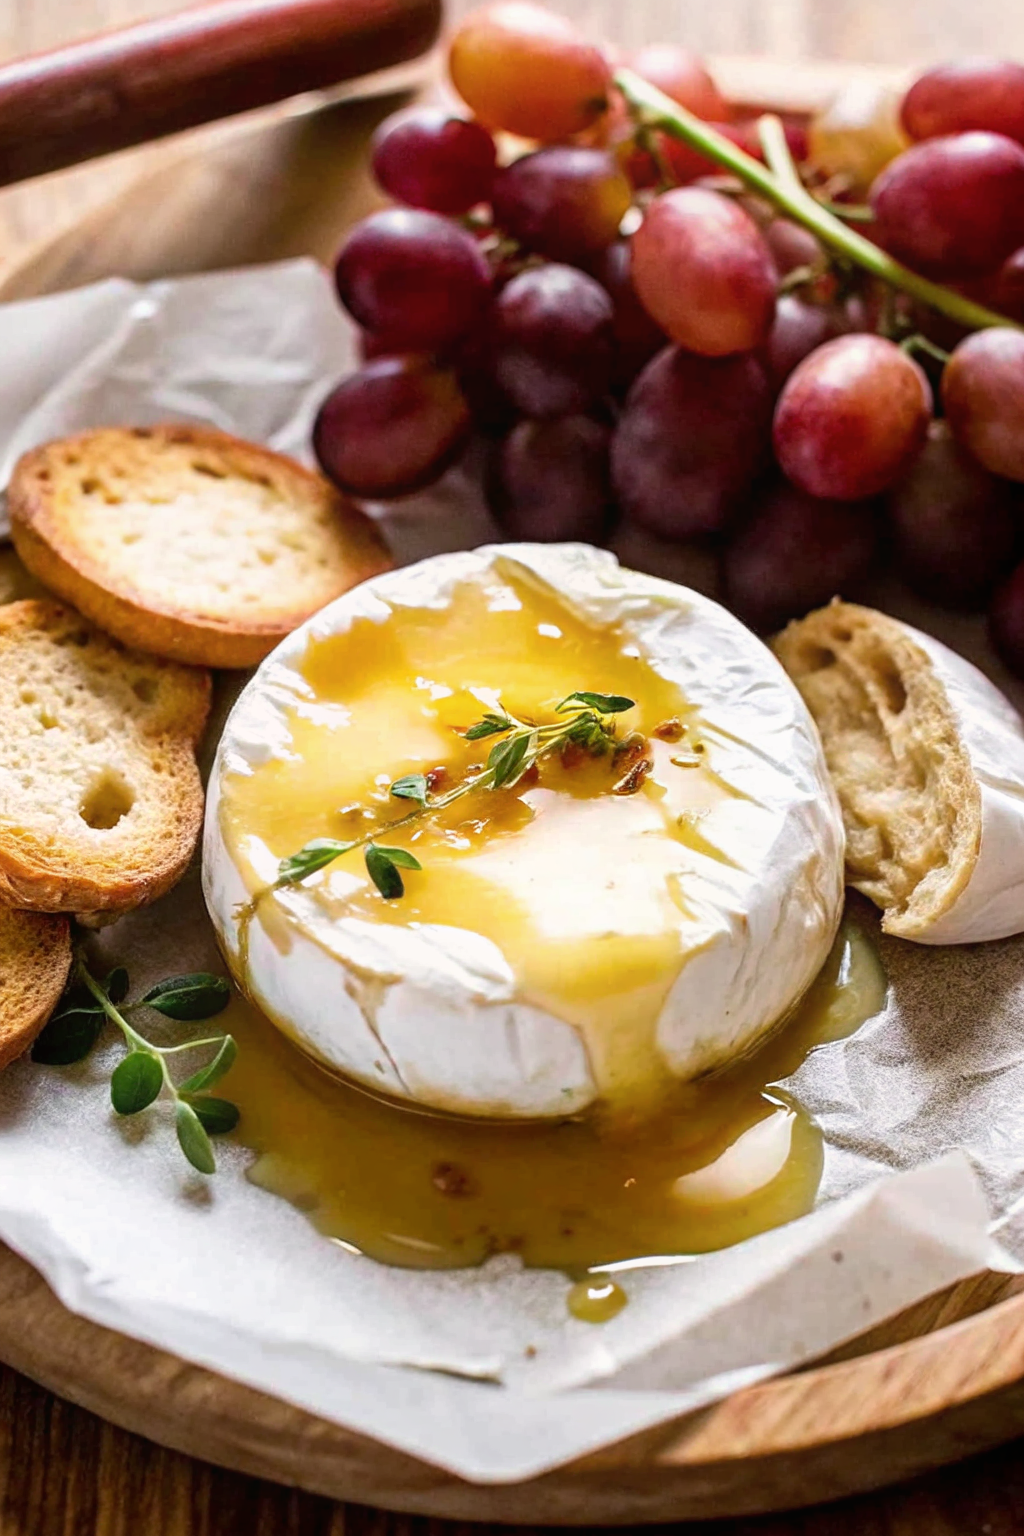
If you treat this almost like a dessert or a pre-dinner treat, sugar is your friend. My go-to combination involves honey, rosemary, and walnuts. The honey caramelizes slightly in the oven, the rosemary adds an aromatic pine scent, and the walnuts provide a necessary texture contrast to the soft cheese.
If you want to get really festive, top it with cranberry sauce or fig jam. This setup reminds me of the best Christmas recipes that act as the centerpiece for a holiday spread. The red fruit against the white cheese looks stunning.
The Savory Route
Sometimes, I don’t want sugar. I want garlic. For a savory bomb, mince two cloves of garlic and mix them with a tablespoon of olive oil and fresh thyme. Slather this mixture over the top of the exposed cheese before baking.
As it bakes, the garlic roasts and loses its bite, becoming sweet and mellow. Pairing this with a salty pretzel chip or a rosemary cracker changes the entire vibe. It feels more like a hearty meal than a light snack.
Step-by-Step: The Perfect Bake
Let’s walk through the actual process. It’s simple, but details matter.
1. Preheat the Oven:
Set your oven to 400°F (200°C). You want a high heat to melt the inside quickly without drying out the rind.
2. Prep the Cheese:
Take the wheel out of the fridge. While it’s still cold, use a sharp knife to shave off the top layer of rind. If you wait until it warms up, the cheese gets sticky and difficult to cut.
3. Dress It Up:
Place the wheel in your baking dish or on the parchment paper. Add your toppings now. Whether it’s honey, jam, or garlic oil, pile it right on that exposed center.
4. The Bake:
Slide it into the oven. How long? usually 15 to 20 minutes. You are looking for the sides to bulge slightly. If you touch the center gently, it should feel like a water balloon. Do not overbake it. If you go too long, the cheese separates, and you end up with a pool of oil and a hard lump of protein.
5. The Rest:
This is the hardest part. Let it sit for 5 minutes. If you cut into it immediately, the cheese runs out like water. Letting it rest allows it to thicken slightly back into a scoopable consistency.
Serving: The Art of the Scoop
You pull the beautiful, bubbling dish out of the oven. You place it on a wooden board surrounded by your sturdy crackers. Now what?
You need a knife or a spoon. Do not expect guests to dip their crackers directly into the wheel. That creates chaos. The first person breaks the dam, and the cheese flows everywhere. Provide a small spreading knife or a spoon so people can serve a dollop onto their cracker.
I also like to add “palate cleansers” to the board. Rich cheese coats your tongue. Acidic fruits like green apples, grapes, or even pickles help cut that fat. A slice of tart Granny Smith apple with a smear of baked brie is arguably better than the cracker combo. FYI, sliced pears work wonders here too.
Troubleshooting: When Good Cheese Goes Bad
Even with something this easy, things happen.
“My cheese hardened immediately!”
You probably used a cold metal pan or a thin plate. Next time, try the ceramic baker. Also, you might have bought a “stabilized” cheese that doesn’t melt well. Stick to traditional French-style Double Creams.
“It tastes bitter.”
Did you burn the toppings? Honey burns quickly at 400°F. If you notice the toppings darkening too fast, throw a piece of foil over the top for the last few minutes of baking.
“It looks like a grease slick.”
You overcooked it. Once the fat separates, you can’t really fix it. You just have to mop up the oil with some bread and eat it anyway. It will still taste good, it just won’t look pretty.
Why This Beats Cold Dips
Look, I love a good cold dip. There is a time and a place for a classic cream cheese dip with herbs and spices. It’s reliable. But it doesn’t feel special.
Heat transforms food. It releases aromas that fill the kitchen. When guests walk in and smell roasting garlic or caramelized honey, it sets a mood. Baked brie with crackers signals comfort. It invites people to gather around the warm dish and engage in that communal style of eating. It breaks the ice.
Plus, you can prepare the wheel days in advance. Wrap the cheese with its toppings in plastic wrap and keep it in the fridge. When the doorbell rings, you just unwrap it and toss it in the oven. It is the ultimate low-stress hosting hack.
If you are looking for other ways to impress your guests without working too hard, you should definitely check out my list of easy appetizer recipes. You will find plenty of ideas that pair perfectly with a warm wheel of cheese.
Final Thoughts: Embrace the Goo
We live in a complicated world. Our food doesn’t need to be complicated. There is profound joy in the simplicity of warm cheese on a crunchy cracker.
Don’t overthink it. You don’t need the most expensive ingredients. You don’t need a degree from culinary school. You just need a hot oven and an appetite.
Next time you have a bad day, or a good day, or just a Tuesday, buy a wheel of Brie. Toast some pecans. Drizzle some honey. Bake it until it bubbles. Sit down with a box of your favorite crackers and enjoy the moment. You deserve it.
And seriously, don’t worry about the calories. It’s cheese. It’s good for the soul.
For a deeper look into the different types of rinds and why we eat them (or don’t), check out this fantastic guide from Bon Appétit. It changed how I look at my cheese board forever.
Now, go preheat that oven!
Honey & Rosemary Baked Brie with Crackers
Author: Prep: 5 minutes Cook: 15 minutes Total: 25 minutesEquipment
- Brie Baker, Small Cast Iron Skillet, or Rimmed Baking Sheet
- Parchment paper
- Sharp knife
- Serving Board or Platter
Instructions
The Cheese:
- 1 wheel (8-12 oz) Double Cream Brie (keep it chilled until ready to prep)
The Toppings:
- 2-3 tbsp honey (plus more for drizzling)
- ¼ cup walnuts or pecans, roughly chopped
- 1 sprig fresh rosemary, leaves stripped and minced
- 1 pinch sea salt flakes (optional)
The Dippers:
- 1 box sturdy crackers (sourdough crisps, woven wheat, or baguette slices)
- 1 Granny Smith apple, sliced (optional, for a tart contrast)
Notes
- Heat It Up: Preheat your oven to 400°F (200°C). While the oven heats, line a baking sheet with parchment paper (or get your ceramic brie baker ready).
- Trim the Rind: Remove your wheel of Brie from the fridge. Using a sharp knife, carefully shave off the very top layer of the white rind to expose the creamy cheese underneath. Tip: Do this while the cheese is cold; if it’s room temperature, it will be sticky and difficult to cut.
- Dress the Cheese: Place the Brie on the parchment paper or in the baker. Drizzle the honey generously over the exposed top. Sprinkle the chopped walnuts and minced rosemary over the honey.
- Bake: Slide it into the oven and bake for 15 to 20 minutes. You are looking for the sides of the wheel to bulge slightly and the center to feel soft and liquid like a water balloon when gently touched.
- The Hardest Part (Waiting): Remove the cheese from the oven and let it rest for 5–10 minutes. This is crucial! If you cut into it immediately, the cheese will run out like soup. Resting allows it to thicken back up into a perfect, scoopable consistency.
- Serve: Transfer the warm wheel to a serving board (lift it by the parchment paper if needed). Arrange your sturdy crackers and apple slices around the wheel. Serve immediately while warm and gooey!
Nutrition


