
Let’s talk about the absolute gold standard of comfort food. I’m not talking about fancy soufflés or delicate pastries that require a degree in chemistry to pull off. I’m talking about cornbread.
You know the smell. It hits you the second you walk into the kitchen—that earthy, toasted aroma of cornmeal mingling with rich, sizzling fat. It’s the kind of scent that grabs you by the shoulders and tells you everything is going to be okay. Whether you crumble it into a bowl of beans, slather it with honey butter, or eat it straight out of the skillet while burning your fingers (we’ve all been there), cornbread holds a special place in the culinary soul.
But here’s the thing: everyone thinks their way is the only way. Opinions on this subject run hotter than a preheated cast-iron skillet. Is sugar blasphemy? Does flour belong in the mix? I have some strong feelings on this, and today, we are going to settle some scores. So, grab your apron and let’s get messy.
The Great Sugar Debate: Sweet vs. Savory
Let’s address the elephant in the room immediately. Should you put sugar in your cornbread?
If you ask a Southerner, they might look at you like you just insulted their grandmother. In the South, traditional cornbread is savory. It stands up to spicy foods and rich stews. It doesn’t need to be a dessert. However, if you travel North, you’ll find cornbread that resembles yellow cake. It’s sweet, fluffy, and practically begs for a cup of coffee rather than a plate of collard greens.
Here is my take: Context is king.
If I am eating a <a href=”https://cookingwithdonna.com/easy-beef-chili”>hearty bowl of chili</a>, I want savory cornbread. I want that salty, corn-forward flavor to balance the heat of the peppers. But if I’m having it for breakfast? Sure, throw a little honey or sugar in there. I’m not the cornbread police, but I do draw the line at making it taste like a cupcake. IMO, if you need frosting, you aren’t making bread anymore.
The Role of Flour
Another battleground involves flour. Purists insist on 100% cornmeal. They want that gritty texture and intense corn flavor. But let’s be honest—sometimes 100% cornmeal turns into a brick that could shatter a window.
I prefer a blend. Mixing all-purpose flour with cornmeal lightens the texture. It gives the bread a crumb that holds together without feeling like you’re chewing on sand. A 50/50 split usually does the trick for me, but feel free to experiment. Just don’t skip the flour entirely unless you really enjoy choking on dry crumbs.
The Holy Trinity of Ingredients
You can’t hide behind complex techniques here. Since this recipe relies on so few ingredients, the quality of those ingredients matters immensely. You can’t make gold out of lead, and you can’t make top-tier cornbread out of stale, flavorless dust.
1. The Cornmeal
Buy good cornmeal. Please. Do not grab that bag that’s been sitting in the back of your pantry since the last presidential election. Freshness counts.
- Stone-Ground: This is the good stuff. It retains the hull and germ, providing more flavor and texture.
- Fine vs. Medium: I lean toward medium grind. It gives you that pleasant crunch without breaking a tooth.
- White vs. Yellow: This is largely aesthetic, though yellow tends to taste a bit “cornier” to me.
2. The Fat
You have options here, but one reigns supreme.
- Bacon Grease: The undisputed champion. If you cook bacon, save the grease. It adds a smoky, salty depth that butter just can’t touch.
- Butter: A solid runner-up. It browns beautifully and tastes delicious.
- Vegetable Oil: It works, but it’s boring. Use this only if you hate flavor. :/
3. The Liquid
Water? No. Milk? getting closer. Buttermilk? Bingo.
Buttermilk reacts with the baking soda to create lift. It also adds a tangy flavor that cuts through the richness of the corn. If you don’t have buttermilk, don’t panic. You can make a substitute by adding a splash of vinegar to regular milk, but the real deal yields the best results.
Cast Iron: The Secret Weapon
If you are baking cornbread in a glass pyrex dish or a flimsy aluminum cake pan, we need to have a serious talk. You are missing out on the best part: the crust.
You need a cast-iron skillet. It retains heat like nothing else. The magic happens when you stick that skillet in the oven while it preheats. You want that iron screaming hot. When you pour the batter into the hot pan, it should sizzle aggressively. That contact sears the edges immediately, creating a dark, golden-brown crust that is crispy, buttery, and utterly addictive.
Why Cast Iron Wins:
- Even Heating: No hot spots or soggy centers.
- Crust Development: That crunch is non-negotiable.
- Flavor Seasoning: Years of cooking in that pan add a layer of flavor you can’t buy in a store.
Don’t have a skillet? Go buy one. It’s an investment in your happiness. Plus, you can use it to make perfect <a href=”https://cookingwithdonna.com/southern-fried-cabbage”>southern fried cabbage</a> to go right alongside your meal.
Step-by-Step: How to Nail It Every Time
Let’s walk through the process. I’ll keep this simple because hungry people don’t like to wait.
Prep the Pan
Turn your oven to 425°F (218°C). Place your 10-inch cast-iron skillet inside the oven while it heats up. Once the oven beeps, carefully drop a tablespoon (or two) of bacon grease or butter into the skillet. Let it melt and get hot. Do not skip this.
Mix the Dry Stuff
In a large bowl, whisk together your cornmeal, flour, salt, baking powder, and a pinch of baking soda. Whisking breaks up clumps and ensures the leavening agents distribute evenly. Nobody wants to bite into a pocket of bitter baking soda.
Mix the Wet Stuff
In a separate bowl or large measuring cup, beat your eggs. Whisk in the buttermilk. If you are adding melted butter to the batter (and you should), stream it in slowly so you don’t scramble the eggs.
The Combination
Pour the wet ingredients into the dry. Now, put the whisk down. Grab a rubber spatula or a wooden spoon. Stir just until the flour disappears.
- Warning: Do not overmix. Overmixing develops gluten, and gluten makes cornbread tough. Lumps are fine. Lumps are your friends.
The Sizzle
Pull that hot skillet out of the oven. Carefully pour the batter into the center. Listen for that sizzle. Smooth the top if you must, but don’t fuss with it too much. Pop it back into the oven.
The Bake
Bake for about 20 to 25 minutes. You want the top to be golden brown. If you press the center lightly, it should spring back. If your finger sinks into raw batter, give it another few minutes.
Variations to Keep Things Interesting
Once you master the basic recipe, you can start playing jazz with your food. Cornbread is a blank canvas.
Jalapeño Cheddar:
This is a classic for a reason. Fold in a cup of sharp cheddar cheese and some diced pickled jalapeños before baking. The cheese creates these gooey pockets of joy, and the peppers add a nice kick.
Cracklin’ Bread:
If you have access to pork cracklings (fried pork skin), crush them up and throw them in the batter. It adds a salty, meaty crunch that is out of this world. It’s not diet food, but who cares?
Corn Kernel Add-In:
Some people like whole kernels of corn in their bread. It adds moisture and texture. I prefer using fresh corn cut off the cob, but frozen works too. Canned corn? Eh, drain it well if you must.
Troubleshooting: Why is My Cornbread Dry?
Nothing is sadder than cornbread that sucks the moisture out of your mouth like a vacuum. If your bread is dry, you likely made one of these mistakes:
- Overbaking: You left it in too long. Check it early.
- Not Enough Fat: Did you skimp on the butter or oil? Don’t do that.
- Too Much Flour: You measured heavy-handed. Use the “spoon and level” method for flour.
- Old Cornmeal: As mentioned, stale cornmeal absorbs liquid poorly and tastes like cardboard.
FYI, if you do mess up and bake a brick, don’t throw it out. Dry cornbread is actually perfect for making dressing (stuffing) or crumbling into a glass of cold milk.
Serving Suggestions
You pulled the skillet out of the oven. It looks beautiful. Now what?
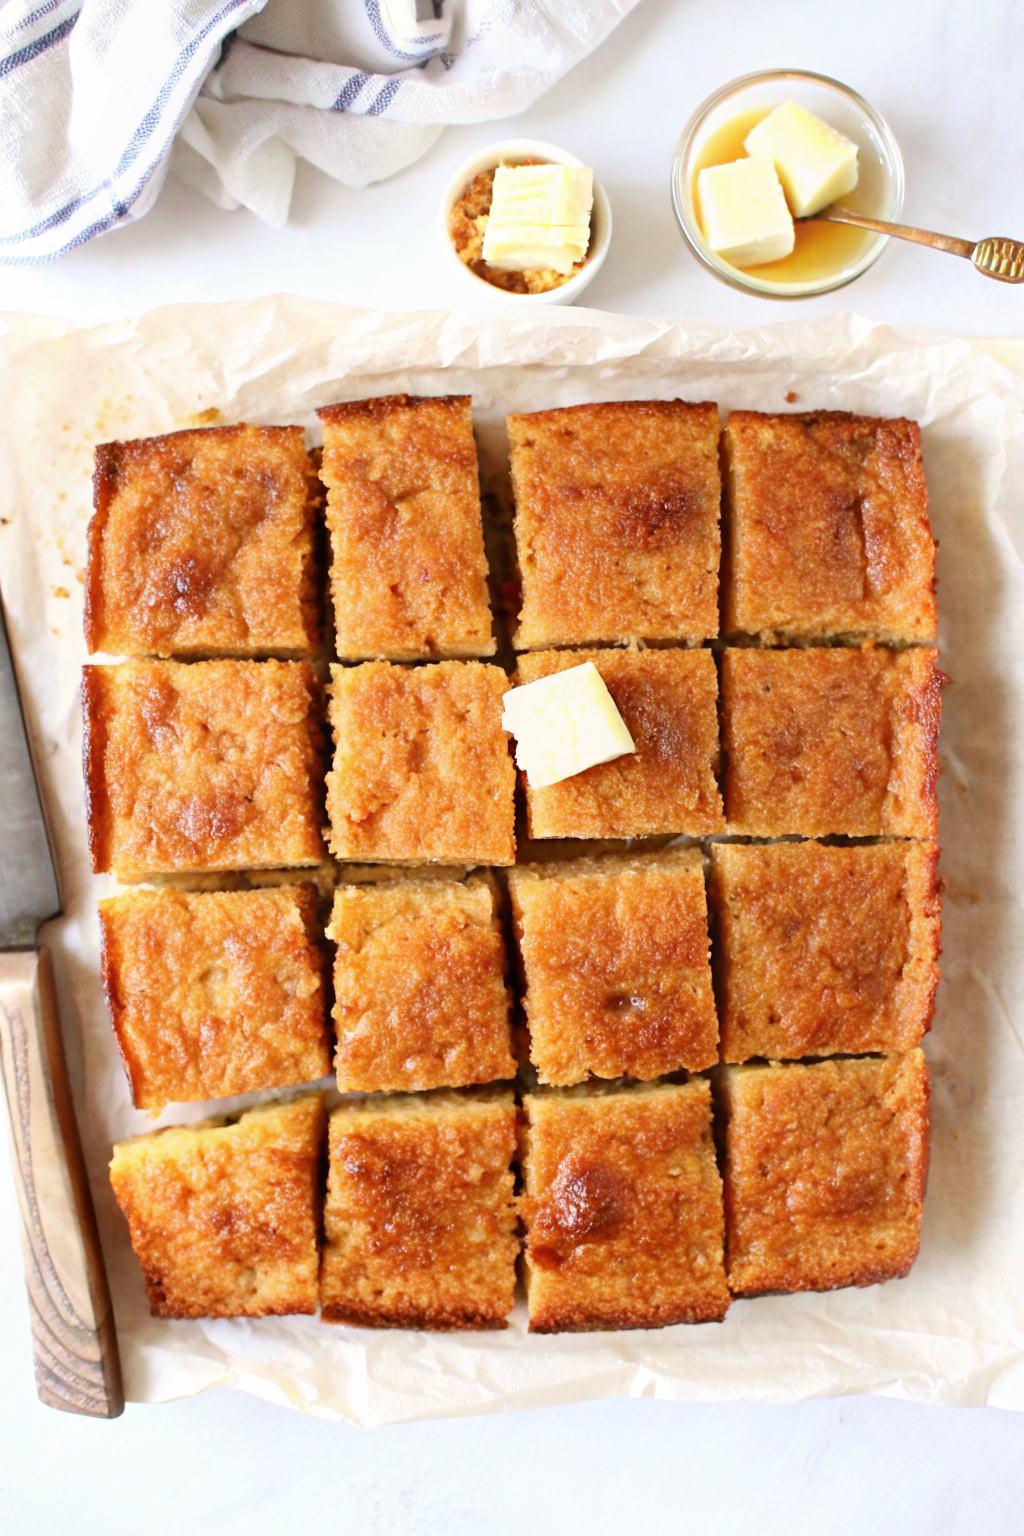
You cut a wedge while it’s still hot. That steam rising up is the victory lap. I strongly suggest taking a stick of high-quality butter and running it over the top of the crust immediately. Let it melt into the crevices.
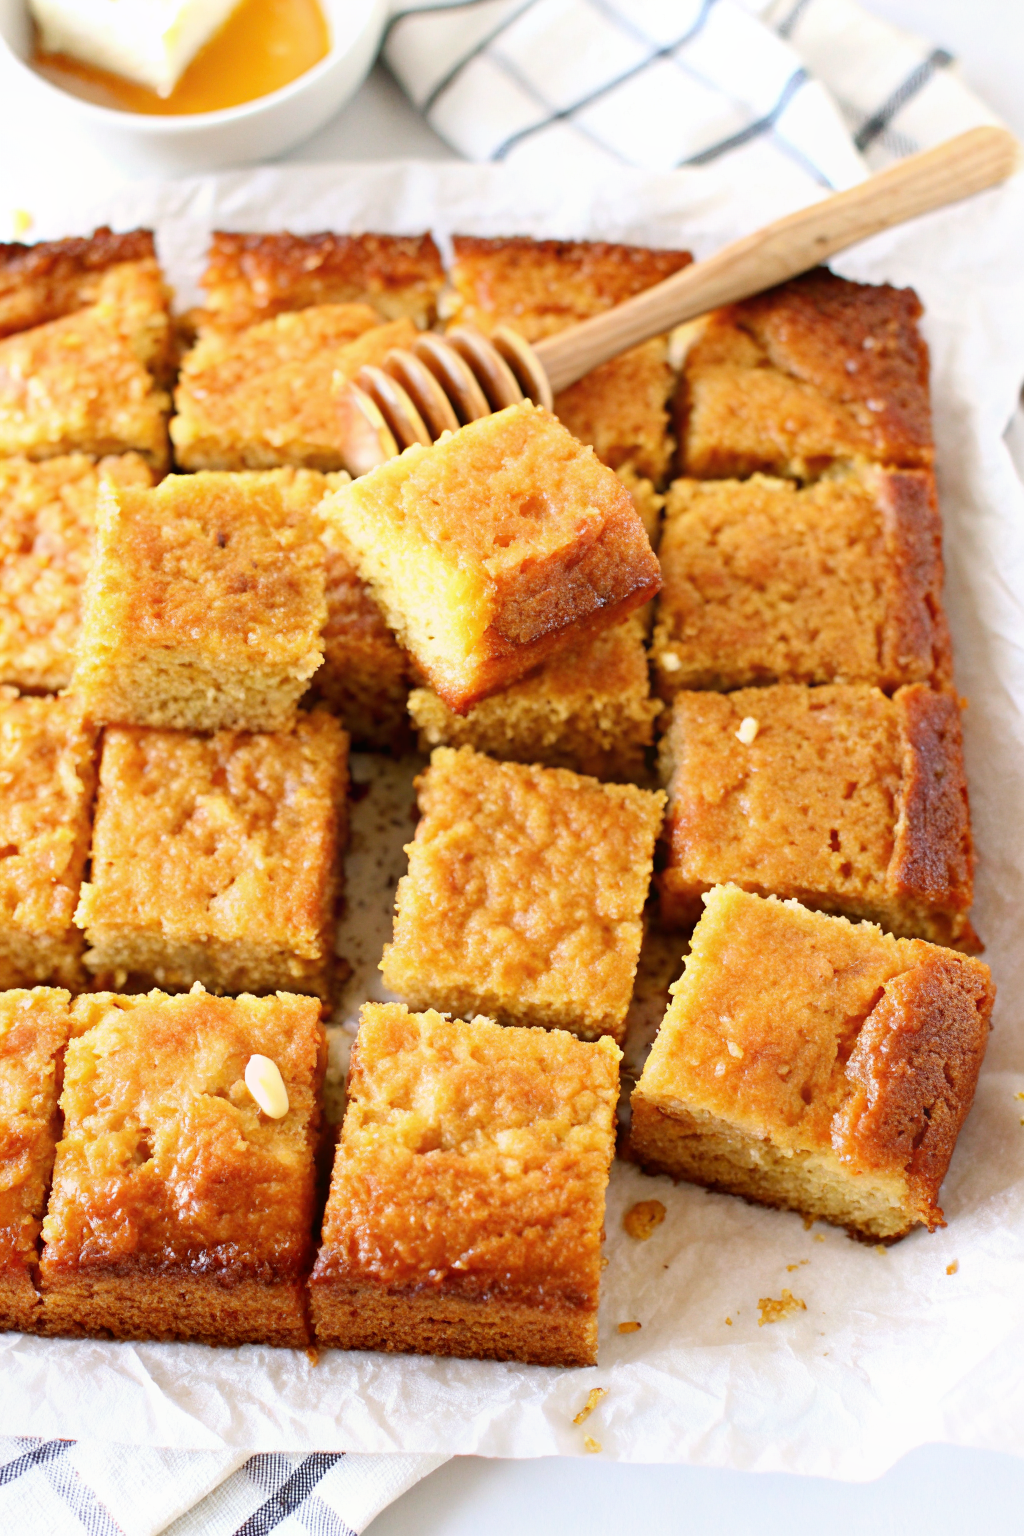
If you want to get fancy, whip up some honey butter. Just mix soft butter with honey and a pinch of salt. It creates that sweet-salty dynamic that makes your taste buds dance.
Cornbread pairs with almost anything, but it shines brightest next to soups, stews, and barbecue. It’s the ultimate mop for soaking up potlikker (the broth from cooking greens). Speaking of which, have you ever tried dipping a slice into a bowl of <a href=”https://cookingwithdonna.com/homemade-honey-butter”>homemade honey butter</a> glazed carrots or just straight into the sauce on your plate? Life-changing.
Storage and Reheating
Let’s be real—leftovers are rare. But if you somehow manage not to eat the whole skillet in one sitting, you need to store it right.
- Room Temp: It keeps for about two days in an airtight container.
- Freezing: It freezes surprisingly well. Wrap individual slices in plastic wrap and toss them in a freezer bag.
Reheating Rule:
Never, under any circumstances, microwave cornbread for more than 15 seconds. It will turn rubbery. The best way to reheat it is in a toaster oven or back in a skillet with a little butter. You want to crisp those edges back up.
The Cultural Connection
I think the reason we love this dish so much isn’t just the taste; it’s the history. It’s a survival food that became a celebration food. Indigenous peoples in the Americas were using corn long before European settlers arrived. They taught the settlers how to use it, and over centuries, it evolved into the staple we know today.
Every region has a spin on it. You have hot water cornbread, hushpuppies, spoonbread, and johnnycakes. It’s a versatile grain that has fed generations through hard times and good times. When you bake a skillet of this stuff, you are participating in a very long, very delicious tradition.
Also, have you ever noticed how cornbread brings people together? You put a skillet on the table, and suddenly everyone stops arguing about politics and starts fighting over who gets the corner piece. (The corner piece has the most crust, so naturally, it is the superior slice).
Final Thoughts
Making incredible cornbread does not require expensive equipment or a culinary degree. It requires respect for the ingredients and a heavy cast-iron pan.
Don’t overthink it. Don’t stress about the sugar police. Make it the way you like it. If that means adding blueberries, go for it. If that means using bacon grease from three weeks ago, even better. The goal is to make something that feels like home.
So, go preheat your oven. Check your pantry for cornmeal. And for the love of all that is holy, make sure your buttermilk hasn’t expired.
Now, I want to know—are you team sweet or team savory? Or are you like me, just happy to be eating carbs?
Go forth and bake. Your kitchen is about to smell amazing.
For more information on the science of baking with cornmeal, check out this guide from Serious Eats.
Classic Cast Iron Cornbread
Author: Prep: 10 minutes Cook: 20 minutes Total: 30 minutesEquipment
- 10-inch Cast Iron Skillet
- Large mixing bowl
- Rubber spatula
Ingredients
For the Skillet
- 2 tbsp bacon grease or unsalted butter, for coating the pan
The Dry Mix
- 1 cup yellow cornmeal medium grind is best
- 1 cup all-purpose flour
- 1 tbsp baking powder
- ½ tsp baking soda
- ½ tsp salt
- ¼ cup granulated sugar optional, adjust to your taste!
The Wet Mix
- 1 ¼ cups buttermilk shake well before pouring
- 2 large eggs
- ½ cup unsalted butter melted and slightly cooled
Notes
- Preheat the Oven & Skillet: Preheat your oven to 425°F (218°C). Place your 10-inch cast iron skillet inside the oven while it heats up. We want that iron screaming hot to create the perfect crust!
- Whisk the Dry Ingredients: While the oven is heating, grab a large bowl. Whisk together the cornmeal, flour, baking powder, baking soda, salt, and sugar (if using). Make sure to break up any lumps.
- Mix the Wet Ingredients: In a separate medium bowl or measuring cup, whisk the eggs and buttermilk together. Slowly stream in the melted butter while whisking constantly so you don’t scramble the eggs.
- Combine: Pour the wet mixture into the dry ingredients. Using a rubber spatula, stir just until the flour disappears. Do not overmix! A few lumps are totally fine and keep the bread tender.
- Sizzle the Skillet: Carefully remove the hot skillet from the oven using an oven mitt. Drop in the bacon grease (or butter) and swirl it around to coat the bottom and sides.
- Bake: Pour the batter directly into the hot skillet—you should hear a satisfying sizzle. Smooth the top gently and place it back in the oven.
- Cool & Serve: Bake for 20 to 25 minutes, or until the top is golden brown and a toothpick inserted in the center comes out clean. Let it cool for about 10 minutes before slicing. Serve warm with extra butter or honey!
Nutrition


