
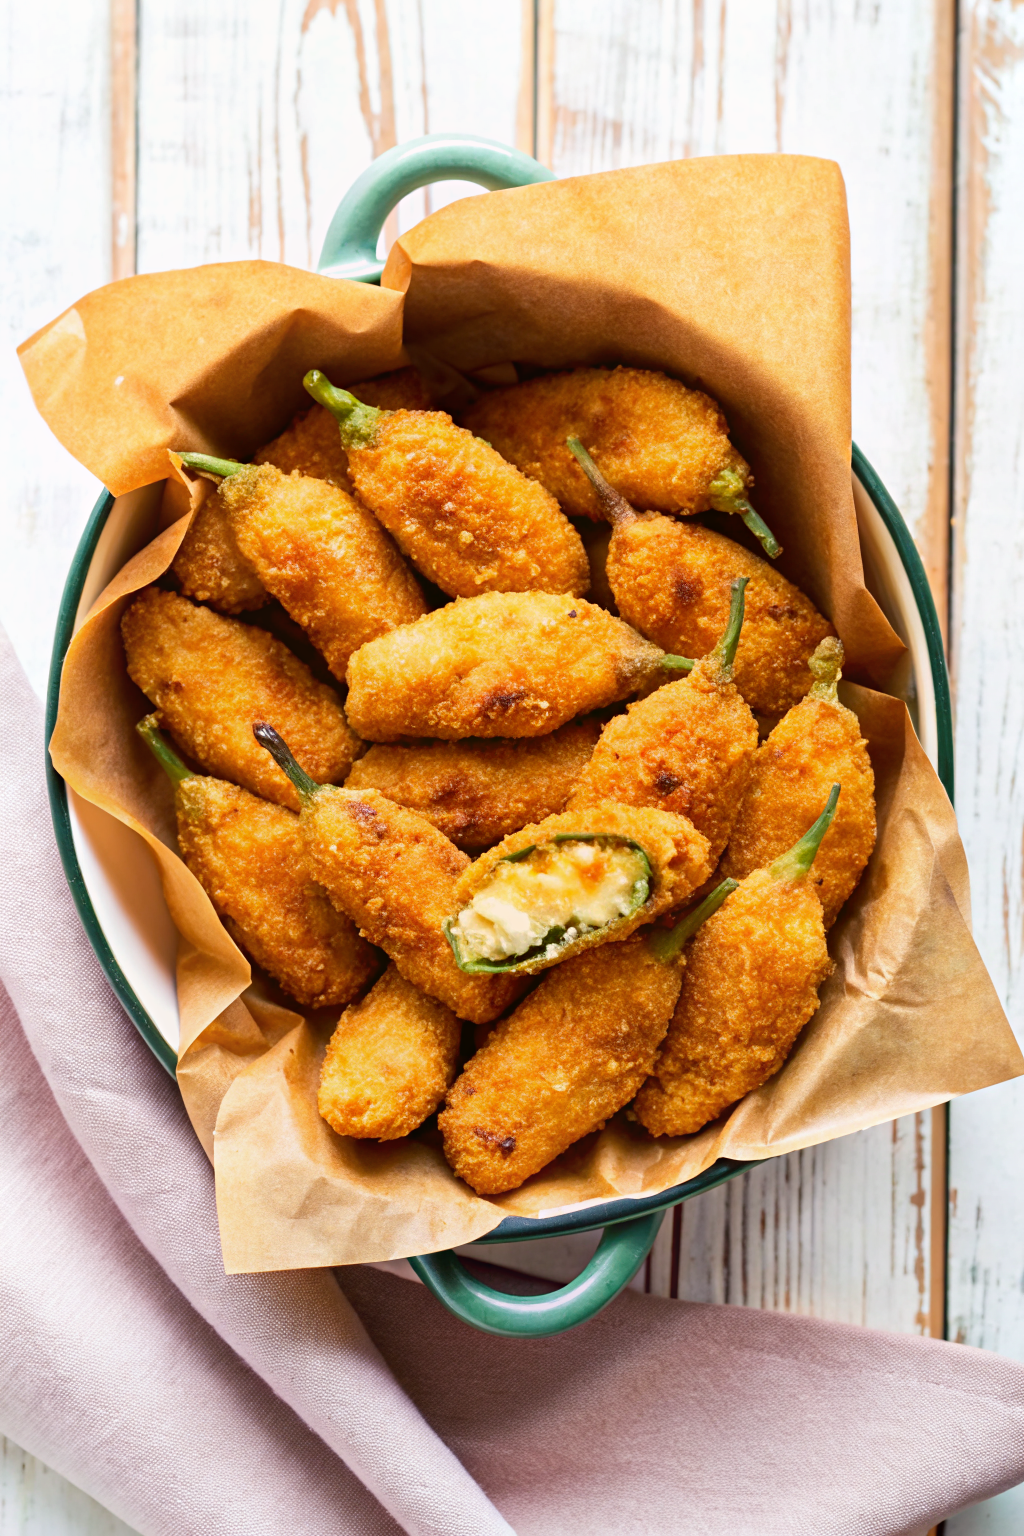
Let’s be real for a second: is it even a party if there isn’t a tray of Cheesy Jalapeño Poppers somewhere on the table? I don’t think so. These little boats of spicy, cheesy, bacon-wrapped goodness are the undisputed champions of finger foods. You walk into a gathering, scan the snack spread, and immediately zero in on them. You know you’re going to burn the roof of your mouth because you lack patience (we all do), but you also know it will be totally worth it.
If you have been buying those sad, frozen poppers from the grocery store, we need to have a serious intervention. Homemade poppers are infinitely better. They offer a fresh crunch, a creamy filling that actually tastes like cheese, and the satisfaction of knowing you made something delicious. Plus, you can customize the heat level so you don’t accidentally blow smoke out of your ears. Whether you are hosting a Super Bowl bash or just crave a savory snack on a Tuesday, this recipe delivers every single time.
Why We Crave the Heat
There is actual science behind why we love these things. It’s the contrast. You get the fresh, vegetal crunch of the pepper, the sharp heat of the capsaicin, and then—bam—the rich, cooling dairy from the cream cheese hits your tongue. It is the perfect culinary balancing act.
- Texture: Crispy bacon, soft cheese, crunchy pepper.
- Flavor: Smoky, spicy, salty, creamy.
- Vibe: Pure comfort food.
Honestly, I could eat a dozen of these in one sitting. And I definitely have. 🙂
The Danger Zone: Prepping Your Peppers
Before we even look at the cheese, we need to discuss safety. I am not being dramatic here. If you cut jalapeños and then rub your eye, you will experience a level of regret that lasts for hours. I learned this the hard way years ago, and I still cringe thinking about it.
The Glove Rule
Wear disposable gloves. Just do it. If you don’t have gloves, coat your hands in a little oil before handling the peppers, and scrub them with dish soap immediately after. But seriously, buy the gloves.
cleaning the Guts
Slice your jalapeños lengthwise. Now you see the white membrane (the ribs) and the seeds.
- For mild poppers: Scrape out every single seed and the white ribs. That white pith holds most of the heat.
- For spicy poppers: Leave a little bit of the membrane intact.
- For “I hate my tastebuds” poppers: Leave the seeds in. (I don’t recommend this, but you do you).
Use a small teaspoon or a melon baller to scrape the insides out. It works way better than a knife and keeps the pepper boat intact.
The Filling: More Than Just Cream Cheese
A lot of recipes tell you to just shove a block of plain cream cheese into a pepper and call it a day. That is boring. We want flavor town. We want a filling that stands up to the heat of the pepper.
The Cheese Blend
I prefer a mix of softened cream cheese and sharp cheddar. The cream cheese provides the melt and the structure, while the sharp cheddar brings the actual cheese flavor. If you want to get fancy, you can mix in some Monterey Jack for extra gooeyness.
The Seasoning
Plain cheese is fine, but seasoned cheese is better. I always add:
- Garlic Powder: Because garlic belongs in everything.
- Onion Powder: For depth.
- Green Onions: The fresh bite cuts through the richness.
- Smoked Paprika: This echoes the smoky flavor of the bacon.
Mix this all together in a bowl until it looks like a delicious, spreadable mess. IMO, you should taste the filling before you stuff the peppers. If the filling tastes bland now, it will taste bland later.
Bacon Wrapped vs. Breaded: The Great Debate
You generally see two types of Cheesy Jalapeño Poppers in the wild: the breaded, deep-fried diner style, and the bacon-wrapped BBQ style.
While breaded poppers have their place, the bacon-wrapped version is superior for home cooking. Why? Because breading is messy. You need a dredging station, hot oil, and a lot of cleanup. Bacon-wrapped poppers just require, well, bacon. Plus, the bacon fat renders out and bastes the pepper while it cooks. It’s a win-win situation.
The Bacon Strategy
Do not use thick-cut bacon here. I repeat: do not use thick-cut bacon. It takes too long to crisp up. By the time thick bacon cooks, your cheese will have exploded all over the oven. Use standard, thin-cut bacon. It stretches easily and crisps up at the same rate the pepper cooks.
Stuffing and Wrapping Technique
This is where the magic happens. Take your hollowed-out jalapeño boat. Fill it with your cheese mixture.
- Don’t overfill it. If you mound the cheese too high, it will bubble over and make a mess. Fill it just level with the edges of the pepper.
Now, grab a slice of bacon. Start at one end of the pepper and wrap it spirally towards the other end. You want to cover the opening as much as possible to keep the cheese inside. Secure the ends with a toothpick. If you skip the toothpick, the bacon might unravel, and you’ll have a sad, naked pepper.
Cooking Methods: Oven vs. Air Fryer
You can cook these in a few different ways depending on your kitchen setup. Both methods work great, but they yield slightly different results.
The Oven Method (The Crowd Pleaser)
This is best if you are making a huge batch for a party.
- Preheat your oven to 400°F (200°C).
- Place a wire rack on a baking sheet. This allows the heat to circulate underneath so the bacon doesn’t get soggy on the bottom.
- Bake for 20–25 minutes.
- If the bacon isn’t crispy enough for your liking, turn on the broiler for the last minute. Watch it like a hawk, though. Bacon goes from “perfect” to “charcoal” in seconds.
The Air Fryer Method (The Speed Demon)
I love my air fryer for these. The convection air makes the bacon incredibly crispy.
- Set the air fryer to 375°F (190°C).
- Place the poppers in a single layer. Do not crowd them.
- Cook for 10–12 minutes.
- Check them halfway through.
If you are looking for the king of easy party appetizers, the air fryer version wins on speed and texture.
Serving Suggestions
So you have a tray of sizzling hot poppers. What do you drink? What do you dip them in?
- Dip: Honestly, they don’t need dip, but I love dipping them in ranch dressing. The cool, herby ranch compliments the spicy bacon perfectly. Some people swear by blue cheese dressing.
- Sides: If you are throwing a party, serve these alongside homemade soft pretzels for a carb-heavy feast that balances out the keto-friendly nature of the poppers.
- Drinks: An icy cold beer is the classic pairing. The carbonation scrubs the heat off your tongue. If you don’t drink alcohol, a cold lemonade or limeade works wonders.
Troubleshooting Common Disasters
Even easy recipes can go wrong. Here is how to fix the most common popper problems.
“My cheese leaked out everywhere!”
You probably overfilled them, or you didn’t wrap the bacon tightly enough over the cheese seam. Next time, use less filling or overlap the bacon more. Also, make sure your oven is hot enough to crisp the bacon before the cheese turns to liquid.
“The bacon is flabby.”
Nobody likes flabby bacon. :/ This usually happens because you used thick-cut bacon or the temperature was too low. Crank up the heat. If you cooked them on a flat baking sheet, the grease might be pooling. Use a wire rack next time.
“My mouth is on fire!”
You picked a nuclear jalapeño. It happens. Nature is unpredictable. Eat some bread or drink milk. Do not drink water; it just spreads the oil around your mouth. You might need some easy dessert ideas to cool down your palate after the fire subsides.
Variations on the Classic
Once you master the basic recipe, you can start experimenting.
- The Texas Twinkie: Use brisket mixed with cream cheese and wrap the whole thing in bacon.
- The Sweet Heat: Brush the bacon with a little BBQ sauce or maple syrup in the last 5 minutes of cooking. Sticky, sweet, and spicy is a killer combo.
- The Vegetarian: Skip the bacon (I know, it hurts to say) and top the cheese with panko breadcrumbs mixed with melted butter. Bake until crunchy.
Storing and Reheating
If you somehow have leftovers (which I doubt), store them in an airtight container in the fridge for up to 3 days.
To reheat: Do not use the microwave. The microwave will make the bacon chewy and the pepper soggy. Put them back in the air fryer or oven at 350°F for 5 minutes until they sizzle again.
Final Thoughts
Making Cheesy Jalapeño Poppers at home is a game-changer. They are fresher, cheaper, and tastier than anything you can get at a restaurant or from the freezer aisle. There is something deeply satisfying about handling the fresh produce (carefully!), mixing the savory filling, and watching them bubble away in the oven.
So, go grab a bag of peppers, fry up some bacon, and invite some friends over. Or don’t invite friends and eat them all yourself. I won’t judge. Just remember the gloves.
For more tips on handling hot peppers safely, check out this guide from Chili Pepper Madness. Now, get cooking!
Cheesy Jalapeño Poppers
Author: Prep: 20 minutes Cook: 25 minutes Total: 45 minutesEquipment
- Baking sheet with wire rack
- Disposable Gloves (highly recommended!)
- Mixing bowl
- Air Fryer (Optional)
- Toothpicks
Ingredients
The Peppers
- 12 fresh large jalapeño peppers approx. 3-4 inches long
The Filling
- 8 oz cream cheese softened to room temperature
- 1 cup sharp cheddar cheese shredded
- 2 green onions finely sliced
- 1 tsp garlic powder
- ½ tsp onion powder
- ½ tsp smoked paprika
- ¼ tsp salt optional, as bacon is salty
The Wrap
- 12 slices bacon standard cut, NOT thick-cut, cut in half crosswise to make 24 strips
Instructions
- Preheat & Prep: Preheat your oven to 400°F (200°C). Line a baking sheet with aluminum foil for easy cleanup and place a wire rack on top. (If using an Air Fryer, preheat to 375°F/190°C).
- Safety First: Put on your disposable gloves! Slice each jalapeño in half lengthwise. Using a small spoon or melon baller, scrape out the seeds and white membranes. If you want spicy Cheesy Jalapeño Poppers, leave a little bit of the membrane inside.
- Mix the Filling: In a medium bowl, combine the softened cream cheese, shredded cheddar, green onions, garlic powder, onion powder, and smoked paprika. Mix until fully combined and creamy.
- Stuff the Peppers: Fill each jalapeño half with the cheese mixture. Fill them just to the level of the pepper’s edges—do not overstuff or mound it high, or it will overflow while baking.
- Wrap it Up: Take a half-slice of bacon and wrap it around the stuffed pepper. Start at the top and spiral down, tucking the ends underneath. Secure with a toothpick if the bacon feels loose.
- Bake (Oven Method): Arrange the poppers on the wire rack. Bake for 20–25 minutes, or until the bacon is crispy and the peppers are tender. If you want extra crispiness, broil for 1–2 minutes at the end (watch closely!).
- Air Fry (Alternative Method): Place poppers in a single layer in the air fryer basket. Cook at 375°F for 10–12 minutes until bacon is crispy.
- Cool & Serve: Let them sit for about 5 minutes before serving (the cheese is molten lava right now). Serve with ranch or blue cheese dressing.
Notes
- Bacon Choice: Do not use thick-cut bacon for this recipe. It takes too long to render, and by the time it’s crispy, your jalapeño will be mush and the cheese will be gone. Standard thin-cut is best.
- Glove Up: Seriously, capsaicin oil burns are no joke. If you don’t have gloves, oil your hands before cutting and wash immediately with dish soap after.
- Make Ahead: You can stuff and wrap these peppers up to 24 hours in advance. Keep them in the fridge, then just pop them in the oven when your guests arrive.
- Dip It: These are rich and spicy, so a cooling dip like ranch or a creamy garlic sauce is the perfect pairing.


