
Let’s address the elephant in the room immediately. We have all stood by the snack table at a party, digging through a bowl of Chex mix, hunting for the rye chips. We ignore the pretzels. We tolerate the wheat squares. But we ruthlessly scavenge for those garlic-soaked bagel chips like our lives depend on it. It’s a universal human experience.
But here is the sad truth: the stuff in the blue bag is disappointing. It’s often stale, the seasoning distribution is uneven, and the ratio of delicious bits to boring filler is tragic. If you are still buying pre-made mix, you are robbing yourself of one of the greatest joys in the culinary world.
I used to be like you. I grabbed a bag off the shelf and called it a day. Then, one rainy Saturday, I decided to make it from scratch. I never looked back. Homemade Chex mix is a completely different animal. It’s buttery, intensely savory, and you can customize it so you aren’t stuck with a handful of pretzels you didn’t ask for.
So, put the bag down. We are going to make the ultimate snack mix, and we are going to do it right.
The “Original” Recipe is a Lie
If you look at the back of the cereal box, you will see a recipe. It’s fine. It’s edible. But it’s timid. The box recipe assumes you want a light, healthy-ish snack. I don’t know about you, but when I eat Chex mix, I want my fingers covered in savory dust. I want flavor that punches me in the face.
To achieve snack nirvana, we need to break the rules:
- Double the Butter: The box says one stick. We use two. Maybe more. Don’t judge.
- Amplify the Seasoning: A standard teaspoon of garlic powder vanishes in a big batch. We go heavy.
- Slow the Roast: High heat burns the spices. We need a low, slow dehydration process to bake the flavor into the cereal, not just on top of it.
This isn’t just cooking; it’s engineering. We are building a flavor delivery system, and every piece plays a specific role.
The Holy Trinity of Cereal
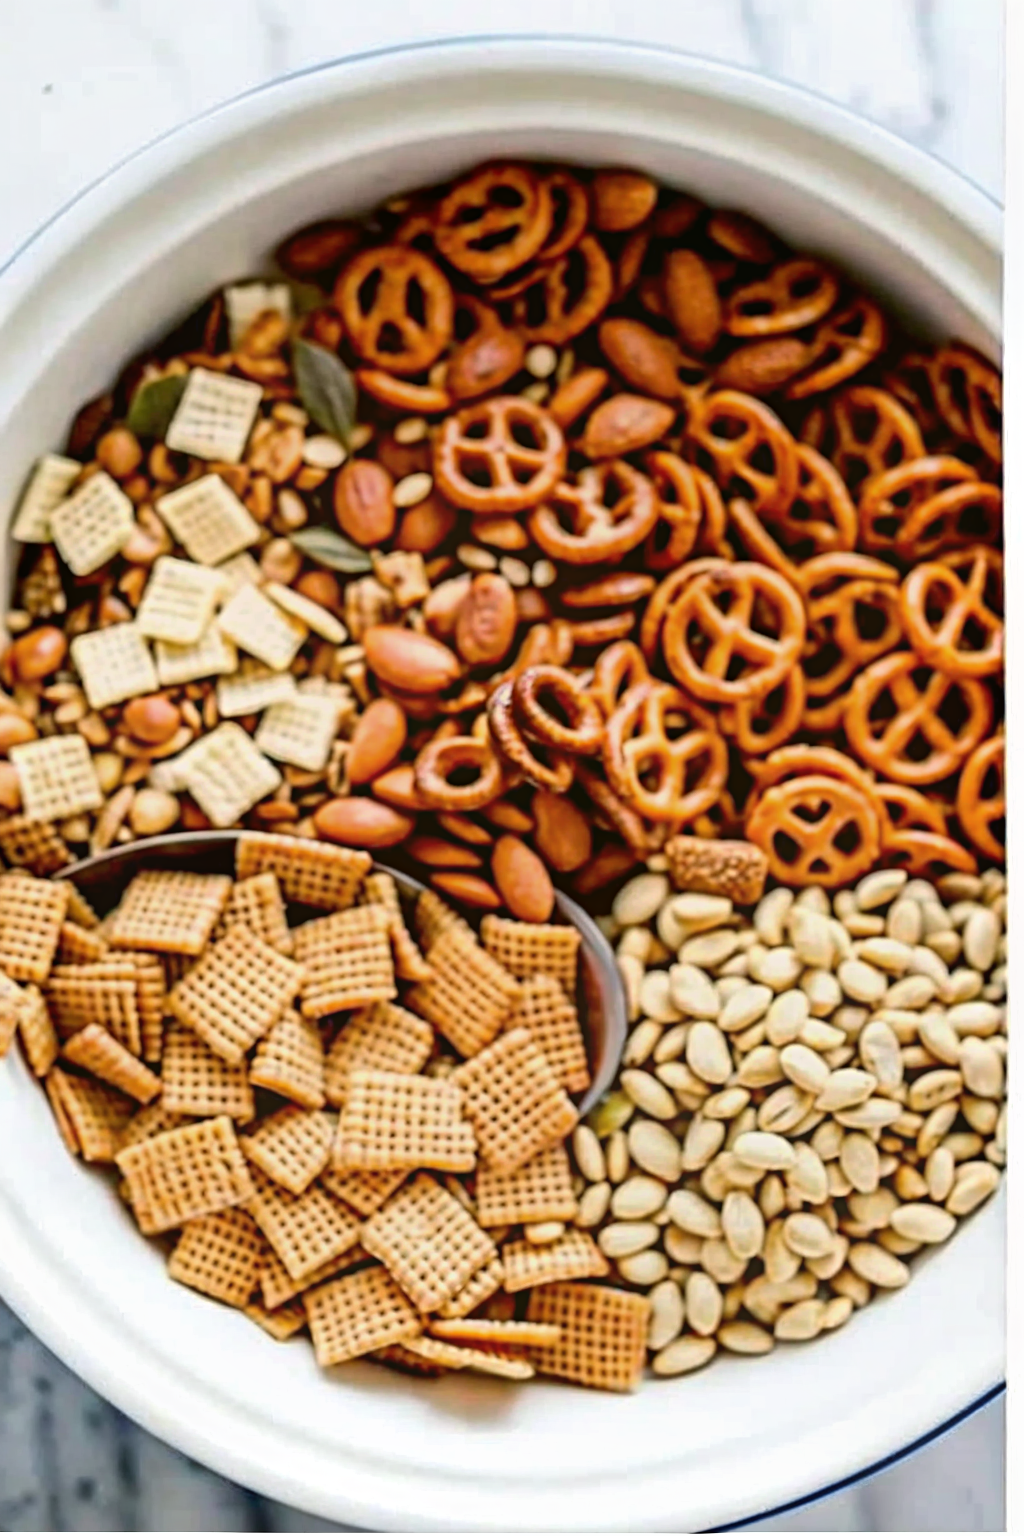
You might think all Chex are created equal. They are not. Each variety brings a different texture and absorption rate to the party. You need all three to create the perfect balance.
Corn Chex
This is your crunch. Corn Chex holds its shape better than the others. It provides that satisfying snap when you bite down. It doesn’t absorb as much butter as the others, so it acts as a palate cleanser between the heavier bites.
Rice Chex
Think of Rice Chex as the lightweight contender. It’s airy and crispy. It absorbs the butter mixture quickly, but because it’s so thin, it crisps up the fastest. It adds a delicate texture that contrasts with the denser ingredients.
Wheat Chex
This is the MVP. The heavy hitter. Wheat Chex is essentially a dense little sponge. It soaks up the Worcestershire sauce and butter like it’s been stranded in a desert. When you find a piece that is dark brown and heavy with seasoning, you know you’ve struck gold. IMO, a batch without Wheat Chex is just a waste of time.
Choosing Your Supporting Cast
Here is where the fun begins. You control the narrative. You hate pretzels? Ban them. You love peanuts? Add a pound. However, you need to maintain a balance of textures.
The Classic Contenders:
- Pretzels: Use the mini twists or the waffle shapes. The sticks fall to the bottom of the bowl and get annoying.
- Nuts: You want something substantial. Peanuts are classic, but if you want to elevate your game, toss in some homemade salted mixed nuts. The extra roast on the nuts adds a depth of flavor that raw peanuts just can’t match.
- Bagel Chips/Rye Chips: These are non-negotiable. They are the crunchy vehicles for the garlic salt. If you can’t find them in the store, break up some melba toast or plain bagel chips.
- Cheez-Its: Listen, purists might hate this. But adding cheese crackers adds a tangy, sharp note that cuts through the salt.
What to Avoid:
Do not add raisins. Do not add chocolate chips to a savory mix. If I reach for a salty snack and bite into a warm, mushy raisin, I have trust issues for the rest of the day :/
The Liquid Gold: Mastering the Sauce
The dry ingredients are just the canvas. The sauce is the paint. This is where most people fail because they skimp on the good stuff. You need enough liquid to coat every single piece, but not so much that the cereal turns into mush.
The Golden Ratio:
- Unsalted Butter: Use real butter. Margarine contains water and will make your mix soggy.
- Worcestershire Sauce: This provides the umami. It gives the mix that savory, meaty depth.
- Seasoning Salt: Lawry’s is the standard for a reason. It has paprika and turmeric that give the mix its signature color.
- Garlic and Onion Powder: Use the powder, not the salt. We are already adding seasoning salt, so we don’t want to overdo the sodium.
The Technique:
Melt the butter completely. Whisk in the Worcestershire sauce and spices while the butter is hot. The heat helps bloom the spices, waking up the garlic and onion flavors before they even hit the cereal.
The Mixing Method: Gentle Hands Required
You have a massive bowl of dry cereal and a pot of hot seasoned butter. Do not just dump the butter in one spot. If you do that, the Wheat Chex in the center will drown, and the Rice Chex on the outside will be dry.
Drizzle the sauce. Pour a little, stir gently. Pour a little, stir gently.
Use a large rubber spatula and fold the mixture from the bottom up. Chex cereal is fragile. If you stir aggressively, you will crush the Rice Chex into dust. We want whole squares, not breadcrumbs. Take your time. This step ensures every piece gets a hug from the butter.
The Cook: Oven vs. Microwave
I will say this clearly: Do not use the microwave.
I know the recipe says you can. I know it takes only 6 minutes. But the microwave steams the cereal. You end up with a chewy, tough texture. We want a shatteringly crisp texture. The only way to achieve this is dehydration in the oven.
The Oven Strategy:
- Preheat to 250°F (120°C). Low and slow.
- Spread it out. Use a large roasting pan or two baking sheets.
- The one-hour rule. Bake for at least one hour.
- The interruption. Stir every 15 minutes.
Why stir? Gravity pulls the butter and spices to the bottom of the pan. Stirring redistributes that flavor back onto the cereal. It also prevents the pieces on the bottom from burning.
Think of this process like roasting a large cut of meat. You wouldn’t rush a roast goose by blasting it with high heat, right? You give it time to develop character. Your snack mix deserves the same respect.
Customization: Breaking the Mold
Once you master the classic savory version, you can start experimenting. Chex mix is a blank slate.
Spicy Buffalo:
Swap half the Worcestershire for Frank’s RedHot sauce. Add a packet of ranch dressing mix powder. The result is tangy, spicy, and addictive.
The “Muddy Buddy” pivot:
If you crave sugar, coat the cereal in peanut butter and chocolate, then dust it with powdered sugar. It’s messy, but it rivals even the best apple pie dessert when you need a sweet fix.
Tex-Mex:
Add taco seasoning, pepitas (pumpkin seeds), and chili powder. Toss in some corn chips (Fritos) for extra crunch.
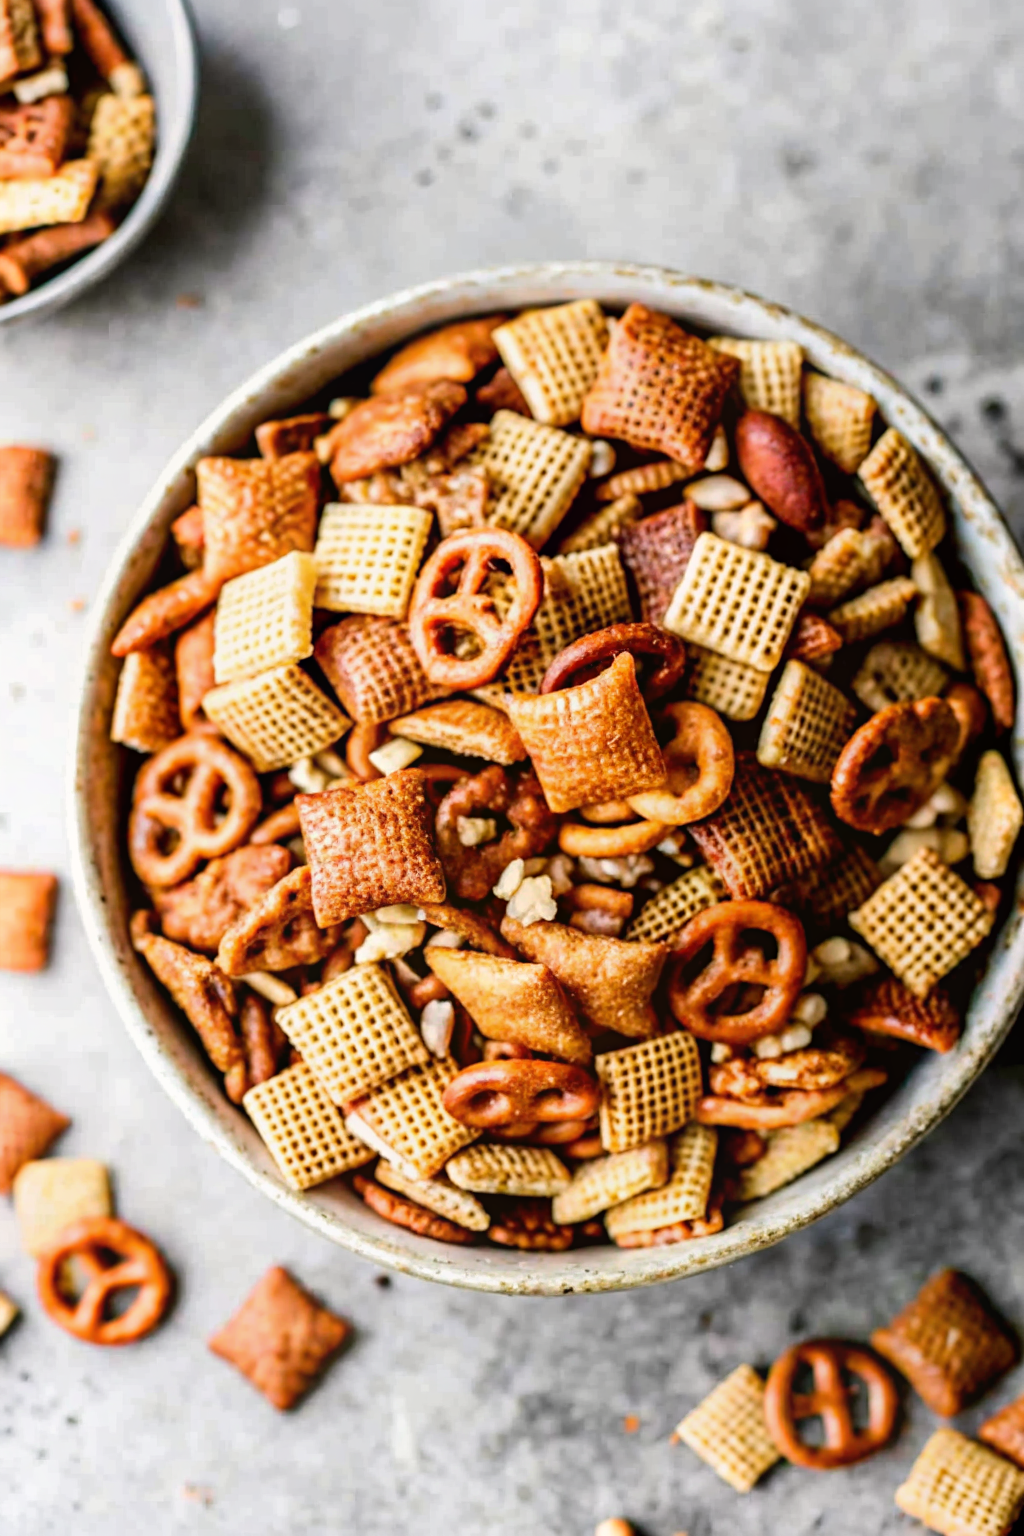
Storage: Keeping the Crunch Alive
You made a massive batch. Your house smells like garlic heaven. Now, how do you keep it from going stale?
Moisture is the enemy. As the mix cools, it draws moisture from the air. You must let it cool completely on the baking sheets before you pack it away. If you put warm mix into a Tupperware container, the steam will get trapped, and your crunchy masterpiece will turn into a soggy disappointment.
Use airtight containers.
Zip-top bags work, but hard plastic or glass containers are better because they protect the cereal from getting crushed in the pantry. Properly stored, this mix stays fresh for 3 to 4 weeks. But let’s be real—it rarely lasts that long.
The Economics of Snacking
Is it cheaper to make it yourself? Maybe not, once you buy the nuts and the butter. But we aren’t doing this to save pennies. We are doing this for quality.
When you buy a bag, you are paying for convenience and preservatives. When you make it, you are paying for premium butter, fresh nuts, and the right to exclude the pretzels if you want.
Plus, homemade Chex mix makes an incredible gift. Fill a nice mason jar, tie a ribbon around it, and give it to a neighbor. It’s thoughtful, delicious, and way better than a fruitcake.
Troubleshooting Your Mix
Sometimes, things go wrong. Here is how to fix common disasters.
“It tastes burnt.”
You had the oven too high, or you didn’t stir often enough. Garlic powder burns easily and turns bitter. Stick to 250°F. If you smell burning, pull it out immediately and transfer it to a cool tray to stop the cooking.
“It’s too salty.”
You probably used salted butter AND seasoning salt. Next time, use unsalted butter. To fix the current batch, roast some more plain cereal (no sauce) and mix it in to dilute the saltiness.
“It’s soggy.”
You didn’t bake it long enough. The butter needs to evaporate. Put it back in the oven for another 15 minutes. Test a piece of Rice Chex—if it snaps, it’s done. If it bends, keep baking.
Why We Keep Coming Back
There is a reason this recipe has survived for decades. It taps into something primal. The combination of salt, fat, and crunch triggers the pleasure centers of our brain.
According to General Mills, the recipe first appeared on cereal boxes in the 1950s. It has been a staple of American parties for over 70 years. That’s not a trend; that’s a legacy.
FYI, making this smell permeates your house for days. It smells like comfort. It smells like the holidays. It welcomes people in.
Final Thoughts
Making Chex mix at home is a declaration of independence. You are freeing yourself from the tyranny of the blue bag. You are taking control of your snacking destiny.
It’s messy. It takes an hour. You will probably spill cereal on the floor. But the moment you take that first bite of a warm, buttery, garlic-infused Wheat Chex, you will understand.
So, go buy the boxes. Clear off the counter. Get the big roasting pan. Your friends will thank you, your family will thank you, and honestly, your stomach will thank you. Just save the rye chips for me
Ultimate Chex Mix Recipe
Author: Prep: 15 minutes Cook: 1 hour Total: 1 hour 35 minutesEquipment
- Large roasting pan (or 2 large baking sheets)
- Small saucepan
- Whisk
- Large rubber spatula
- Airtight container (for storage)
Ingredients
The Crunch Base
- 3 cups Corn Chex cereal
- 3 cups Rice Chex cereal
- 3 cups Wheat Chex cereal
- 1 cup Mixed nuts or peanuts
- 1 cup Bite-sized pretzels twists or waffles
- 1 cup Garlic bagel chips or rye chips, broken into pieces
The Savory Sauce
- 1 cup Unsalted butter 2 sticks, melted
- 3 tbsp Worcestershire sauce
- 2 tsp Seasoning salt like Lawry’s
- 1 ½ tsp Garlic powder
- ¾ tsp Onion powder
Instructions
- Preheat: Preheat your oven to 250°F (120°C). We are roasting low and slow to dehydrate the cereal without burning the spices.
- Mix the Dry Goods: In a very large bowl (or directly in your large roasting pan), combine the Corn Chex, Rice Chex, Wheat Chex, nuts, pretzels, and bagel chips. Give it a gentle toss.
- Make the Sauce: In a small bowl or saucepan, mix the melted butter, Worcestershire sauce, seasoning salt, garlic powder, and onion powder. Whisk vigorously until the spices are evenly suspended in the butter.
- The Pour: Slowly drizzle the butter mixture over the cereal mixture. Do not dump it all in one spot. Pour a little, then fold gently with a rubber spatula. Repeat until everything is coated. Be gentle so you don’t crush the Rice Chex!
- Roast: Spread the mixture evenly into the roasting pan (or across two baking sheets). Bake for 1 hour.
- The Stir: Every 15 minutes, pull the pan out and stir the mix. This brings the sauce from the bottom back to the top and ensures an even roast.
- Cool Down: After an hour, remove from the oven. Spread the Chex mix out on paper towels or parchment paper on the counter. Let it cool completely. It will crisp up as it cools.
- Store: Once cool, store in an airtight container for up to 4 weeks (if it lasts that long).
Notes
- Butter Matters: Use real butter, not margarine. Margarine adds water, which makes the cereal soggy instead of crisp.
- Don’t Rush: Do not increase the oven temp to speed it up. You will burn the garlic powder and end up with bitter, black cereal.
- The Microwave Myth: You can make this in the microwave, but don’t. The oven dehydration method is the only way to get that professional-grade crunch.
- Customization: Feel free to swap the nuts or add cheese crackers (like Cheez-Its) for an extra cheesy kick.
Nutrition


