
Stop buying those frozen, cardboard-flavored boxes from the grocery store freezer aisle. Seriously, put it back. You deserve better, and quite frankly, so does your stomach. There is something incredibly satisfying about pulling a homemade dessert out of the oven, but nothing beats the satisfaction of nailing a Classic Cheesecake Recipe. It’s that golden, slightly wobbly masterpiece that screams, “I have my life together,” even if you’re currently baking in pajama pants at 2 PM.
I used to be terrified of cheesecake. My first attempt looked less like a dessert and more like a tectonic plate experiment gone wrong. It cracked, wept and was a tragedy. But after years of tweaking (and eating my mistakes), I’ve found the formula for a Classic Cheesecake Recipe that is creamy, dense, and practically foolproof.
Ready to conquer the dairy beast? Let’s bake.
Why This Classic Cheesecake Recipe Works
Why does everyone treat cheesecake like it’s bomb diffusal? Usually, it comes down to two things: the water bath and the dreaded crack.
People panic about water leaking into the springform pan (which turns your crust into a soggy sponge—gross). Or they fear opening the oven door and finding a canyon splitting the surface of their cake. But here is the secret: preparation beats panic every time. If you follow the steps and respect the chemistry, this Classic Cheesecake Recipe will make you look like a pro.
The Crust: Your Crunchy Foundation
A great cheesecake needs a solid base. Without it, you’re just eating a block of warm cream cheese, and while I won’t judge you, we can do better.
For this Classic Cheesecake Recipe, we stick to the holy grail: the graham cracker crust. It’s sweet, buttery, and provides that necessary crunch to cut through the richness of the filling.
- Graham Cracker Crumbs: Blitz them until they look like sand. If you leave big chunks, your crust will crumble when you slice it.
- Melted Butter: The glue that holds your dreams together.
- Sugar: Just a pinch to help it crisp up.
Some people skip the pre-bake on the crust. Do not skip the pre-bake. Baking the crust alone for 10 minutes sets it, ensuring it stays crunchy even after we pour the wet filling on top.
Ingredients for the Perfect Classic Cheesecake Recipe
Here is where most people fail before they even crack an egg. You cannot—I repeat, you cannot—use cold ingredients.
If you throw cold cream cheese into a mixer, it won’t blend smoothly. You will end up with a lumpy batter, and you’ll overbeat it trying to smooth it out. Overbeating whips air into the batter. Air bubbles expand in the oven and then collapse, causing cracks. See the pattern?
Required Ingredients:
- Full-Fat Cream Cheese: Buy the bricks, not the tubs. The tubs have whipped air and weird stabilizers. We want dense, fatty bricks.
- Granulated Sugar: Standard white sugar works best here.
- Sour Cream: This adds that signature tang and softens the texture.
- Eggs: The binder. Room temperature is non-negotiable.
- Vanilla Extract: Use the real stuff. Imitation vanilla tastes like chemical sadness.
The Water Bath (Bain-Marie) Situation
Okay, take a deep breath. We need to talk about the water bath.
A water bath simply means placing your cake pan inside a larger roasting pan filled with hot water. This surrounds the cheesecake with gentle, moist heat. It prevents the edges from cooking faster than the middle and keeps the top level.
Do you need it? technically, no. But do you want a smooth, uncracked surface? Then yes, you do. IMO, skipping the water bath is like driving without a seatbelt—you might make it there, but is it worth the risk?
Pro Tip: Wrap your springform pan in slow cooker liners or extra-wide heavy-duty foil. I use two layers of foil and then place the pan in a roasting tray. If you want the nerdy science on why this works, King Arthur Baking breaks down the humidity factor beautifully.
Step-by-Step Instructions
Grab your apron and let’s get messy.
1. Prep the Crust
Preheat your oven to 350°F (175°C). Mix 1 ½ cups of graham cracker crumbs, 2 tablespoons of sugar, and 5 tablespoons of melted butter in a bowl. Press this mixture firmly into the bottom of a 9-inch springform pan. Use the bottom of a measuring cup to pack it down tight. Bake for 8–10 minutes, then set it aside to cool.
2. Mix the Cheese
Turn the oven down to 325°F (163°C). In a large bowl or stand mixer, beat 4 blocks (32 oz) of room-temperature cream cheese and 1 cup of sugar. Beat on medium-low speed just until smooth. Do not go crazy here. We aren’t making whipped cream.
3. Add the Creaminess
Stir in 1 cup of sour cream and 2 teaspoons of vanilla extract. Mix until combined. Scrape down the sides of the bowl. Seriously, scrape the bowl—there is always a chunk of unmixed cheese hiding at the bottom like a coward.
4. The Eggs
Add 4 large eggs, one at a time. Mix each egg until just blended. Once the yolk disappears, stop. Stop immediately. Pour the batter over your cooled crust.
5. The Bath and Bake
Boil a pot of water. Wrap the bottom of your springform pan in foil (waterproof it!). Place the cake pan into a large roasting pan. Pour the boiling water into the roasting pan until it comes halfway up the side of the cheesecake pan.
Carefully slide it into the oven. Bake for 60–75 minutes.
6. The Jiggly Test
How do you know it’s done? Gently shake the pan. The edges should be set and puffy, but the center should still wobble slightly, like Jell-O. If it’s firm all the way through, you overbaked it. If it ripples like a soup, it needs more time.
The Cooling Process: Patience is Key
This is the hardest part. You want to eat it now, but you can’t.
When the timer goes off, turn the oven off. Crack the oven door open slightly (stick a wooden spoon in the door if it won’t stay) and leave the cheesecake inside for 1 hour. This slow cooling prevents the cheesecake from going into thermal shock and cracking.
After an hour, remove it from the water bath and let it cool completely on the counter. Then, wrap it in plastic wrap and refrigerate for at least 6 hours, preferably overnight. FYI, warm cheesecake tastes like sweetened scrambled eggs. Let it chill.
Variations on the Classic Cheesecake Recipe
Once you master this base recipe, the world is your oyster (or your bakery). You can start experimenting with flavors that go beyond the standard vanilla bean.
For example, if you are baking in the autumn, you might want to switch gears and attempt a pumpkin cheesecake delight that incorporates those warm spices we all love. The texture is similar, but the flavor profile screams “sweater weather.”
On the flip side, if you want something brighter and tangier to cut through a heavy meal, a passion fruit cheesecake offers a tropical twist that usually impresses guests who are bored of the standard New York style. The key is always mastering the base technique first before you start throwing in wild ingredients.
If you aren’t feeling the cheese vibes today but still want a show-stopping dessert, you could pivot entirely and try a churro cake recipe for that cinnamon-sugar fix without the water bath stress.
Troubleshooting: What if it Cracks?
So, you opened the fridge and found a crack. Did the world end? No.
Cracks happen to the best of us. Maybe the oven was too hot, or maybe you beat the eggs like they owed you money. The good news is that even a cracked Classic Cheesecake Recipe tastes exactly the same as a smooth one.
You have two options:
- Eat it anyway. Nobody cares once it’s on the fork.
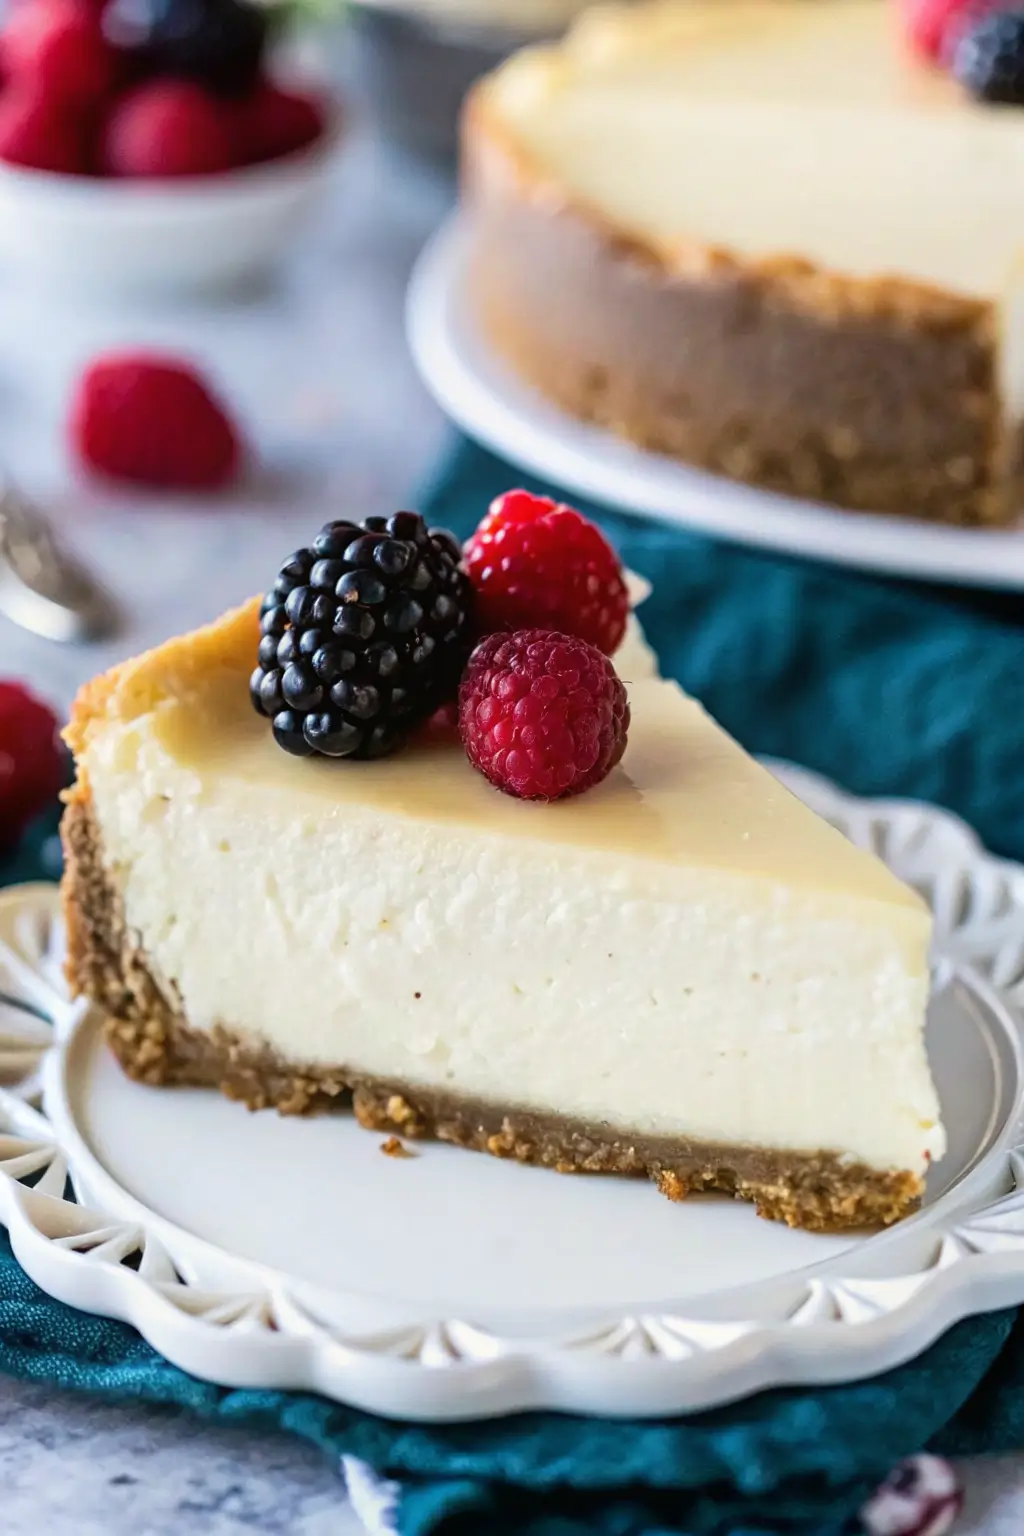
- The Camouflage Method. Cover the top with a sour cream glaze, fresh berries, or a mountain of whipped cream. If they can’t see the crack, it doesn’t exist. 🙂
Serving Suggestions
When you are ready to serve, run a knife under hot water, wipe it dry, and then slice. This gives you those clean, professional-looking cuts.
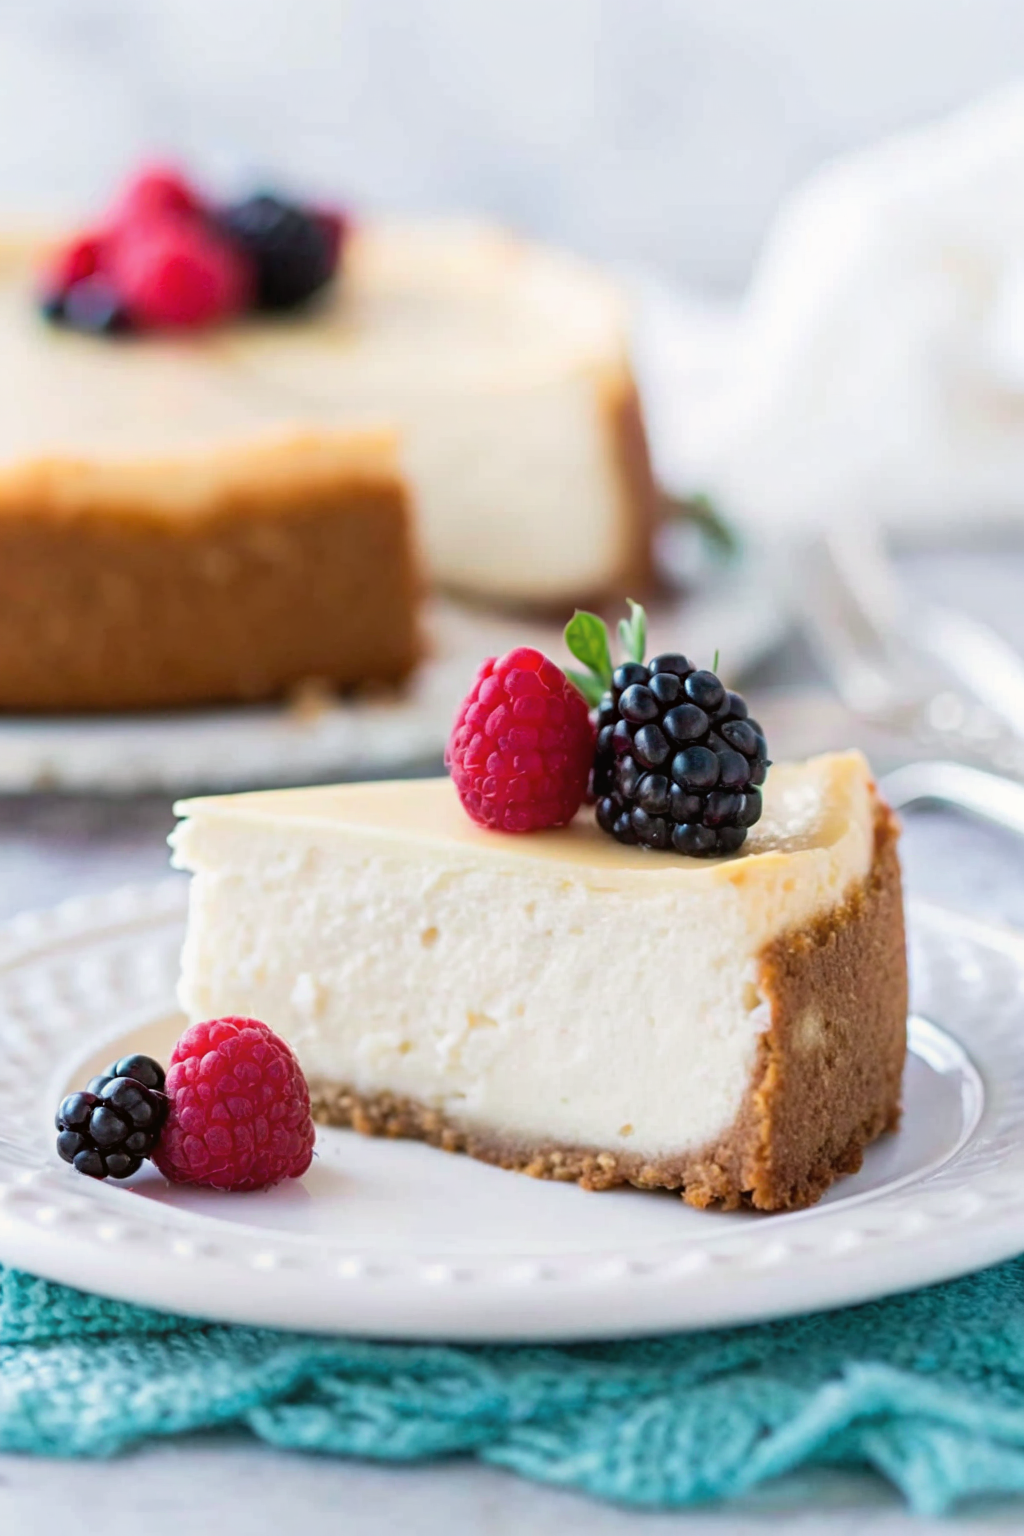
Serve it plain to show off your hard work, or top it with a simple strawberry reduction. Personally, I think it pairs best with a strong cup of coffee and total silence so you can appreciate the texture.
Conclusion
Making a Classic Cheesecake Recipe isn’t about culinary wizardry; it’s about following a few simple rules and having the patience to let the oven do the work.
Once you take that first bite—creamy, tangy, and rich—you will wonder why you ever settled for the frozen stuff. So, go buy those bricks of cream cheese and get baking. And if it cracks? Just call it “rustic” and eat it anyway.
Happy baking!
Classic Cheesecake Recipe
Author: Prep: 20 minutes Cook: 1 hour 15 minutes Total: 8 hours 35 minutesEquipment
- 9-inch springform pan
- Large Roasting Pan (for water bath)
- Electric Stand Mixer or Hand Mixer
- Rubber spatula
- Heavy-duty Aluminum Foil (or Slow Cooker Liner)
Ingredients
The Crust
- 1 ½ cups graham cracker crumbs about 10–12 full sheets
- 2 tablespoons granulated sugar
- 5 tablespoons unsalted butter melted
The Filling
- 32 oz full-fat cream cheese 4 blocks, softened to room temperature
- 1 cup granulated sugar
- 1 cup sour cream room temperature
- 2 teaspoons pure vanilla extract
- 4 large eggs room temperature
Instructions
- Prep the Crust: Preheat your oven to 350°F (175°C). In a medium bowl, combine the graham cracker crumbs, 2 tablespoons of sugar, and melted butter. Mix until it resembles wet sand.
- Bake the Base: Press the crumb mixture firmly into the bottom of a 9-inch springform pan. Use the flat bottom of a measuring cup to pack it down tight. Bake for 8–10 minutes. Remove from the oven and let it cool.
- Adjust Oven: Reduce the oven temperature to 325°F (163°C).
- Mix the Cream Cheese: In a large bowl or stand mixer fitted with the paddle attachment, beat the room-temperature cream cheese and 1 cup of sugar on medium-low speed until smooth and creamy. Do not overmix or whip on high speed (this adds air bubbles!).
- Add Flavor: Stir in the sour cream and vanilla extract. Mix until fully combined. Scrape down the sides and bottom of the bowl with a spatula to ensure no lumps are hiding.
- Add Eggs: Add the eggs one at a time, mixing on low speed after each addition just until the yolk disappears. Stop mixing as soon as the last egg is incorporated.
- Assemble: Pour the batter over the cooled crust and smooth the top with a spatula.
- Prepare Water Bath: Wrap the bottom and sides of your springform pan with two layers of heavy-duty foil (or a slow cooker liner) to waterproof it. Place the springform pan inside a large roasting pan. Bring a kettle of water to a boil. Pour the boiling water into the roasting pan until it reaches halfway up the sides of the cheesecake pan.
- Bake: Carefully place the roasting pan into the oven. Bake for 60–75 minutes. The cheesecake is done when the edges are set but the center still jiggles slightly like Jell-O when the pan is gently shaken.
- Cool Slowly: Turn off the oven. Crack the oven door open slightly (prop it with a wooden spoon if needed) and leave the cheesecake inside for 1 hour.
- Chill: Remove the cheesecake from the water bath and let it cool completely on the counter. Once cool, cover with plastic wrap and refrigerate for at least 6 hours (preferably overnight) before slicing.
Notes
- Room Temperature is Law: Seriously, don’t ignore this! If your cream cheese or eggs are cold, your batter will be lumpy. Set them out on the counter 2 hours before you start.
- The Water Bath: It might seem like a hassle, but it is the secret to a smooth, uncracked surface. Don’t skip it!
- Slicing: For clean, bakery-style cuts, run your knife under hot water and wipe it dry between every single slice.
- Storage: This Classic Cheesecake Recipe keeps well in the fridge for up to 5 days. You can also freeze slices for up to a month.
Nutrition


