
Let’s be real for a second. Most people treat vegetables like a punishment. We grew up eating soggy, boiled broccoli or flavorless steamed carrots that tasted like water and sadness. If that is your memory of vegetables, I don’t blame you for avoiding them. But I have good news: you were just cooking them wrong.
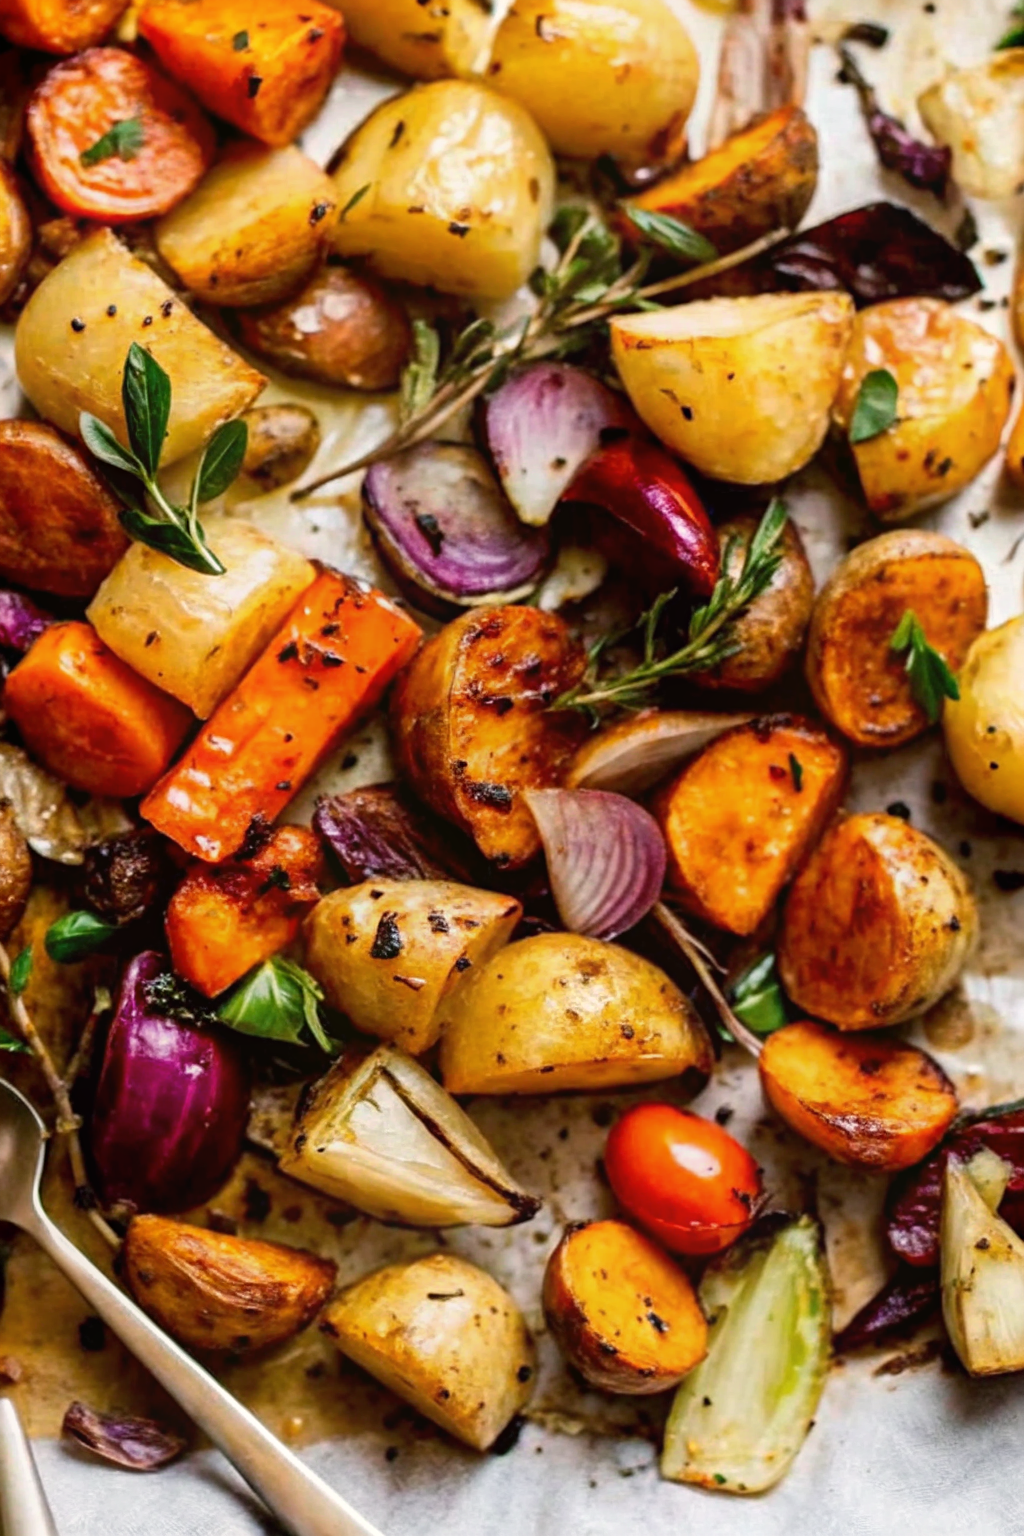
When you learn how to make roasted vegetables with herbs & sea salt, everything changes.
Suddenly, that boring cauliflower transforms into a nutty, crispy delight. Those Brussels sprouts become caramelized flavor bombs. It’s not magic; it’s just high heat and the right seasoning. Roasting concentrates the natural sugars in the produce, creating a depth of flavor that boiling washes away. Today, we are going to master this technique. We will turn your produce drawer from a place of guilt into a treasure chest of dinner possibilities.
Why Roasting Wins Every Time
You might ask, “Does the cooking method really matter that much?” The answer is a resounding yes.
Boiling leaches flavor out. Steaming keeps flavor neutral. But roasting adds flavor through caramelization. The dry heat of the oven evaporates the water inside the vegetable, intensifying its taste. The edges brown and crisp up, giving you that satisfying texture contrast between the soft interior and the crunchy exterior.
Plus, it is incredibly easy. You chop, you toss, you bake. You don’t have to stand over a stove stirring. You can drink wine while the oven does the heavy lifting. That is my kind of cooking. IMO, if a recipe requires me to stir something constantly for 20 minutes, I’m probably ordering pizza.
The Maillard Reaction
This is the science part, but stick with me. The browning you see on roasted vegetables is the Maillard reaction. It’s a chemical reaction between amino acids and reducing sugars that gives browned food its distinctive flavor. It’s the same thing that makes a seared steak taste better than a boiled one. We want to maximize this reaction on our veggies.
The Holy Trinity: Veggies, Fat, and Salt
You don’t need a culinary degree to pull this off. You just need to understand the three pillars of a good roast.
1. The Vegetables
Freshness matters. You can roast almost anything, but root vegetables (carrots, potatoes, beets) and cruciferous vegetables (broccoli, cauliflower, Brussels sprouts) handle the heat the best.
- Root Veggies: Dense and sweet. They take longer to cook but offer the best candy-like sweetness.
- Soft Veggies: Zucchini, bell peppers, and onions. These cook fast and add moisture.
- Cruciferous: These get the crispest edges. Those tiny burnt bits of broccoli? Chef’s kiss.
2. The Fat
You need oil to conduct the heat. Without oil, your vegetables will just dehydrate and shrivel up.
I recommend Avocado Oil or Olive Oil.
Avocado oil has a higher smoke point (500°F), which makes it safer for high-heat roasting. Olive oil tastes amazing but can smoke if you crank the oven too high. Be generous with it. You want the vegetables to glisten, not swim.
3. The Seasoning
This brings us to the title of our show: roasted vegetables with herbs & sea salt.
Do not use iodized table salt here. It tastes metallic and harsh. You need Sea Salt or Kosher Salt. The larger crystals provide a burst of salinity that wakes up the palate. And the herbs? We will get to those in a minute, but they are the difference between “fine” and “fantastic.”
Mastering the Cut
How you chop your vegetables determines how they cook.
If you cut your potatoes into giant chunks and your carrots into matchsticks, you are going to have a bad time. The carrots will burn before the potatoes are edible.
Aim for uniformity.
Cut everything into roughly the same size, about 1-inch cubes. This ensures they cook at the same rate. If you are roasting vegetables with vastly different cook times (like butternut squash and asparagus), use two separate sheet pans. It saves you the headache of picking through the pan to salvage the burnt bits.
The Herb Strategy: Fresh vs. Dried
I have a strong opinion on this. Dried herbs and fresh herbs serve different purposes in roasting.
Dried Herbs go on BEFORE roasting.
Dried rosemary, thyme, and oregano are hardy. They need time and oil to hydrate and release their oils. Toss them with the raw vegetables. They will infuse the oil and flavor the entire batch.
Fresh Herbs go on AFTER roasting.
Parsley, cilantro, basil, and chives are delicate. If you put them in a 400-degree oven for 30 minutes, they will turn into black, bitter ash. Chop them up and sprinkle them over the hot vegetables right when they come out of the oven. The residual heat will release their aroma without killing their flavor.
My Favorite Combos:
- The Classic: Potatoes + Dried Rosemary + Sea Salt
- The Mediterranean: Zucchini + Bell Peppers + Dried Oregano + Fresh Basil
- The Earthy: Carrots + Thyme + Parsley
Step-by-Step to Perfection
Let’s walk through the process. Follow these steps, and you cannot fail.
Step 1: Preheat Like You Mean It
Turn your oven to 400°F (200°C) or 425°F (220°C).
Low and slow is for BBQ, not for roasted veggies. We want a blast of heat to sear the outside before the inside turns to mush.
Step 2: Dry Your Veggies
Water is the enemy. If you wash your broccoli and throw it wet into the pan, it will steam. Steaming equals soggy. Dry your produce thoroughly with a kitchen towel before chopping.
Step 3: The Bowl Toss
Don’t try to drizzle oil directly onto the baking sheet. You won’t get even coverage.
Put your chopped veggies in a massive bowl. Drizzle with oil. Sprinkle with your dried herbs and sea salt. Toss it with your hands. Get in there. Every single piece should have a light coating of oil and seasoning.
Step 4: Spread ‘Em Out
Dump the bowl onto a rimmed baking sheet.
Do not crowd the pan.
I cannot stress this enough. If the vegetables are touching, they create steam pockets. Leave space between the pieces. If you have too many veggies, use a second pan. It is better to wash an extra dish than to eat soggy food. :/
Step 5: The Roast
Pop them in the oven. Roast for 25 to 40 minutes, depending on the vegetable hardness.
Flip halfway through. Use a spatula to toss them around at the 15-minute mark. This ensures even browning on all sides.
Step 6: The Finish
Pull them out when the edges are brown and a fork slides easily into the thickest pieces.
Hit them with a final sprinkle of flaky sea salt and your fresh herbs. Serve immediately.
Flavor Variations to Keep It Interesting
Once you master the basic salt and herb combo, you can get creative. The versatility of roasted vegetables allows you to pair them with almost anything.
Sweet & Savory:
If you are roasting carrots or sweet potatoes, try adding a sweet element. I sometimes toss my roasted roots in a little <a href=”https://cookingwithdonna.com/homemade-honey-butter”>homemade honey butter</a> right before serving. The honey caramelizes with the sea salt creates a addictive glaze that kids absolutely love.
Spicy Kick:
Add red pepper flakes or cayenne powder to your oil mixture. This works exceptionally well with broccoli and cauliflower.
Acid Trip:
A squeeze of fresh lemon juice or a drizzle of balsamic vinegar over the finished dish cuts through the richness of the oil and brightens everything up.
Serving Suggestions
You made a beautiful tray of veggies. Now, what do you eat them with?
Honestly, I sometimes just eat a bowl of them for lunch with a fried egg on top. But they shine as a side dish.
If you are making a heavy main course, like a rich, spicy bowl of easy beef chili, these roasted vegetables provide a necessary texture contrast. The freshness of the herbs breaks up the density of the meat and beans.
They also replace more labor-intensive sides. For example, I love southern fried cabbage, but it requires active cooking time on the stove. If I’m busy, tossing cabbage wedges on a sheet pan to roast gives me a similar flavor profile with half the effort.
Troubleshooting Common Problems
Even with a simple recipe, things can go wrong. Let’s fix them.
Problem: My vegetables are soggy.
- Cause: You overcrowded the pan or didn’t dry the veggies enough.
- Fix: Use two pans next time and dry them well. Also, check your oil amount—too much oil can make them greasy and limp.
Problem: They are burnt on the outside but raw on the inside.
- Cause: Your oven is too hot, or your pieces are too big.
- Fix: Lower the temp to 375°F or cut your veggies smaller.
Problem: They taste bland.
- Cause: You didn’t use enough salt. Potatoes, in particular, soak up salt like a sponge.
- Fix: Sprinkle more sea salt right before serving. The crunch of the salt crystal on your tongue makes a huge difference.
The Health Benefits
We all know we need to eat more plants. Roasting makes that easy.
Vegetables are packed with fiber, vitamins, and antioxidants. When you roast them with healthy fats like olive oil, your body actually absorbs the fat-soluble vitamins (like Vitamin A, D, E, and K) better. So, adding fat makes the veggies healthier. You’re welcome.
For a deeper look into maximizing nutrient retention while cooking, check out this guide from Scientific American. It explains how different cooking methods affect vitamin levels.
Kitchen Tools You Need
You don’t need fancy gadgets, but a few basics help.
- Rimmed Baking Sheets: These prevent oil from dripping onto your oven floor and starting a fire. (Ask me how I know).
- Parchment Paper: This is optional, but it makes cleanup a breeze. Just make sure it’s rated for high heat.
- A Sharp Knife: Dull knives slip and cause accidents. Keep your blade sharp for safely cutting hard root vegetables.
A Note on Leftovers
Roasted vegetables are best fresh, but they keep well in the fridge for 3-4 days.
Do not microwave them to reheat. They will turn to mush instantly.
Instead, throw them back in a toaster oven or an air fryer for 5 minutes. This wakes up the oil and re-crisps the edges. They are also fantastic cold in salads or wrapped in a tortilla with hummus.
Final Thoughts
Cooking roasted vegetables with herbs & sea salt is a life skill. It allows you to walk into a grocery store, buy whatever is on sale, and know exactly how to make it taste delicious. It frees you from recipes. Once you know the ratio of oil to salt and the oven temp, you can improvise with whatever you have in the fridge.
So, stop boiling your Brussels sprouts. Stop steaming your cauliflower until it turns gray. Crank up the heat, grab the sea salt, and let the oven do the work.
What’s your favorite vegetable to roast? I’m currently obsessed with roasted radishes (they taste like potatoes, seriously!).
Now, go preheat that oven. Your dinner is about to get a major upgrade.
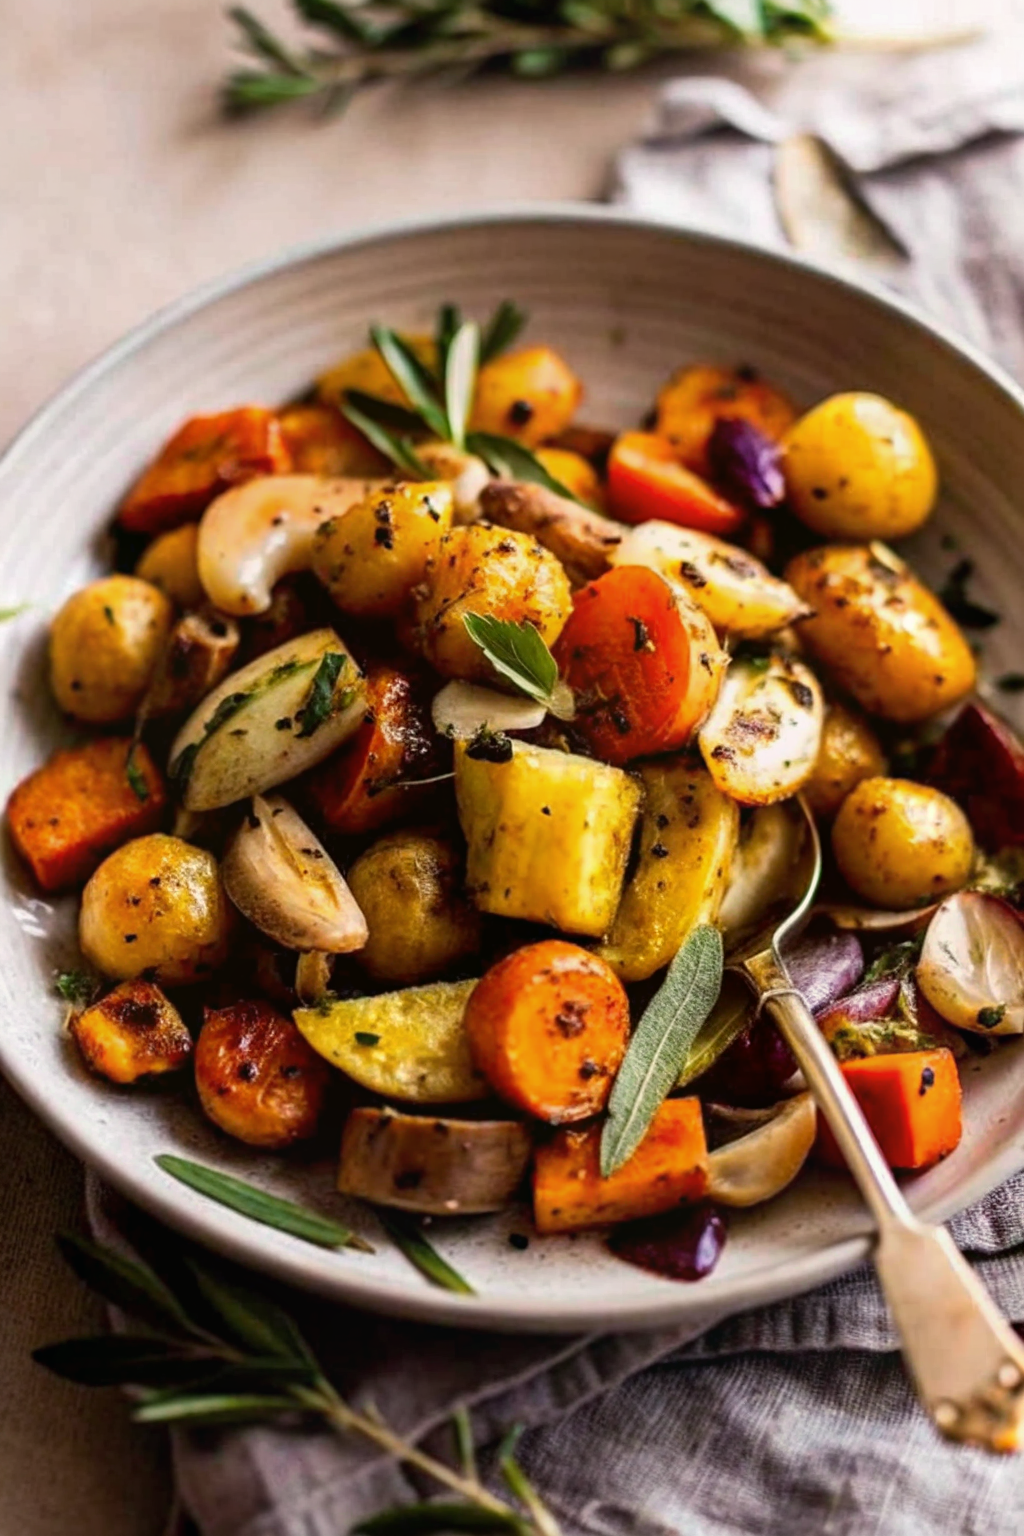
Perfect Roasted Vegetables with Herbs & Sea Salt
Author: Prep: 15 minutes Cook: 35 minutes Total: 50 minutesEquipment
- Large Rimmed Baking Sheet
- Large mixing bowl
- Sharp chef’s knife
- Parchment paper
Ingredients
The Veggies:
- 2 cups broccoli florets
- 2 cups carrots peeled and chopped into 1-inch chunks
- 1 red bell pepper seeds removed and chopped
- 1 red onion cut into wedges
- 1 zucchini sliced into half-moons
The Seasoning:
- 3 tbsp olive oil or avocado oil for higher heat tolerance
- 1 tsp dried thyme or dried rosemary
- 1 tsp flaky sea salt plus more for finishing
- ½ tsp freshly cracked black pepper
The Finish:
- 2 tbsp fresh parsley chopped (or fresh basil)
- 1 tsp lemon juice optional, for brightness
Notes
- Preheat the Oven: Crank your oven up to 425°F (220°C). We need high heat to caramelize the natural sugars in the veggies. If you want easy cleanup, line your baking sheet with parchment paper now.
- Prep the Produce: Wash your vegetables and—this is critical—dry them thoroughly with a towel. If they are wet, they will steam instead of roast. Chop everything into uniform 1-inch pieces so they cook evenly.
- The Bowl Toss: Place all the chopped veggies into a large mixing bowl. Drizzle with the olive oil. Sprinkle in the dried thyme, sea salt, and black pepper.
- Get Dirty: Use your hands to toss everything together. You want every single piece of vegetable to have a light coating of oil and spices. This ensures maximum flavor.
- Spread ‘Em Out: Dump the veggies onto the baking sheet. Spread them out in a single layer. Do not crowd the pan! If they are touching too much, use a second sheet pan. They need room to breathe to get crispy.
- Roast: Pop the tray in the oven. Roast for 30 to 40 minutes.
- The Flip: Halfway through (around the 15-20 minute mark), open the oven and give the veggies a toss with a spatula. This helps them brown on all sides.
- Finish & Serve: Remove from the oven when the carrots are tender and the broccoli edges are crispy and brown. Sprinkle immediately with the fresh parsley and an extra pinch of sea salt. Serve hot!
Nutrition


