
Let’s be real for a moment: most people treat chili like a culinary trash can, but today we are fixing that with the American Chili Escoffier method. You usually open the pantry, grab whatever beans, tomatoes, and mystery spices look vaguely edible, dump them into a pot, and pray for the best. Sometimes it works; however, it often results in a watery, sad soup that leaves you wondering where you went wrong.
But what happens when you take this rugged American classic and apply the high-end techniques of Auguste Escoffier?
For those scratching their heads, Escoffier is the godfather of modern French cuisine. He invented the brigade system, codified the five mother sauces, and basically organized the chaos of professional kitchens. Bringing an American Chili Escoffier mindset to your stove doesn’t mean we are making tiny, pretentious portions. On the contrary, it means we are respecting the ingredients, building layers of flavor, and using science to create a bowl of red so good it might actually change your life.
Ready to trade your can opener for a chef’s knife? Let’s get cooking.
Why the American Chili Escoffier Technique Matters
You might ask, “Why do I need French technique for cowboy food?”
That is a fair question. However, the difference between a cafeteria slop and a Michelin-star meal often boils down to how you cook, not just what you cook. The American Chili Escoffier approach focuses entirely on the “why” behind the steps.
We aren’t just browning meat; in fact, we are creating a fond. We aren’t just chopping veggies; instead, we are executing mise en place. When you apply these principles, you control the outcome. Consequently, you stop guessing. Plus, telling your friends you used a “reduction technique” sounds way cooler than saying you boiled it for a while. 🙂
Mise en Place for the Perfect American Chili Escoffier
In a professional kitchen, chaos is the enemy. Escoffier preached mise en place, which literally translates to “putting in place.”
Before you even look at the stove, you must chop, measure, and organize every single ingredient. Do not try to chop onions while the beef is searing. First, you will burn the beef. Then, you will stress out. Finally, you will cry, and not just because of the onions.
- Dice Uniformly: Cut your peppers and onions into uniform pieces. This ensures they cook at the same rate.
- Measure Spices First: Combine your chili powder, cumin, oregano, and smoked paprika in a small bowl.
- Prep the Liquids: Open your beer bottle (one for the chili, maybe one for you) and measure your stock.
When you have your American Chili Escoffier station set up, cooking becomes a dance rather than a panic attack.
The Maillard Reaction in Gourmet Chili
Here is the biggest mistake home cooks make: they steam their meat.
You throw two pounds of cold ground beef into a lukewarm pot. It turns gray. Consequently, it releases a pool of water. Ultimately, it tastes like sadness. To achieve that deep, savory flavor, you need the Maillard reaction—the chemical browning of proteins.
How to do it right:
- Dry the Meat: Pat your beef dry with paper towels. Moisture kills the sear.
- High Heat: Get your Dutch oven screaming hot.
- Don’t Crowd the Pan: Cook in batches. If you pack the beef in tight, the moisture gets trapped and steams the meat. Brown it, remove it, and repeat.
By taking the time to properly brown the meat, you create a fond—those sticky, brown bits stuck to the bottom of the pot. That is pure flavor gold. FYI, if you scrub that off in the sink, you are literally washing away flavor.
If you enjoy working with beef and want to master another classic comfort dish, you should check out my ultimate meatloaf recipe, where we use similar principles to keep the meat juicy and tender.
Building Aromatics for French-Style Chili
In French cooking, you start with a mirepoix (onions, carrots, celery). In our American Chili Escoffier version, however, we swap that for the “Holy Trinity” of chili: onions, bell peppers, and jalapeños.
Drop these veggies into the hot beef fat left in the pot. We want to sweat them. This means cooking them until they soften and release their sugars, but before they turn to mush.
The Bloom:
Once the veggies are soft, add your garlic and your spice blend. Do not add liquid yet. You must toast the spices in the hot fat for about 60 seconds. This process, called “blooming,” wakes up the essential oils in the cumin and chili powder. If you skip this, your chili will taste dusty. IMO, this step separates the amateurs from the pros.
Deglazing: The Secret to American Chili Escoffier
Now, look at the bottom of your pot. It looks dark and crusty, right? Perfect.
We need to release that fond using a liquid. This is called deglazing. For an American Chili Escoffier style, a dark lager or a stout works beautifully. The carbonation and alcohol help lift the caramelized bits off the bottom.
Pour in the beer and use a wooden spoon to scrape the bottom vigorously. You are dissolving that caramelized meat and vegetable sugar into the sauce. As a result, this creates a depth of flavor that a bouillon cube could never dream of achieving.
Simmering and Reduction in Your Chili Recipe
Escoffier was the king of sauces, and he knew that reduction concentrates flavor.
Add your beef stock, crushed tomatoes, and the browned meat back into the pot. Now, we wait. You cannot rush a good chili. You need to maintain a gentle simmer—not a violent boil. A boil agitates the meat too much; conversely, a simmer gently breaks down the collagen in the beef, turning it into gelatin.
This gelatin gives the chili a silky, rich mouthfeel. It’s the difference between a soup and a stew.
Rhetorical Question: Ever notice how chili tastes better the next day?
That’s because the flavors have had time to meld and the proteins have fully relaxed. Therefore, if you have the patience, cool it down and reheat it tomorrow.
Refining the Texture of American Chili Escoffier
Sometimes, despite our best efforts, chili ends up a bit thin. In the French repertoire, you would typically use a roux (flour and fat) or a beurre manié to thicken a sauce.
For an American Chili Escoffier adaptation, however, we keep it gluten-free and rustic by using Masa Harina (corn flour).
Mix a tablespoon of Masa Harina with a little water to make a slurry, then stir it into the simmering pot about 30 minutes before serving. It tightens the liquid and adds a subtle corn flavor that screams “Southwest.” Furthermore, it gives the chili that distinct, velvety sheen that looks amazing in photos.
Balancing the Palate of Your Gourmet Bowl
Here is a secret that chefs use to make food taste “restaurant quality.” They balance the five tastes: sweet, sour, salty, bitter, and umami.
Your chili has salt and umami (beef), and probably some heat. However, it often lacks acid.
- The Acid Trick: Stir in a teaspoon of apple cider vinegar or lime juice right at the end. It cuts through the heavy fat and brightens the whole dish.
- The Bitter Note: Add a square of dark chocolate or a shot of espresso. It deepens the color and adds a complexity that makes people ask, “What is that secret ingredient?”
The American Chili Escoffier Recipe Breakdown
Enough theory. Let’s put this American Chili Escoffier concept into action.
Ingredients:
- Fat: Bacon grease or neutral oil.
- Meat: 3 lbs Chuck Roast (hand-cut into small cubes is better than ground), or 80/20 ground beef.
- Aromatics: 2 onions, 2 bell peppers, 4 cloves garlic.
- Spices: Chili powder, cumin, smoked paprika, oregano, coriander.
- Liquids: 1 bottle dark beer, 2 cups beef bone broth, 1 can crushed tomatoes.
- The Finish: Masa Harina, dark chocolate, lime juice.
Instructions:
- Sear the Beef: Heat the oil in a Dutch oven. Sear the beef in batches until dark brown. Remove and set aside.
- Sauté Veggies: Add onions and peppers to the pot. Cook until soft (5–8 minutes).
- Bloom Spices: Add garlic and spices. Stir constantly for 1 minute.
- Deglaze: Pour in the beer. Scrape the bottom of the pot like your life depends on it.
- Simmer: Return beef to the pot. Add tomatoes and broth. Bring to a boil, then reduce heat to low. Cover slightly and simmer for 2 hours.
- Thicken and Finish: Stir in the Masa Harina slurry. Simmer for another 15 minutes. Stir in the chocolate and lime juice. Taste for salt.
Serving Suggestions for Your Masterpiece
You spent three hours making this masterpiece. Therefore, do not serve it on a paper plate.
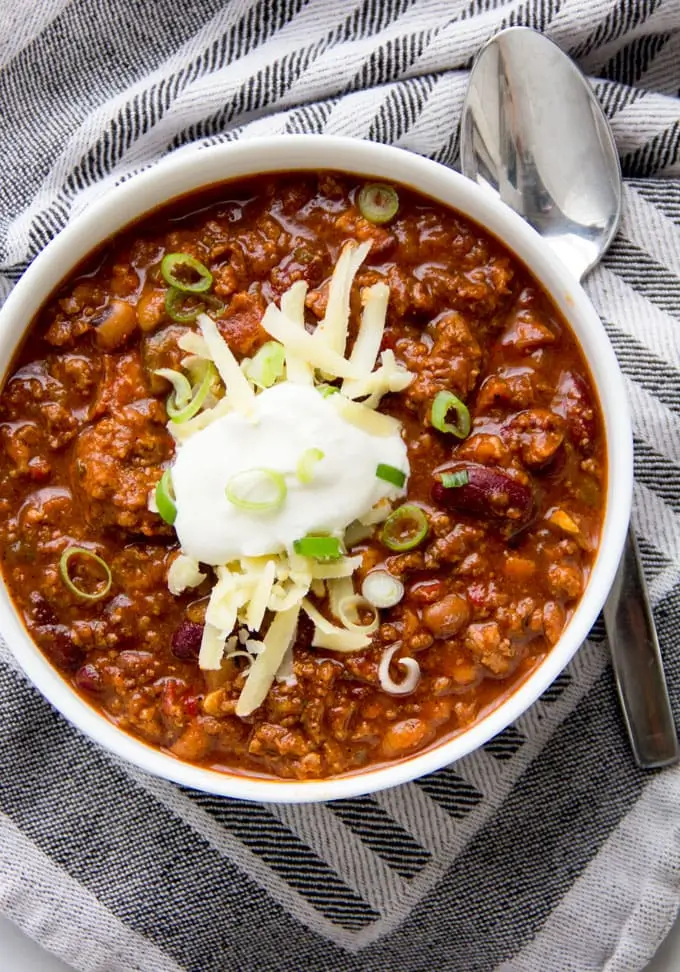
Ladle it into deep bowls. Garnish with intention. Fresh cilantro, diced raw white onion (for crunch), and shredded sharp cheddar. Additionally, if you want to cool down the heat, add a dollop of sour cream.
And what about dessert? After a heavy, savory meal like this, you need something sweet to cleanse the palate. I highly recommend baking a classic cheesecake recipe. The cool, creamy texture is the perfect contrast to the spicy, hot chili.
Alternatively, if you aren’t in the mood for cheese, a cinnamon-sugar dusted churro cake recipe keeps the Tex-Mex theme going and is surprisingly easy to make while the chili simmers.
Common Mistakes in American Chili Escoffier
Even with the best intentions, things can go sideways.
- Burning the Garlic: Garlic burns in seconds. Therefore, always add it after your onions and peppers are mostly cooked. Burnt garlic tastes acrid and ruins the whole pot.
- Under-salting: Tomatoes and potatoes (if you use them) suck up salt. Taste your chili at the end. If the flavors don’t “pop,” it probably just needs more salt.
- Using Lean Meat: Fat is flavor. If you use 96% lean beef, your American Chili Escoffier experiment will be dry and rubbery. So, stick to the fatty cuts.
The American Chili Escoffier Verdict
Applying French technique to American chili might seem like overkill to some. They might say, “It’s just chili, relax.”
But when you taste the difference—the depth of the fond, the complexity of the reduction, the silkiness from the collagen—you realize that Escoffier knew what he was doing. We aren’t changing the soul of the dish; rather, we are just giving it a tuxedo.
So, next time you plan a chili night, channel your inner French chef. Slow down. Sear properly. Scrape the fond. Your tastebuds will thank you.
Conclusion
Mastering the American Chili Escoffier style is about respect. It is about respect for the ingredients, the process, and the people you feed. It turns a humble weeknight meal into a culinary event.
For more deep dives into culinary techniques and the history of the “King of Chefs,” you can read up on Auguste Escoffier’s legacy directly from the experts.
Now, go grab that Dutch oven. You have a masterpiece to build. :/
Happy cooking!

American Chili Escoffier
Author: Prep: 15 minutes Cook: 1 hour 10 minutes Total:Equipment
- Heavy-bottomed pot or Dutch oven
- Wooden spoon
- Cutting board
- Chef’s knife
- Measuring cups
- Measuring spoons
Ingredients
For the Chili
- 2 tablespoons olive oil
- 1 large onion diced
- 1 green bell pepper chopped
- 4 garlic cloves minced
- 1 ½ pounds ground beef
- 2 tablespoons chili powder
- 1 tablespoon smoked paprika
- 1 teaspoon cumin
- ½ teaspoon oregano
- ½ teaspoon cayenne pepper optional
- 1 teaspoon salt
- ½ teaspoon black pepper
- 1 28-ounce can crushed tomatoes
- 1 15-ounce can kidney beans, drained and rinsed
- 1 15-ounce can black beans, drained and rinsed
- 1 cup beef broth
- 1 tablespoon tomato paste
- 1 teaspoon brown sugar
- 1 bay leaf
Optional Toppings
- Shredded cheddar cheese
- Sour cream
- Sliced green onions
- Fresh cilantro
- Crushed tortilla chips
Instructions
- Step 1 — Sauté the Base
- Heat the olive oil in a large pot over medium heat. Add the onion and bell pepper, then cook for 4–5 minutes until they soften. Stir in the garlic and cook for 1 minute to bring out its flavor.
- Step 2 — Brown the Beef
- Add the ground beef to the pot. Break it up with your spoon and cook until fully browned. Drain excess fat if needed.
- Step 3 — Add the Spices
- Stir in the chili powder, smoked paprika, cumin, oregano, cayenne, salt, and pepper. Mix well to coat the beef with all those bold flavors.
- Step 4 — Build the Chili
- Add the crushed tomatoes, beans, beef broth, tomato paste, brown sugar, and bay leaf. Stir everything to combine.
- Step 5 — Simmer Low and Slow
- Bring the chili to a gentle simmer. Let it cook uncovered for 45–60 minutes, stirring occasionally so nothing sticks. The chili will thicken and deepen in flavor as it cooks.
- Step 6 — Taste and Adjust
- Remove the bay leaf. Taste and adjust seasonings—add more salt, chili powder, or cayenne if you want extra heat.
- Step 7 — Serve and Enjoy
- Ladle your American Chili Escoffier into bowls and top it with cheese, sour cream, cilantro, or anything you love. Let it cool for 5–10 minutes before serving so the flavors settle beautifully.
Notes
- Let the chili rest: A short cooling period helps deepen the flavors.
- Make it ahead: Chili tastes even better the next day.
- Swap the beef: Ground turkey or chicken works great for a lighter version.
- Adjust the heat: Add more cayenne for spicy lovers or skip it for kids.
- Thicken naturally: Simmer uncovered to reduce and thicken the chili without extra thickeners.
Nutrition


