
Let’s address the elephant in the kitchen right now. The Bûche de Noël, or Yule Log Cake, terrifies people. It really does. There is something about the phrase “roll the cake” that sends a shiver down the spine of even competent home bakers. I used to be one of them. My first attempt looked less like a festive log and more like a chocolate landslide that happened to have a Santa figurine stuck in it.
But here is the truth: making a Bûche de Noël is actually fun once you know the secret handshake. Okay, there is no handshake, but there is a specific technique to rolling the sponge that guarantees success. If you can handle a few eggs and have a clean kitchen towel, you can pull this off.
So, put aside your fear of cracking cakes. We are going to make a dessert that looks like it came from a Parisian bakery, but tastes like pure, homemade comfort.
What is This Thing, Anyway?
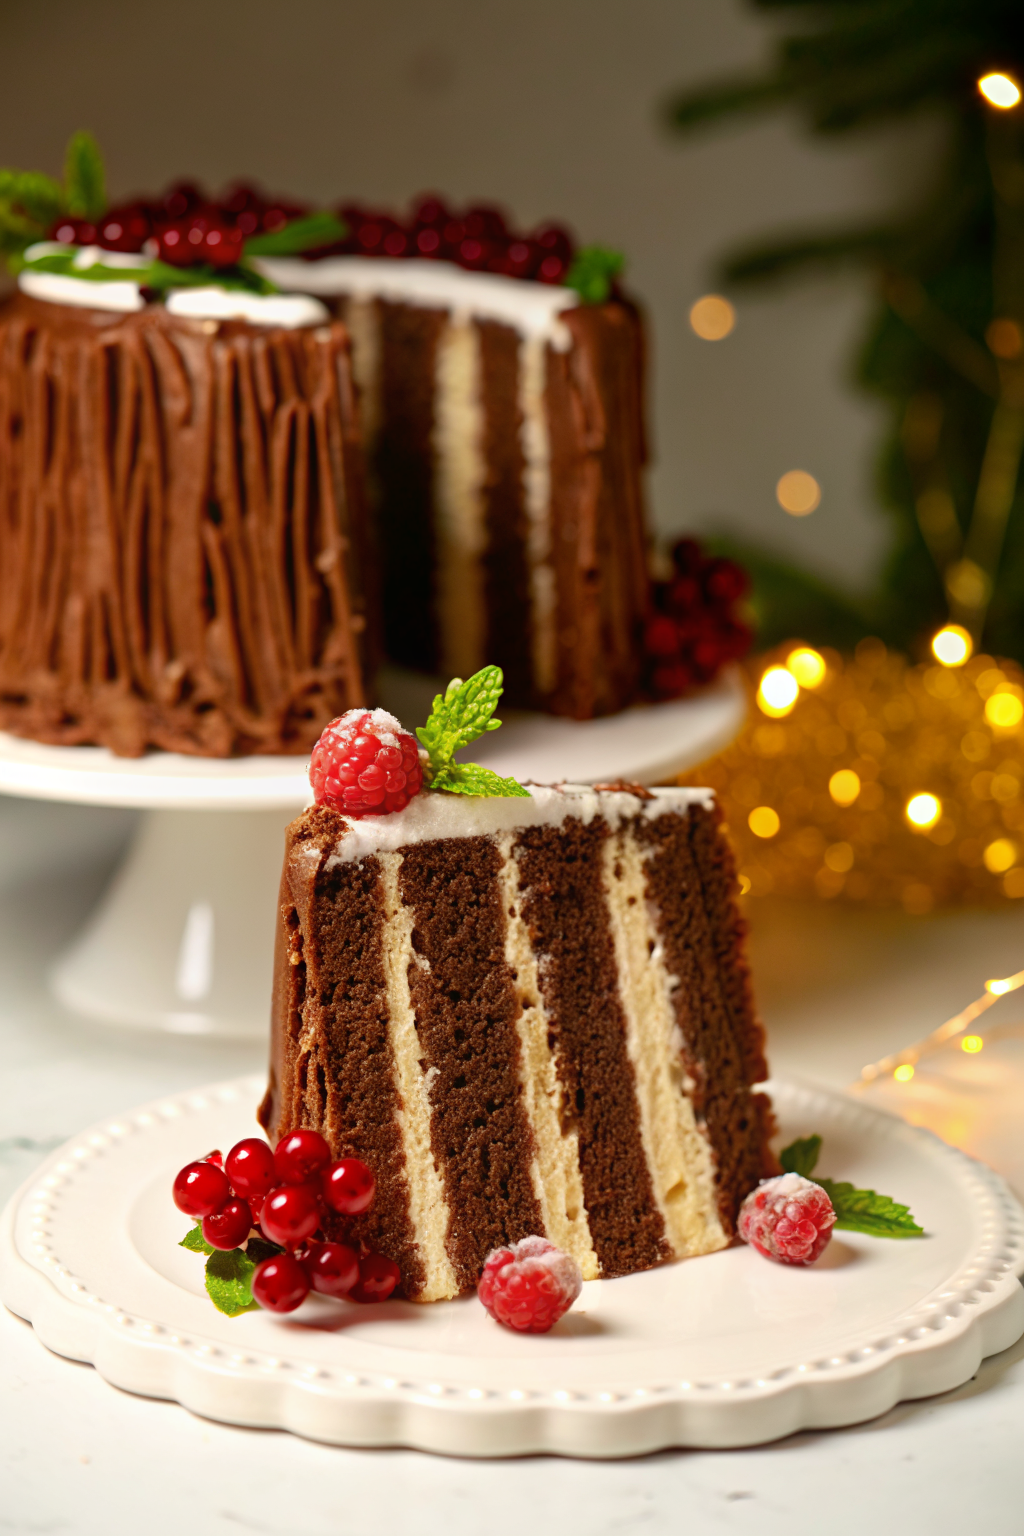
If you didn’t grow up with this tradition, a Yule Log is essentially a giant Swiss roll that went to art school. It mimics the actual wooden logs burned in the hearth on Christmas Eve. It consists of a light, airy sponge cake (usually chocolate), a creamy filling, and a frosting textured to look like tree bark.
Unlike the dense, forgiving crumb of a pumpkin bread, this sponge relies on air. We whip eggs until they look like clouds, and that air keeps the cake flexible enough to roll. It’s light, it’s not overly sweet, and it creates a stunning centerpiece for your holiday table.
The Foundation: The Genoise Sponge
We need to talk about the cake base. We use a sponge called a Genoise. This sounds fancy and French, but it just means we beat whole eggs with sugar until they triple in volume.
Why No Baking Powder?
You might notice some recipes skip chemical leaveners like baking powder. IMO, you get a better texture without them. You want the lift to come from the mechanical action of whipping air into the eggs. This creates a flexible structure. If you add too much baking powder, the cake rises too high, becomes fluffy rather than spongy, and snaps when you try to roll it.
The Egg Whipping Strategy
You need a stand mixer or a very patient hand with an electric hand mixer. You beat the eggs and sugar on high speed for about 5 to 7 minutes. You are looking for the “ribbon stage.” This means when you lift the whisk, the batter falls back into the bowl in a thick ribbon that sits on the surface for a few seconds before disappearing.
If you don’t hit this stage, your cake will be a rubbery pancake. :/
Choosing Your Chocolate
Since chocolate is the primary flavor profile here, quality matters. If you think choosing chocolate for chocolate chip cookies is high stakes, this is even more critical.
For the sponge, use a high-quality cocoa powder. I prefer Dutch-processed cocoa because it has a darker color and a smoother, less acidic flavor. It gives the cake that deep, wood-like hue we want for a log.
For the frosting (the bark), use real chocolate bars, not chips. Chips contain stabilizers that prevent them from melting smoothly. You want a luscious, spreadable ganache or buttercream that melts on your tongue.
The Scary Part: The Rolling Technique
Okay, this is where everyone gets sweaty palms. How do you roll a cake without it breaking?
The secret is muscle memory.
You must teach the cake to curl while it is still hot. The moment you pull that baking sheet out of the oven, the clock starts ticking. Here is the drill:
- Prepare a Towel: While the cake bakes, lay a clean, thin kitchen towel on the counter. Dust it generously with powdered sugar or cocoa powder. This acts as a barrier so the cake doesn’t stick to the cloth.
- Flip and Peel: Turn the hot cake immediately onto the towel. Peel off the parchment paper. Do this gently but quickly.
- The Pre-Roll: Starting at one short end, roll the cake up with the towel inside it. Yes, you are rolling the cloth into the cake.
- Cool It: Let the rolled-up cake cool completely on a wire rack.
Why do we do this? As the cake cools, the proteins set. If you let it cool flat and then try to roll it, it will snap. By cooling it in a coiled shape, it develops a “memory” of that shape. When you unroll it later to fill it, it will naturally want to curl back up. Genius, right?
The Filling: Keep It Light
You unrolled your cake, and it didn’t crack. Celebration time! Now you need to fill it.
You want a filling that contrasts with the chocolate sponge. A simple Chantilly cream (sweetened whipped cream with vanilla) is traditional and delicious. Think of the texture of the frosting on my easy vanilla cake, but much lighter and airier.
Pro Tip: Add a stabilizer to your whipped cream if you are making this a day ahead. A spoonful of mascarpone cheese or a tiny bit of gelatin helps the cream hold its shape so your log doesn’t go flat in the fridge.
Spread the filling evenly, leaving about an inch of space at the end so it doesn’t squirt out when you re-roll. Then, using the towel to help you, gently roll the cake back up (without the towel inside this time, obviously).
The Frosting: Creating the Bark
This is the fun part where perfectionism goes to die. You actually want this to look messy. You are making tree bark, not a wedding cake.
I prefer a chocolate ganache for the exterior. It’s just heavy cream and chocolate melted together. It sets into a firm, fudge-like consistency that is easy to sculpt.
How to texture the log:
- Slather the frosting all over the rolled cake.
- Take a fork and drag it through the frosting lengthwise. Wiggle it slightly to create knots and rough patches.
- Don’t worry about smooth edges. Trees are rugged.
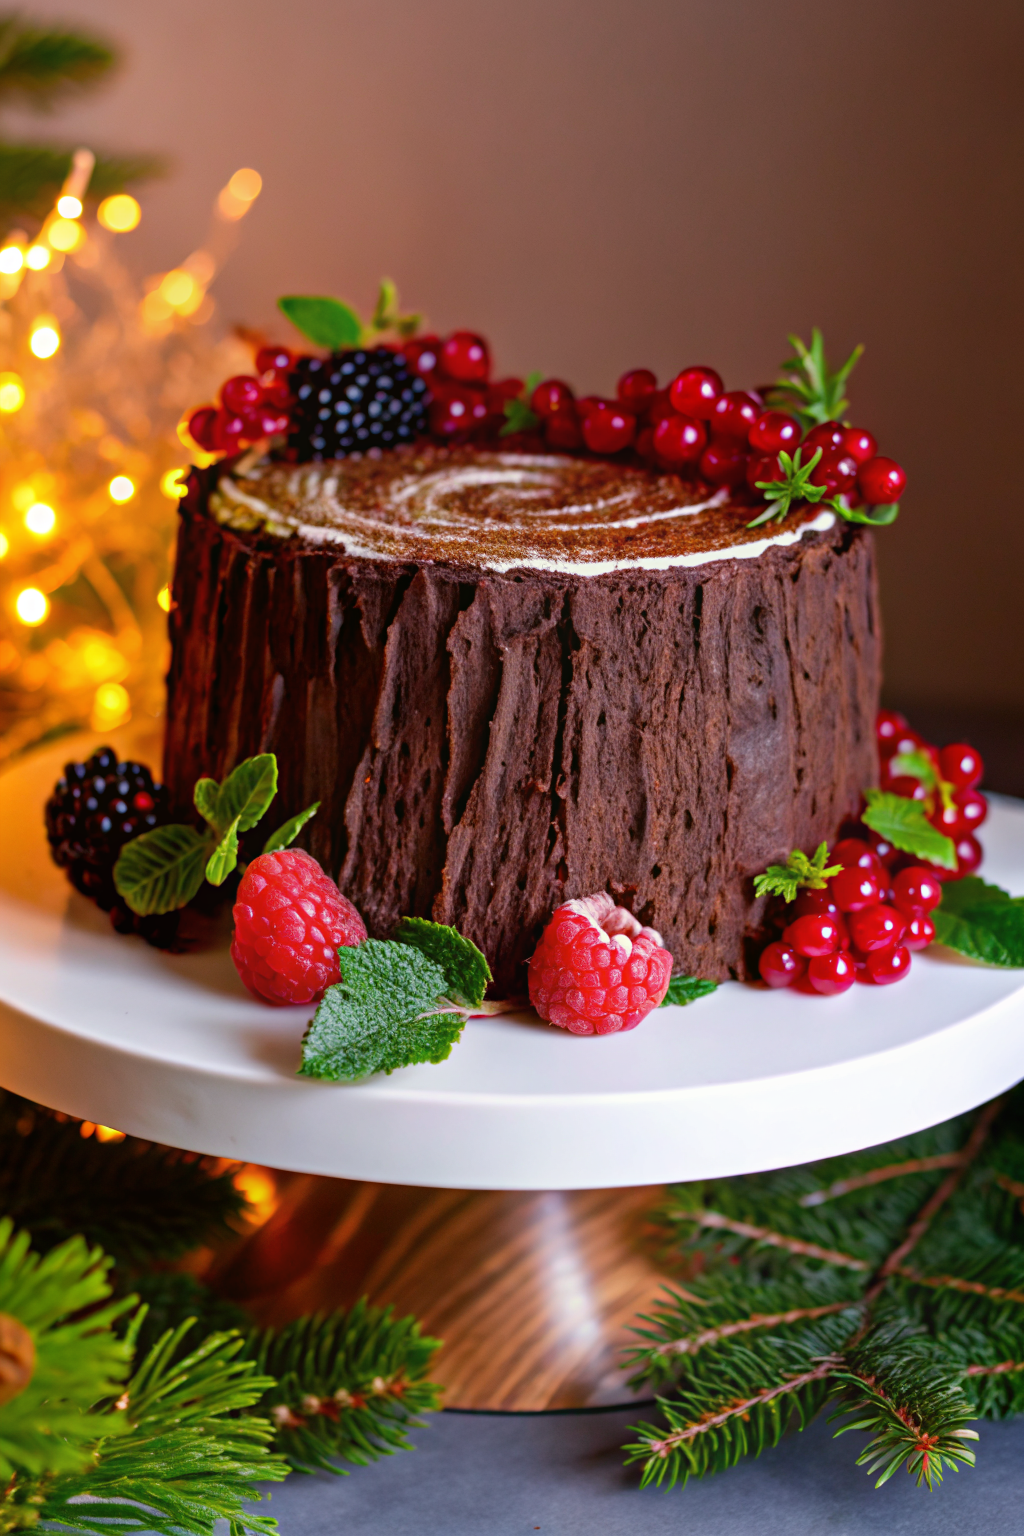
Making It Look Like a Log
If you just leave it as a cylinder, it looks like a Swiss roll. We want a Bûche de Noël.
To achieve the “branch” look, slice about two inches off one end of the roll at a diagonal angle. Place this cut piece on the side or top of the main log using a dollop of frosting as glue. Frost over the seam. Suddenly, you have a branch protruding from your log. It creates immediate dimension and makes you look like a sculpting pro.
Decorating: The Forest Floor
You can stop at the chocolate bark, but why would you? Let’s accessorize.
- Meringue Mushrooms: These are classic. You pipe little caps and stems out of meringue, bake them until crisp, and glue them together with chocolate. They look adorable nestled against the log.
- Sugared Cranberries: These add a pop of red and a tart crunch.
- Rosemary Sprigs: Turn them upside down, and they look like tiny evergreen trees.
- Powdered Sugar: Just before serving, dust the entire thing with powdered sugar. It looks like fresh snow has fallen on your log.
FYI: If your cake did crack slightly during the rolling process, this is where you hide the evidence. Paste a meringue mushroom or a rosemary sprig right over the crack. No one will know.
Avoiding Common Disasters
Let’s troubleshoot before you even start. I want you to win this holiday season.
The Cake is Rubber
You overmixed the batter. Once you add the flour to your whipped eggs, you must fold gently. Use a spatula and cut through the middle, scoop the bottom, and fold over. Do this only until the flour disappears. If you beat it, you knock out all the air, and you get a rubber mat instead of a sponge.
The Cake Cracked Everywhere
You probably baked it too long. A thin sponge cake only needs 10 to 12 minutes in the oven. If you bake it until it’s dry, it loses flexibility. Check it early. It should spring back when you touch it.
For a deep dive on the science of folding and mixing foams (which is what your egg mixture is), check out this excellent guide from Serious Eats. It explains exactly how to keep that precious air in your batter.
The Filling Oozed Out
You rolled it too tight, or you didn’t let the cake cool enough before filling. If the cake is even slightly warm, it will melt your whipped cream. Patience is your best ingredient here.
Storage and Serving
A Bûche de Noël actually tastes better the next day. The moisture from the filling migrates into the sponge, making it softer and more cohesive.
You can make the cake fully up to two days before Christmas. Keep it loosely covered in the fridge. However, wait to add the meringue mushrooms and powdered sugar until right before serving. The humidity in the fridge will make the meringues sticky and dissolve the sugar snow.
When you serve it, use a serrated knife. Use a gentle sawing motion so you don’t squash the fluffy filling.
Flavor Variations
Once you master the chocolate version, you can branch out (pun intended).
- White Christmas: Use a vanilla sponge, fill it with cranberry jam and mascarpone, and frost it with white chocolate buttercream.
- Coffee Lover: Add espresso powder to the sponge and use a mocha filling.
- Nutty Log: Fold finely ground hazelnuts into the flour mixture for a flavor profile similar to a popular chocolate-hazelnut spread.
Final Thoughts
The Bûche de Noël is more than just a cake; it’s a centerpiece. It sparks conversation. When you bring this to the table, people stop talking and stare. It looks impressive, complicated, and professional.
You don’t have to tell them that the “bark” took you three minutes with a dinner fork or that the “snow” is just hiding a thumbprint where you grabbed it too hard. That can be our little secret.
So, grab your eggs, preheat your oven, and find a clean kitchen towel. You are about to conquer the roll. Trust me, the first slice makes all the anxiety worth it.
Happy baking!
Classic Bûche de Noël (Yule Log Cake)
Author: Prep: 30 minutes Cook: 12 minutes Total: 1 hour 42 minutesEquipment
- 10×15 inch Jelly Roll Pan (Baking sheet with rim)
- Stand Mixer or Electric Hand Mixer
- Clean Kitchen Towel (thin, cotton)
- Parchment paper
- Offset Spatula
- Sifter or Fine Mesh Sieve
Ingredients
The Chocolate Sponge (Genoise)
- 6 Large Eggs room temperature
- 150 g Granulated Sugar 3/4 cup
- 65 g Unsweetened Cocoa Powder 1/2 cup, preferably Dutch-processed
- 1 tsp Vanilla Extract
- 1/4 tsp Salt
- Powdered Sugar for dusting the towel
The Filling (Chantilly Cream)
- 240 ml Heavy Whipping Cream 1 cup, cold
- 30 g Powdered Sugar 1/4 cup
- 1 tsp Vanilla Extract
- 1 tbsp Mascarpone Cheese optional, helps stabilize the cream
The Bark (Ganache)
- 170 g Semisweet or Bittersweet Chocolate chopped, or good quality chips
- 120 ml Heavy Cream 1/2 cup
Decoration (Optional)
- Fresh Cranberries sugared
- Rosemary Sprigs
- Meringue Mushrooms
- Powdered Sugar for snow
Instructions
- Prep and Preheat: Preheat your oven to 190°C (375°F). Grease a 10×15 inch jelly roll pan and line it with parchment paper. Grease the parchment paper too—we aren't taking any chances with sticking!
- Whip the Eggs: In a large bowl (or stand mixer), beat the eggs, granulated sugar, vanilla, and salt on high speed. Do this for a solid 5 to 7 minutes. You want the mixture to triple in volume and reach the “ribbon stage”—thick, pale, and fluffy.
- Fold the Cocoa: Sift the cocoa powder over the egg mixture. Using a rubber spatula, gently fold the cocoa in. Cut through the middle and fold over the sides. Be gentle; you want to keep all that air you just whipped in. Stop as soon as the streaks disappear.
- Bake: Pour the batter into the prepared pan and spread it evenly into the corners. Bake for 10 to 12 minutes. The top should spring back when lightly touched. Do not overbake, or it will crack when rolling!
- The Towel Trick: While the cake bakes, lay a clean kitchen towel on the counter and dust it generously with powdered sugar. Immediately upon removing the cake from the oven, flip it onto the towel. Peel off the parchment paper carefully.
- The Hot Roll: Starting at one short end, roll the cake up with the towel inside. Yes, roll the cloth right into the spiral. Place this warm, rolled-up cake on a wire rack to cool completely. This teaches the cake its shape.
- Make the Filling: While the cake cools, whip the cold heavy cream, powdered sugar, vanilla, and mascarpone (if using) until stiff peaks form.
- Fill and Roll: Once the cake is fully cool (touch the inside of the roll to check), gently unroll it. Spread the whipped cream evenly over the surface, leaving a 1-inch border at the far end. Gently re-roll the cake without the towel. Place it seam-side down on your serving platter.
- Make the Bark: Heat the 1/2 cup heavy cream until just simmering (microwave or stove). Pour it over the chopped chocolate. Let it sit for 2 minutes, then stir until smooth and glossy. Let it cool until it thickens to a spreadable consistency.
- Decorate: Spread the ganache over the log. Drag a fork through the frosting to create a bark-like texture. If you want a “branch,” cut a slice off the end at an angle and attach it to the side. Dust with powdered sugar “snow” before serving.
Notes
- Crack Control: Did your cake crack a little when unrolling? Don’t panic! The ganache covers a multitude of sins. Just patch it together with frosting; no one will know. 🙂
- Temperature Matters: Make sure your eggs are at room temperature to get maximum volume, but keep your heavy cream ice cold for the best whipped filling.
- Make Ahead: You can bake, fill, and frost the Bûche de Noël up to 2 days in advance. Store it in the fridge. Actually, the sponge gets softer and tastier after sitting for a day.
- Flavor Twist: Add a teaspoon of espresso powder to the sponge batter for a mocha version!
Nutrition


