
Let’s be honest for a second. We all have a love-hate relationship with holiday baking. You see those pristine, perfectly twisted Candy Cane Cookies on Pinterest, and you think, “I can totally do that.” Then, two hours later, you find yourself staring at a baking sheet full of what looks like red and white roadkill. I have been there. We have all been there.
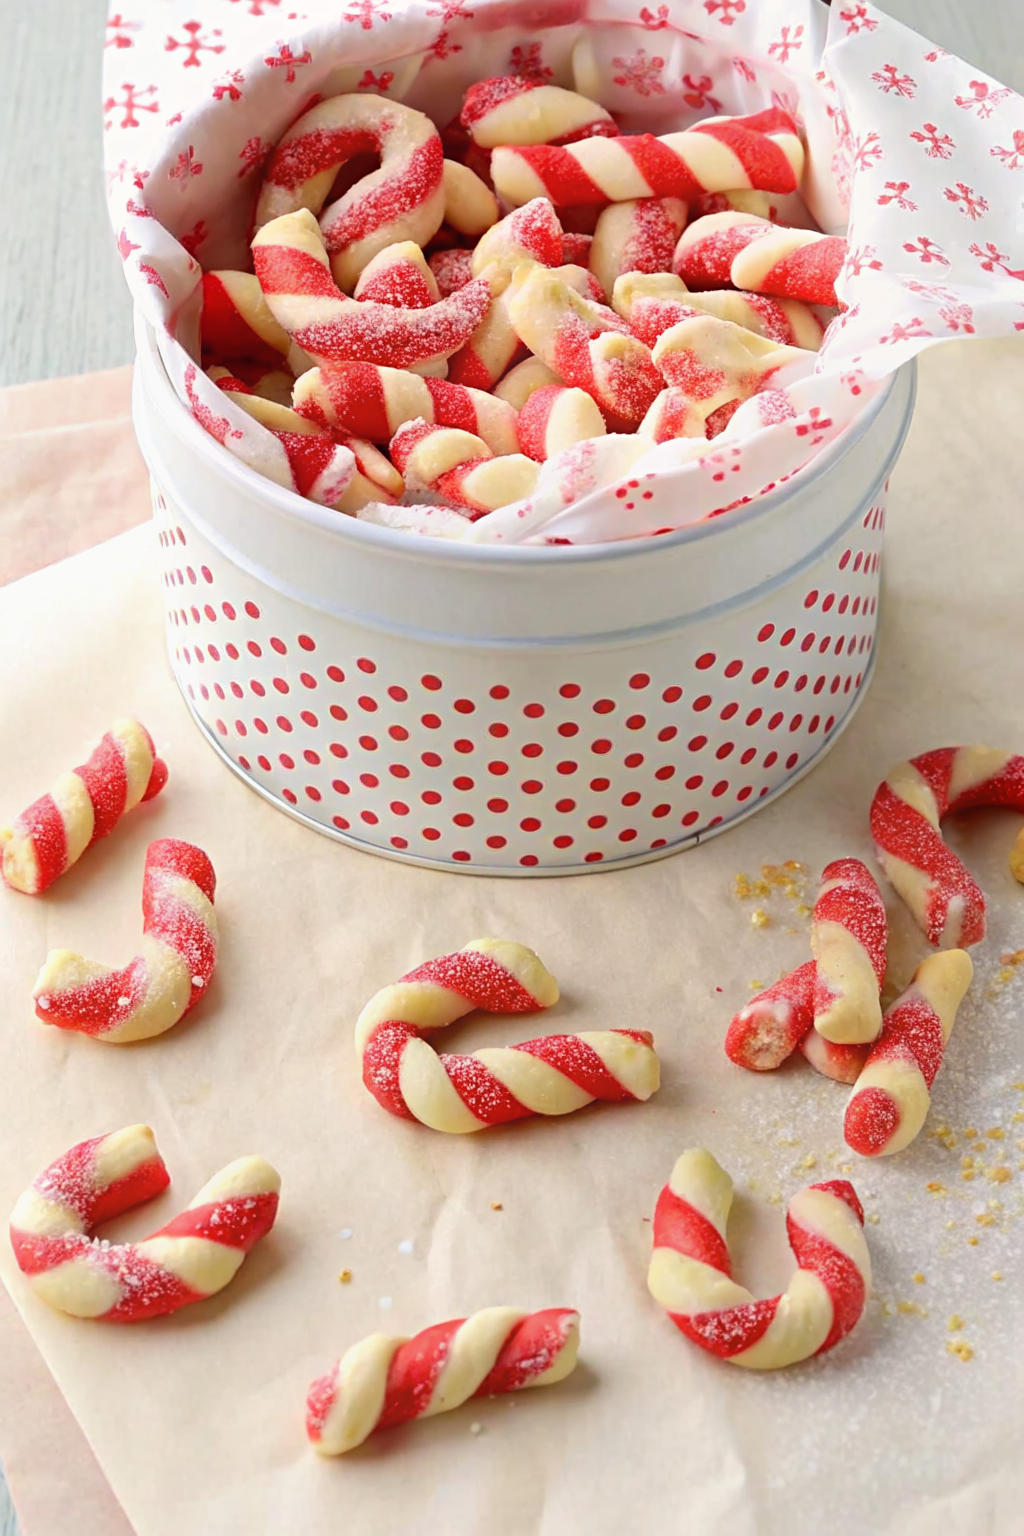
But here is the thing: when you get them right, these cookies are the absolute champions of the Christmas cookie tin. They smell like pure nostalgia, taste like a sweet peppermint cloud, and look undeniably festive.
Does the dough require a little patience? Absolutely. Will you want to throw the rolling pin across the kitchen at least once? Maybe. But stick with me. I have broken enough candy canes in my life to figure out exactly how to make these work without losing my mind. We are going to tackle this classic recipe together, and I promise, your cookies will actually look like candy canes this year.
Why We Keep Coming Back to This Recipe
Why do we torture ourselves with dough that needs to be rolled into tiny snakes? Simple. The flavor and the texture are unbeatable. Unlike a crunchy store-bought candy cane that gets stuck in your teeth, these cookies offer a tender, melt-in-your-mouth bite. They strike that perfect balance between a buttery sugar cookie and a refreshing hit of peppermint.
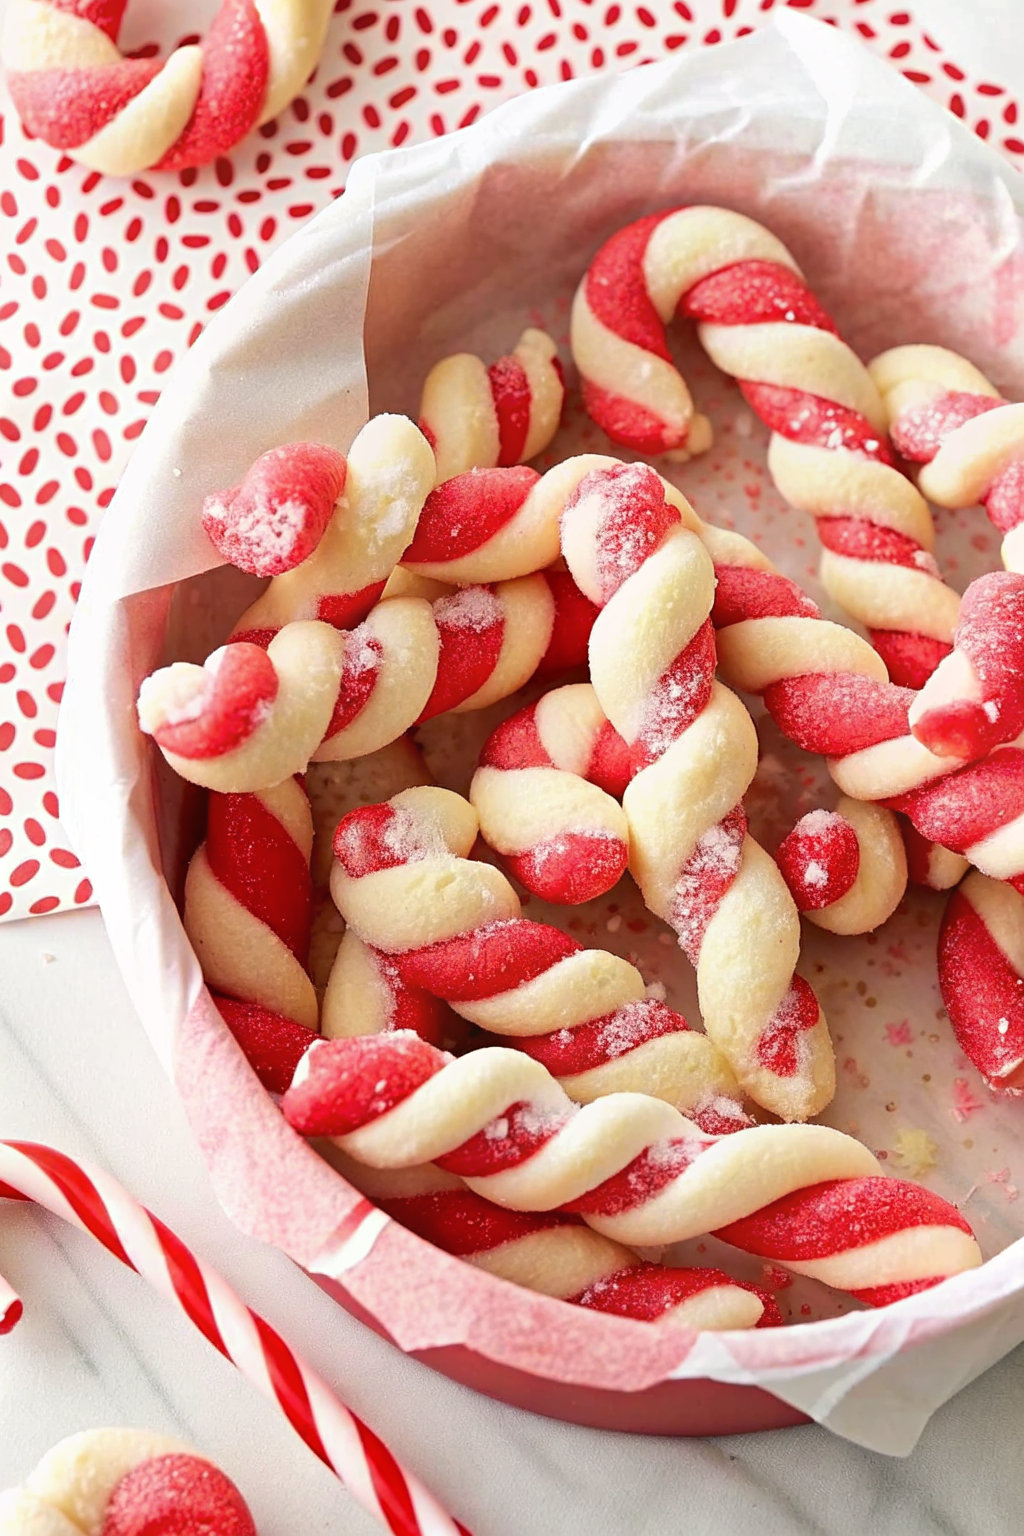
Plus, let’s admit it, they look impressive. When you bring a platter of these to a cookie swap, people assume you possess some sort of wizard-level baking skill. You don’t need to tell them you just followed a few specific tricks to keep the dough from cracking.
The Ingredients: Don’t Skimp on the Good Stuff
You cannot hide behind icing with these cookies. The dough is the star, so your ingredients matter. I use a very specific lineup to ensure the flavor pops and the structure holds up during the twisting process.
- Unsalted Butter: You need to control the salt content. Make sure your butter is at cool room temperature. If it’s too soft, your cookies will spread into puddles.
- Granulated Sugar: Keep it simple. We want a crisp edge and a tender center.
- Egg: This binds everything together.
- Peppermint Extract: This is non-negotiable. Please do not use mint extract unless you want your cookies to taste like toothpaste. Peppermint is the holiday flavor; mint is for gum.
- Vanilla Extract: A splash of vanilla rounds out the harshness of the peppermint.
- All-Purpose Flour: The backbone of your cookie.
- Red Food Coloring: Here is a pro tip: use gel food coloring rather than liquid. Liquid coloring adds water to the dough, which messes up the consistency and makes it sticky. Plus, gel gives you that vibrant “Santa suit” red.
Mastering the Dough
You start by creaming your butter and sugar. You want this mixture pale and fluffy. I usually let my mixer run for about 3 minutes. Under-creaming leads to dense cookies, and nobody wants that. Once you add your egg and extracts, the kitchen starts to smell amazing.
Now, for the flour. I add this slowly. If you dump it all in at once, you’ll end up with a flour storm and tough dough. Mix just until the flour disappears.
The Great Divide
Here comes the fun part (or the messy part, depending on your perspective). You need to divide the dough in half. I actually use a kitchen scale for this because I am slightly obsessive, but you can eyeball it.
One half stays plain. The other half gets the red treatment. Add your coloring and mix it in until you see a uniform color. If you used liquid coloring in the past, you probably remember the dough turning a sad, sticky pink. Gel coloring solves that problem instantly. FYI, wear gloves if you don’t want your hands to look like you lost a fight with a red marker.
Chill Out
You must chill this dough. Do not skip this step. I repeat: do not skip this step. Warm dough will not roll; it will just smear against your counter. Wrap each ball of dough in plastic wrap and toss them in the fridge for at least 2 hours. I sometimes leave mine overnight if I plan ahead (which, let’s be real, rarely happens).
The Art of the Twist (Without Screwing It Up)
Okay, this is the moment of truth. You have your chilled dough, your festive playlist is on, and you are ready to roll.
Take a small piece of dough from each color—about a teaspoon of each. You want to work with small amounts while keeping the rest of the dough in the fridge. If the main batch gets warm, you are in trouble.
- Roll the Snakes: On a lightly floured surface, roll the plain piece into a 4-inch rope. Do the same with the red piece. Keep them thin! Thick ropes create massive cookies that bake unevenly.
- The Twist: Place the two ropes side by side. Gently press them together at the top. Now, twist them around each other.
- The Curve: Carefully transfer the twisted rope to your baking sheet. Curve the top to create the cane handle.
- Repeat: Do this until you run out of patience or dough.
Here is a rhetorical question for you: why does the red dough always seem to soften faster than the white? I don’t have a scientific answer, but I suspect it’s just the universe testing our resolve. If the red dough gets sticky, pop it back in the fridge for 10 minutes.
If you enjoy making intricate shapes, you might find the technique similar to how you handle dough for braided bread recipes, where tension and temperature control are everything. The principles remain the same even if the size differs!
Baking: The Sweet Spot
Preheat your oven to 375°F (190°C). These cookies bake fast. I bake mine for about 8 to 10 minutes. You want them set, but not brown.
If Candy Cane Cookies turn golden brown, they look burnt. The white parts should stay white. Keep an eagle eye on the oven during the last two minutes.
Once they come out, let them cool on the baking sheet for 5 minutes. They are fragile when hot. If you try to move them immediately, you will decapitate your candy canes. After they firm up, move them to a wire rack.
Troubleshooting: Why Do My Cookies Look Like Sad Worms?
Look, failures happen. I once made a batch that spread so much they looked like peppermint pancakes. Let’s troubleshoot some common issues so you don’t have to learn the hard way.
The Dough Cracks When I Roll It
Your dough is too cold or too dry. If it’s crumbling, let it sit on the counter for 5 minutes. The warmth of your hands will usually bring it back to life. If you measured your flour by scooping the cup directly into the bag, you likely packed too much flour in. Next time, spoon the flour into the cup and level it off.
The Cookies Spread Too Much
Your butter was too warm, or you didn’t chill the dough long enough. If your kitchen is hot (thanks, oven), the dough melts before it bakes. IMO, it’s worth putting the formed cookies back in the fridge for 10 minutes before baking to firm up that fat again.
The Red Bleeds into the White
This usually happens with liquid food coloring or lower-quality dyes. Stick to high-quality gel pastes. Also, avoid over-handling the twisted dough. The more you touch it, the more the colors smear.
If you are dealing with a totally disastrous batch, don’t throw them out. Crumble them up and use them as a topping for ice cream or even as a mix-in for a batch of chocolate peppermint brownies. Waste not, want not!
Variations to Spice Things Up
Classic peppermint is great, but sometimes I like to switch things up.
- The Chocolate Dip: Melt some dark chocolate and dip the bottom half of the baked cookie. Then, sprinkle some crushed hard candy canes on the chocolate. It adds a nice crunch and looks professional.
- Glazed Finish: Whisk together powdered sugar and milk for a simple glaze. Drizzle it over the cooled cookies for extra sweetness.
- Almond Twist: Not a fan of peppermint? Swap the peppermint extract for almond extract. The flavor profile changes completely but remains delicious. I do this for my friends who think mint tastes like mouthwash. :/
For those of you who love experimenting with different flavor profiles in holiday treats, you can apply these same dipping techniques to gingerbread biscotti for a unified holiday dessert platter.
Storage: Keep Them Fresh
You put all that work in; let’s make sure they last. Store these cookies in an airtight container at room temperature. They stay fresh for about a week.
Layer them with wax paper so they don’t stick together or break. These cookies are sturdy enough to stack, but handle the hooks with care. If you want to freeze them, freeze the baked cookies without any chocolate dip or glaze. They thaw out perfectly.
The Verdict
Are Candy Cane Cookies high maintenance? A little bit. Are they worth it? 100%.
There is something deeply satisfying about seeing a tray full of red and white twists that you made with your own hands. It beats buying a plastic tub of generic cookies from the grocery store any day.
Plus, baking these gives you a legitimate excuse to blast Christmas music and eat raw cookie dough (at your own risk, of course). So, grab your flour, find your red food coloring, and get to twisting.
I hope this guide helps you conquer the fear of the twist. If your first few look a little wonky, just eat the evidence. No one needs to know.
Happy Baking!
Tips for Success at a Glance
- Measure Flour Correctly: Spoon and level. Do not scoop!
- Temperature Control: Cold dough, hot oven.
- Gel Coloring: Vibrant color, better texture.
- Gentle Hands: Roll lightly to avoid uneven ropes.
Ingredients List Breakdown
To ensure you have everything ready before you start, here is what you need to gather:
- 1 cup (2 sticks) unsalted butter, softened.
- 1 cup granulated sugar.
- 1 large egg.
- 1 teaspoon vanilla extract.
- 1 ½ teaspoons peppermint extract.
- 3 cups all-purpose flour.
- 1 teaspoon baking powder.
- ½ teaspoon salt.
- Red gel food coloring.
Instructions Recap
- Cream butter and sugar until fluffy.
- Beat in egg and extracts.
- Mix in flour, baking powder, and salt.
- Divide dough; color one half red.
- Chill for 2+ hours.
- Roll ropes and twist into canes.
- Bake at 375°F for 8-10 minutes.
- Cool completely.
Why This Dough Texture Matters
I want to dive a bit deeper into the texture because this is where people get stuck. This dough feels different than your standard chocolate chip cookie dough. It has a clay-like consistency. This is intentional. You need a dense structure to hold the twist shape.
If the dough feels sticky, it means the butter melted too much. If it feels crumbly, it lacks moisture or fat. Getting this balance right determines if you end up with a candy cane or a sad, fractured stick.
When you roll the ropes, use the palm of your hand, not just your fingers. Fingers leave indentations that look bumpy when baked. Smooth, even pressure creates that professional cylinder shape.
Also, keep your work surface only lightly floured. Too much extra flour dries out the outside of the rope, which prevents the two colors from sticking together when you twist them. They will unravel in the oven if they don’t adhere to each other. It’s a delicate dance, but you got this.
A Note on Peppermint Extract Strength
Not all extracts are created equal. I learned this the hard way. Some brands are incredibly potent, while others are weak.
Smell your extract. If it makes your eyes water immediately, it’s strong. Start with 1 teaspoon and taste a tiny bit of dough (I won’t tell). You can always add more, but you can’t take it out. Over-flavoring ruins the buttery undertone that makes these cookies delicious. You want the peppermint to say “hello,” not scream in your face.
For more information on the science of baking extracts and how they interact with fats and sugars, I highly recommend checking out the extensive guides on King Arthur Baking. They break down the chemistry in a way that actually makes sense.
Gifting Ideas
These cookies look adorable in clear cellophane bags tied with a red ribbon. They are sturdy enough to survive a car ride, making them perfect for gifting to neighbors or teachers.
I usually pair a small bag of these with a packet of hot cocoa mix. It’s a simple, inexpensive gift that feels personal. Who doesn’t want something homemade during the holidays?
Final Thoughts
Baking is supposed to be fun. If your candy canes break, call them “peppermint sticks” and move on. The taste is what counts.
So, preheat that oven. Get your hands messy. Create something delicious. And seriously, save the ugliest cookie for yourself—it usually tastes the best anyway.
Classic Candy Cane Cookies
Author: Prep: 30 minutes Cook: 10 minutes Total: 2 hours 40 minutesEquipment
- Stand mixer or hand mixer
- Large mixing bowls
- Baking sheets
- Parchment Paper or Silicone Baking Mats
- Wire Cooling Rack
- Plastic wrap
- Kitchen scale (optional but recommended)
Instructions
The Dough
- 1 cup unsalted butter, softened to room temperature
- 1 cup granulated sugar
- 1 large egg
- 1 teaspoon vanilla extract
- 1 ½ teaspoons peppermint extract
- 3 cups all-purpose flour (spooned and leveled)
- 1 teaspoon baking powder
- ½ teaspoon salt
- 1 teaspoon red gel food coloring (amount may vary depending on brand intensity)
Optional Decoration
- ½ cup dark chocolate chips, melted
- 3 tablespoons crushed candy canes
- ½ cup powdered sugar (for glaze)
- 1 tablespoon milk (for glaze)
- Instructions:
- Cream the Butter and Sugar: In a large bowl or stand mixer fitted with the paddle attachment, beat the softened butter and granulated sugar together on medium speed for about 3 minutes. You want the mixture to look pale and fluffy.
- Add Wet Ingredients: Add the egg, vanilla extract, and peppermint extract. Beat until fully combined, scraping down the sides of the bowl as needed.
- Incorporate Dry Ingredients: In a separate bowl, whisk together the flour, baking powder, and salt. Gradually add this dry mixture to the wet ingredients on low speed. Mix just until the flour disappears—do not overmix, or the dough will become tough.
- Divide and Color: Remove half of the dough from the bowl (use a kitchen scale for accuracy if you have one). Set the plain dough aside. Return the remaining half to the mixer and add the red gel food coloring. Mix on low until the color is evenly distributed and vibrant.
- Chill the Dough: Shape each dough ball (red and white) into a disk and wrap them tightly in plastic wrap. Refrigerate for at least 2 hours. Do not skip this step, or the cookies will be impossible to roll.
- Preheat and Prep: Preheat your oven to 375°F (190°C). Line two baking sheets with parchment paper or silicone mats.
- Shape the Cookies: Take a teaspoon-sized piece of dough from each color. Roll each piece into a smooth rope, roughly 4 to 5 inches long. Place the two ropes side-by-side, press them gently together at the top, and twist them around each other.
- Form the Cane: Transfer the twisted rope to the baking sheet and curve the top to create a handle shape. Repeat with remaining dough. (Tip: Keep the main batch of dough in the fridge while you work on small batches to keep it firm).
- Bake: Bake for 8 to 10 minutes. The cookies should be set, but not brown. If the edges start turning golden, they are overdone.
- Cool: Let the cookies cool on the baking sheet for 5 minutes—they are very fragile when hot. Carefully transfer them to a wire rack to cool completely.
- Optional Dip: Once cool, dip the bottom ends of the cookies into melted chocolate and sprinkle with crushed candy canes for an extra festive touch.
Notes
- Flour Measurement: Be sure to spoon your flour into the measuring cup and level it off. Scooping directly from the bag packs the flour down, leading to dry, crumbly dough that won’t twist.
- Gel Coloring: Use gel paste rather than liquid food coloring. Liquid adds too much water to the dough, making it sticky and harder to handle.
- Troubleshooting: If the dough cracks while rolling, let it sit at room temperature for a few minutes to soften slightly. If it gets too sticky, pop it back in the fridge for 10 minutes.
- Storage: Store these Candy Cane Cookies in an airtight container at room temperature for up to 1 week. Separate layers with wax paper to keep them pristine
Nutrition


