
Let’s be honest for a second. Is there anything more disappointing than a dry, stringy piece of beef masquerading as a pot roast? You spend three hours smelling that incredible aroma filling your house. You wait patiently while your stomach growls. You finally sit down, fork in hand, expecting meat that melts like butter. Instead, you get a workout for your jaw. We have all been there. It’s a culinary betrayal of the highest order.
But when you get it right? Oh man. When you nail a pot roast, it changes your whole week. It’s rich, savory, and tender enough to cut with a spoon. It brings people to the table faster than free WiFi. If you want to master the art of the Sunday dinner staple, you are in the right place. We are going to banish tough meat from your kitchen forever.
I grew up thinking pot roast was just “meat in a pot.” My early attempts involved throwing a random slab of beef into a slow cooker with a packet of dried onion soup mix and hoping for the best. Sometimes it worked. Usually, it didn’t. Over the years, I learned that while this dish is humble, it demands respect. You need to understand the meat, the heat, and the timing.
Don’t worry, though. I am not sending you to culinary school today. We are just going to have a chat about how to turn a cheap cut of meat into a five-star meal. Let’s get into it.
The Meat: Make or Break Decisions
You cannot fix the wrong cut of meat with extra cooking time. I learned this the hard way. Years ago, I bought a “Eye of Round” roast because it looked lean and pretty. I cooked it for four hours. It tasted like a leather shoe.
Why the Chuck Roast Reigns Supreme
For the ultimate pot roast, you want a Boneless Chuck Roast. Period. Don’t let the butcher talk you into anything else. Why? Because the chuck comes from the shoulder of the cow. It does a lot of work, which means it’s tough. But it also contains a massive amount of connective tissue and fat.
When you cook that connective tissue slowly, it breaks down into gelatin. That gelatin coats the muscle fibers and gives you that sticky, luscious mouthfeel. A lean roast, like a sirloin or round, lacks this internal structure. It just dries out.
Look for a roast with heavy marbling. You want to see white flecks of fat running all through the meat, not just a ring of fat on the outside. IMO, if the meat looks too healthy, put it back. We aren’t counting calories today; we are building flavor.
Prepping the Beef
Take your meat out of the fridge at least 30 minutes before you start. Cold meat seizes up when it hits a hot pan. You want it to relax. Also, pat it dry with paper towels. Wet meat steams; dry meat sears. We want a sear.
Season it aggressively. I’m talking about a heavy hand with the kosher salt and coarse black pepper. This is a big, thick piece of protein. If you only sprinkle the surface lightly, the inside will taste bland.
The Sear: Do Not Skip This Step
I know what you’re thinking. “Can’t I just dump it all in the pot?” Sure, you can. But you also can eat plain oatmeal for dinner. You deserve better.
Searing creates the Maillard reaction. That’s science-speak for “browning equals flavor.” You need to get your Dutch oven ripping hot. Add a high-heat oil (like avocado or vegetable oil) and drop that beef in.
Listen for the sizzle. If it doesn’t hiss effectively, pull it out and wait. You want a deep, dark brown crust on all sides. This usually takes about 4–5 minutes per side. Yes, it might smoke up your kitchen a little. Just open a window. The flavor payoff is worth the minor air quality crisis.
Once you brown the meat, remove it from the pot. Now, look at the bottom of the pan. See those stuck-on brown bits? That is the fond. That is the soul of your gravy. Do not scrub it out!
Building the Flavor Foundation
Now that the meat is resting, we build the aromatics. Turn the heat down to medium so you don’t burn the fond.
The Mirepoix
Toss in chopped onions, carrots, and celery. I like to keep the pieces chunky. If you dice them too small, they disintegrate over the long cook time. Sauté them in the beef fat left in the pot. The water from the vegetables will help lift some of that fond from the bottom.
Add garlic only at the very end of this stage. Burnt garlic tastes bitter and ruins the vibe.
Deglazing the Pot
Here comes the fun part. You need liquid to braise the meat. I highly recommend using a dry red wine—Cabernet Sauvignon or Merlot works wonders. Pour about a cup into the hot pan. It will steam and bubble aggressively. Use a wooden spoon to scrape up every last bit of that brown goodness from the bottom.
If you don’t drink alcohol, no worries. Just use a high-quality beef broth. But the wine adds an acidity that cuts through the rich fat of the chuck roast perfectly.
The Braise: Low and Slow
Put the beef back into the pot. nestle it in among the vegetables. Now, add your beef broth.
Crucial Tip: Do not cover the meat completely. You want the liquid to come up about halfway to two-thirds up the side of the roast. This is braising, not boiling. If you submerge it, you’re just making boiled beef soup. We want the top of the roast to get nice and caramelized while the bottom stays moist.
Toss in your herbs. Fresh thyme, rosemary, and a couple of bay leaves are non-negotiable for me. They infuse the broth with an earthy aroma that screams “comfort food.”
Oven vs. Slow Cooker
You have two choices here.
- The Oven Method (My Favorite): Cover the Dutch oven with a heavy lid and slide it into a 275°F (135°C) oven. Leave it alone for 3 to 4 hours. The radiant heat of the oven reduces the liquid slightly and concentrates the flavors better than any other method.
- The Slow Cooker: Transfer everything to your crockpot. Cook on LOW for 8 hours. It works, and it’s convenient. But I find the sauce tends to be a bit watery because slow cookers trap all the moisture.
I stick to the oven. It just produces a better crust on the meat.
The Vegetable Timing Strategy
Here is where many people mess up. They put the potatoes and carrots in at the very beginning.
If you cook a chunk of potato for four hours, it dissolves. If you want vegetables that actually maintain their integrity, you need to add them later.
I usually wait until the roast has about one hour left. Then, I toss in my Yukon Gold potatoes and thick-cut carrots. They cook in that rich, beefy liquid and come out tender but not mushy.
However, some people prefer mashed potatoes on the side. If that’s you, skip putting potatoes in the pot. Instead, make a batch of creamy mashed potatoes separately. You can ladle the pot roast gravy right over them, and honestly, that might be the best bite of the entire meal.
Finishing the Sauce
When the meat is fork-tender—and I mean it falls apart when you look at it—remove the roast and the veggies to a platter. Cover them with foil to keep warm.
Look at the liquid left in the pot. It’s flavorful, but probably thin and a bit greasy. You have a few options to turn this into gravy.
- Skim the Fat: Use a ladle to skim off the oil pooling on top. Or, if you have a fat separator cup, use it. It makes life so much easier.
- Thicken It: Mix two tablespoons of cornstarch with two tablespoons of cold water (a slurry). Whisk this into the bubbling liquid on the stove. It will thicken up instantly into a glossy gravy.
- Taste It: Does it need salt? Pepper? A splash of balsamic vinegar? That little hit of acid at the end wakes up the heavy flavors.
Serving Suggestions
You have this magnificent platter of meat. Now, what do you serve with it?
Obviously, the vegetables cooked with the roast are the easiest side. But if you want to stretch the meal or impress guests, you need bread. You need something to mop up that gravy. I love serving this with soft homemade dinner rolls. Tearing a warm roll apart and dunking it into the savory beef juice is a spiritual experience.
If you want something green to balance out the richness (and make yourself feel better about the three rolls you just ate), a simple side works best. Sautéed green beans with a little garlic and lemon provide a nice crunch and freshness that contrasts with the soft, savory beef.
Common Mistakes to Avoid
Even with the best intentions, things go wrong. Let’s troubleshoot a few common issues so you don’t have to panic at dinner time.
- The Meat is Tough: You didn’t cook it long enough. I know, it seems counterintuitive. You think, “It’s tough, so I overcooked it.” Nope. With chuck roast, toughness means the connective tissue hasn’t melted yet. Put it back in the oven. Give it another 45 minutes. It will surrender eventually.
- The Meat is Dry: You might have boiled it. Remember, keep the temperature low (275°F). If you boil the meat at a high temperature, the muscle fibers contract and squeeze out all the moisture. Low and slow is the mantra.
- The Gravy is Bland: You probably under-seasoned the meat at the start. Or, you used water instead of broth. You can fix this. Add a beef bouillon cube or a splash of soy sauce to the gravy. Soy sauce is a secret weapon; it adds umami without making it taste like Asian food.
Why We Love It
There is a reason pot roast has survived generations of food trends. It doesn’t care about your kale salad. It ignores the molecular gastronomy. It is honest food.
It connects us to the past. When I make this, I feel like I’m channeling every grandmother who ever stood over a stove trying to feed a hungry family. It requires patience, and in a world where we want everything instantly, that patience makes it taste even better.
Plus, let’s be real—the leftovers are superior. The next day, you shred that cold beef, slap it on some bread with a slice of cheese, and grill it? Best sandwich of your life. FYI, never throw away leftover gravy. Freeze it. Future you will be so happy.
Final Thoughts
Making a great pot roast isn’t difficult, but it does require you to pay attention. You have to pick the right cut. You have to take the time to sear it properly. You have to let it cook until it gives up and becomes tender.
Don’t rush the process. Pour yourself a glass of that wine you opened for the sauce. Put on some music. Enjoy the smell that fills your kitchen. Cooking shouldn’t just be a chore; it should be something you enjoy.
So, go to the store. Find that beautifully marbled chuck roast. dust off your Dutch oven. Make a meal that will make your family put down their phones and actually talk to each other.
And if you want to understand the science behind why tough cuts become tender, Serious Eats has a fantastic breakdown of the collagen-to-gelatin conversion. It’s fascinating stuff if you want to geek out.
Now, go get cooking. You’ve got this!
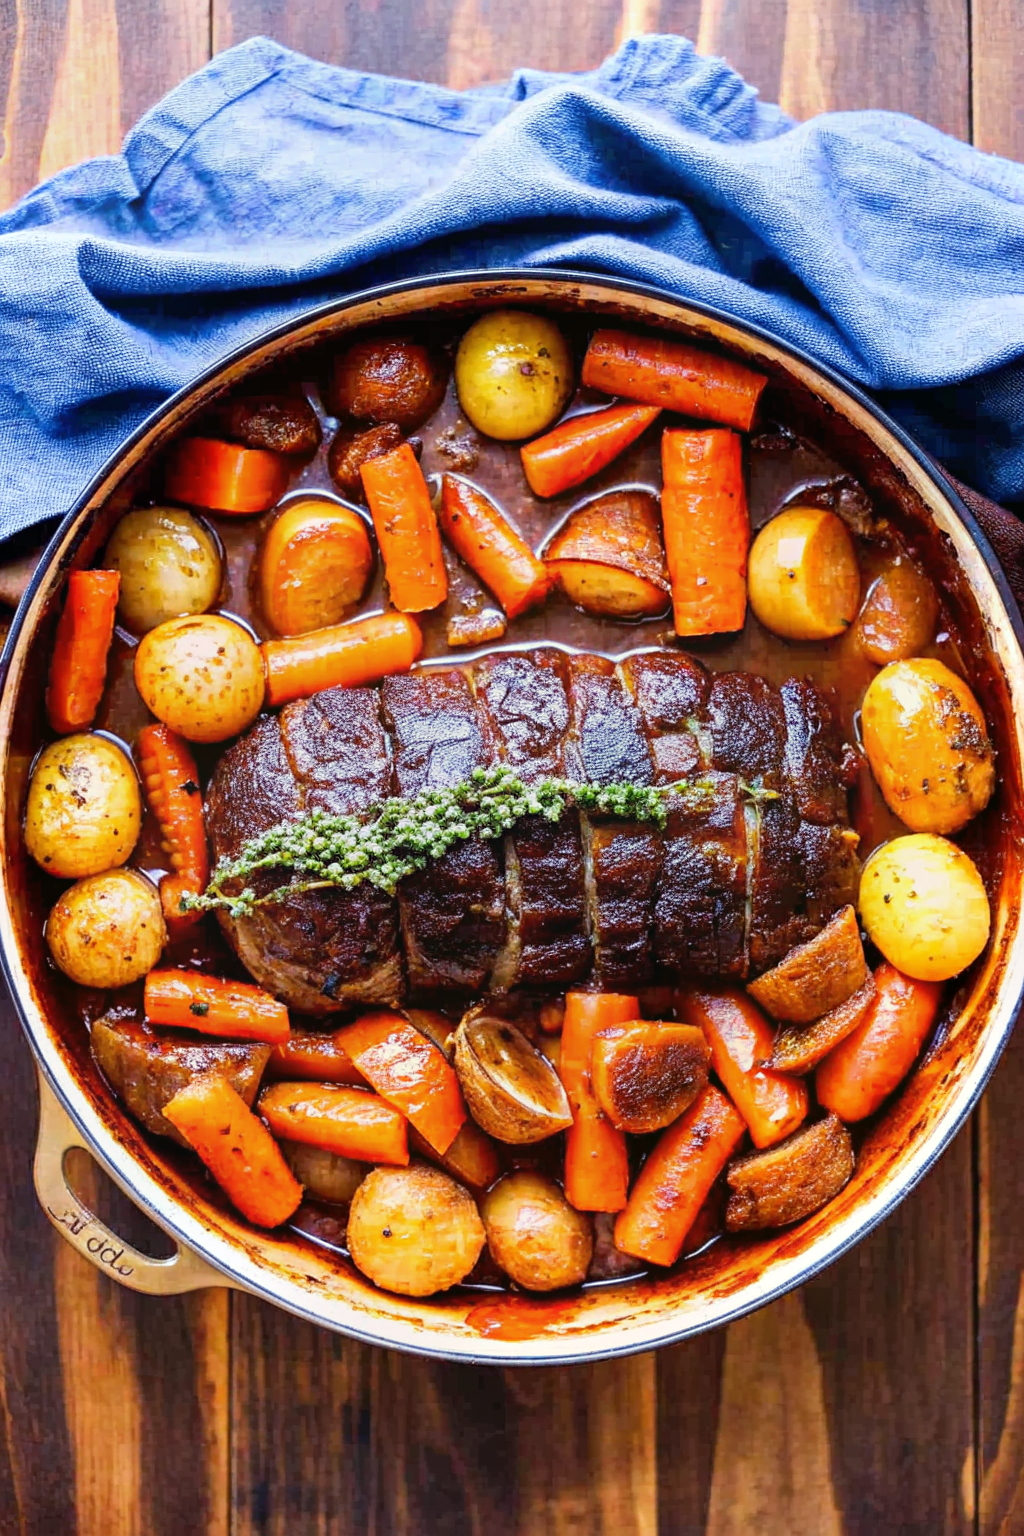
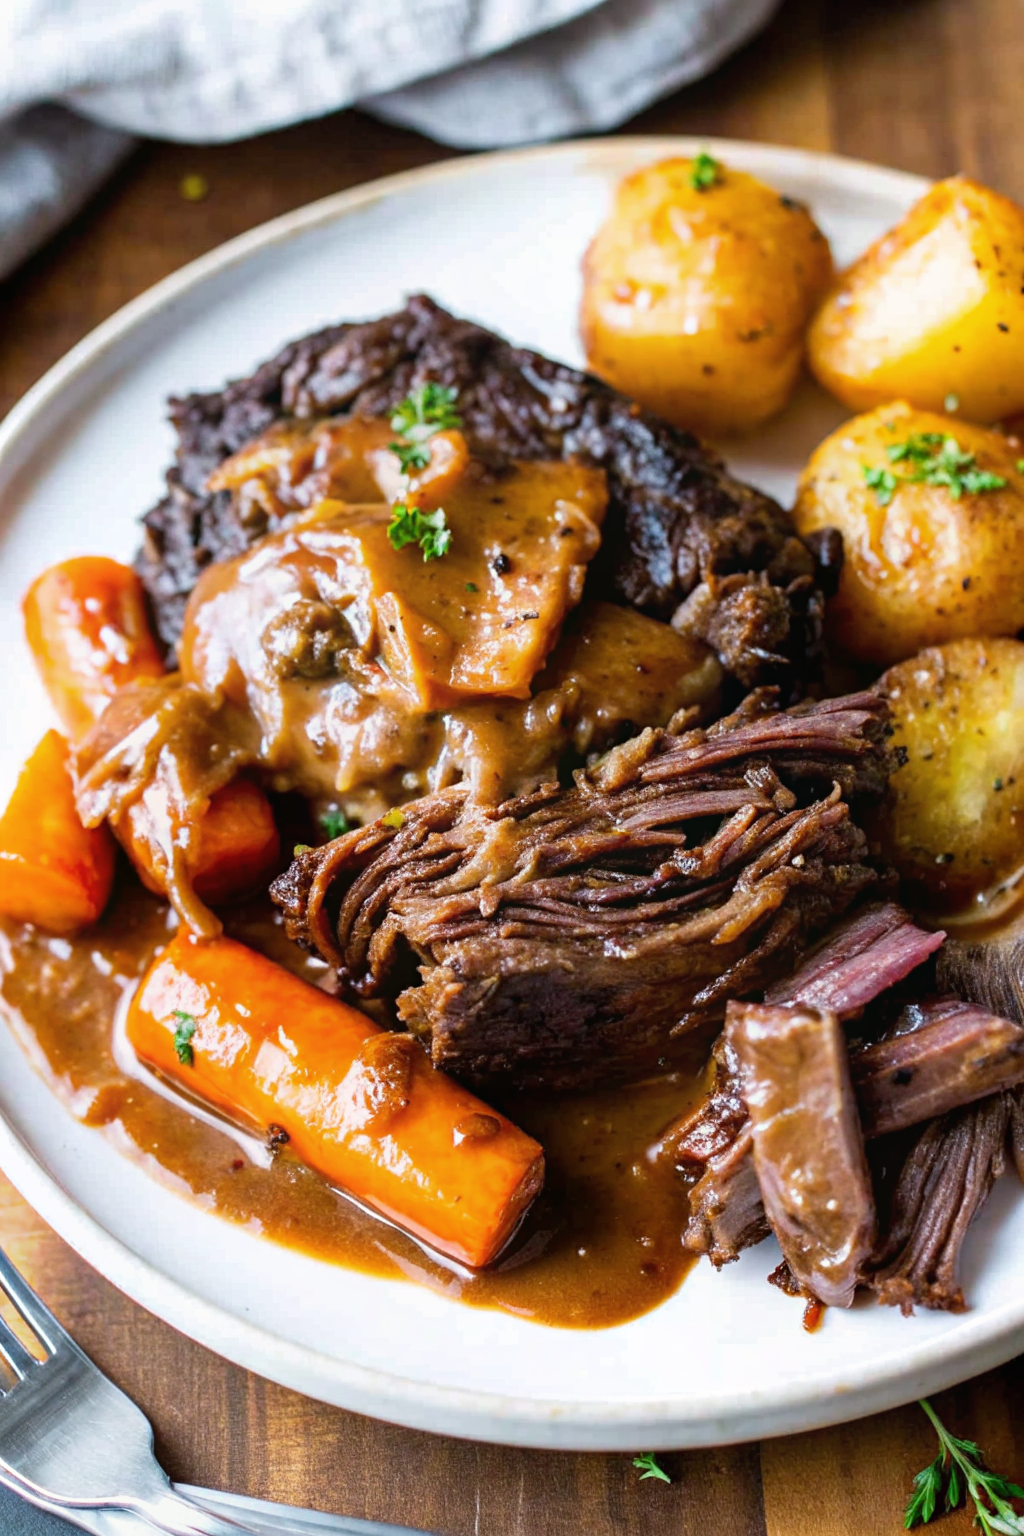
The Ultimate Melt-in-Your-Mouth Pot Roast
Author: Prep: 30 minutes Cook: 3 hours 30 minutes Total: 4 hours 15 minutesEquipment
- Large Dutch Oven (5-7 quart)
- Kitchen Tongs
- Sharp chef’s knife
- Cutting board
- Wooden spoon
- Fat Separator (optional but helpful)
Ingredients
The Meat
- 3 –4 lb boneless beef chuck roast look for good marbling!
- 2 tbsp vegetable or avocado oil for searing
- 1 tbsp kosher salt be generous
- 1 tbsp coarse ground black pepper
The Flavor Base
- 1 large yellow onion chopped into large chunks
- 3 ribs celery cut into 1-inch pieces
- 4 cloves garlic smashed and peeled
- 1 cup dry red wine Cabernet or Merlot work best See notes for alcohol-free sub
- 2-3 cups beef broth low sodium preferred
- 3 sprigs fresh thyme
- 2 sprigs fresh rosemary
- 2 dried bay leaves
The Vegetables (Added Later)
- 1 lb Yukon Gold potatoes halved or quartered
- 4 large carrots peeled and cut into 2-inch chunks
1 lb Yukon Gold potatoes, halved or quartered4 large carrots, peeled and cut into 2-inch chunks
- 2 tbsp cornstarch
- 2 tbsp cold water
Instructions
- Prep the Beef:
- Take your chuck roast out of the fridge about 30 minutes before cooking to let it come to room temperature. Pat it thoroughly dry with paper towels (dry meat sears better!). Season it aggressively on all sides with the kosher salt and black pepper.
- The Sear:
- Preheat your oven to 275°F (135°C). Heat the oil in a large Dutch oven over medium-high heat. Once the oil is shimmering, carefully add the roast. Sear it for 4–5 minutes per side until you have a deep, dark brown crust. Don’t rush this! Transfer the meat to a plate.
- Build the Aromatics:
- Reduce the heat to medium. Toss in the chopped onions and celery (hold the carrots and potatoes for later!). Sauté for 5 minutes until they start to soften and brown slightly. Add the smashed garlic and cook for just 1 minute until fragrant.
- Deglaze the Pot:
- Pour in the red wine. It will steam and hiss—this is good! Use a wooden spoon to scrape up all the brown bits (fond) stuck to the bottom of the pot. Let the wine simmer for 2–3 minutes to reduce slightly.
- Braise:
- Return the roast to the pot, nestling it among the onions and celery. Pour in the beef broth until the liquid reaches about halfway up the side of the meat (do not fully submerge it). Tuck in the thyme, rosemary, and bay leaves.
- Slow Cook:
- Cover the pot with a heavy lid and slide it into the oven. Cook for roughly 3 to 4 hours total.
- The Veggie Drop:
- Here is the secret: About 1 hour before the roast is done (so around the 2.5-hour mark), take the pot out carefully. Add your chunked carrots and potatoes to the liquid. Cover and return to the oven for the final hour.
- Check for Doneness:
- The pot roast is done when the meat is “fork-tender”—meaning you can pull it apart easily with a fork and zero resistance. If it’s tough, put it back in for another 30 minutes.
- Make the Gravy:
- Remove the roast and vegetables to a serving platter and cover with foil to keep warm. Place the Dutch oven with the remaining liquid back on the stove over medium heat. Skim off any excess fat from the top. Whisk the cornstarch and cold water together in a small bowl to make a slurry, then stir it into the bubbling liquid. Let it simmer for 2 minutes until thickened.
- Serve:
- Taste the gravy and adjust salt/pepper if needed. Pour that liquid gold over the meat and veggies and dig in
Notes
- Alcohol-Free Option: If you prefer not to use wine, simply swap it for an extra cup of beef broth and add 1 tablespoon of balsamic vinegar or Worcestershire sauce to get that necessary acidity.
- Why is my meat tough? If the pot roast is tough, it simply hasn’t cooked long enough. The collagen needs time to break down. Don’t panic; just give it more time in the oven.
- Leftovers: Leftover pot roast is arguably better the next day. Store it in an airtight container with the gravy for up to 3 days. It makes incredible sandwiches!
- Slow Cooker Modification: You can make this in a crockpot. Sear the meat and veggies in a pan first (don’t skip this!), then transfer everything to the slow cooker. Cook on LOW for 8 hours. Add the potatoes/carrots at the beginning if you won’t be home, but cut them larger so they don’t turn to mush
Nutrition


