
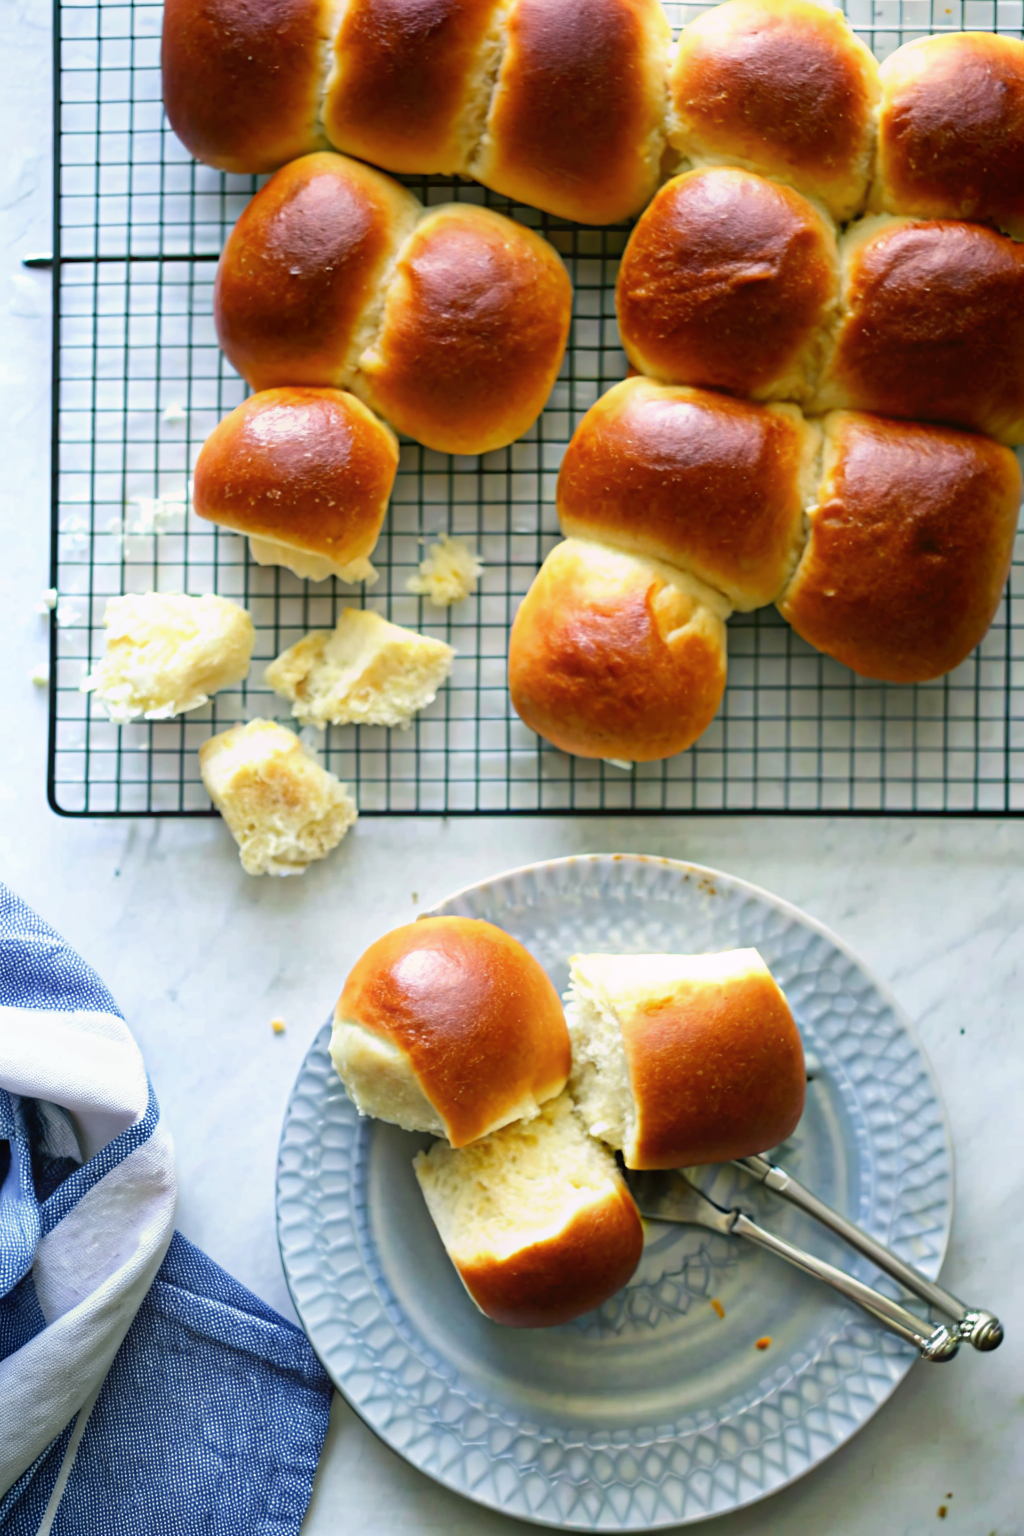
Let’s be honest for a second. When you sit down for a big holiday meal or a cozy Sunday supper, what do you actually look forward to? Is it the salad? Definitely not. Is it the turkey? Maybe, but usually, it’s dry. No, the real MVP of the dinner table is the bread basket. Specifically, soft, warm, buttery Dinner Rolls.
We have all committed the crime of buying those plastic bags of rolls from the grocery store. You know the ones. They taste like air and preservatives, and they crumble into sad little dust piles when you try to butter them. Or worse, the tube. That pressurized cardboard tube that explodes on the counter and scares the dog. We can do better. You deserve a roll that pulls apart in tender, fluffy strands and practically melts in your mouth.
Making bread from scratch intimidates people. I get it. Yeast feels like a science experiment that smells like beer. But I promise you, making incredible rolls at home requires zero magic. It just takes a little patience and the willingness to get flour on your shirt. Let’s break down exactly how to dominate the baking game.
The Science of Softness (Or Why Your Rolls usually Fail)
If you have ever baked a batch of rolls that turned out hard enough to break a window, you probably blamed the recipe. But usually, technique causes the problem. We want Dinner Rolls that squish. To get that, we need to understand “enriched dough.”
Fat is Your Best Friend
Lean doughs, like baguettes, consist mostly of flour, water, and salt. They get chewy and crusty. That is great for a sandwich, but terrible for a dinner roll. We want tenderness.
To achieve this, we introduce fat. We add milk instead of water. We add butter. We add an egg. These ingredients inhibit gluten formation just enough to keep the crumb soft. They coat the flour proteins and prevent them from snapping back like a rubber band. If you leave out the fat, you just made small, round rocks.
The Yeast Variable
Yeast is a living organism. It’s a fungus, which sounds gross, but it gives us bread, so we forgive it. Yeast needs a warm environment to wake up and eat sugar.
- Too Cold: The yeast hits the snooze button and your dough never rises.
- Too Hot: You kill the yeast. RIP.
You want the liquid to feel like a warm bath—around 100°F to 110°F. If you dip your finger in and it burns, let it cool down. If it feels pleasant, you are good to go.
Ingredients: The Holy Quartet
You don’t need a fancy pantry to make these. In fact, you likely have everything right now.
- All-Purpose Flour: You can use bread flour for a chewier texture, but I prefer all-purpose flour for that pillowy softness.
- Sugar: This feeds the yeast and adds a subtle sweetness. Honey works too if you want a different flavor profile.
- Butter: Use unsalted butter so you control the sodium. And please, use real butter. Margarine contains too much water and creates a weird texture.
- Salt: Never forget the salt. Bread without salt tastes like paper.
The Kneading Process: Developing the Structure
You can use a stand mixer or your hands. I love my mixer, but hand-kneading offers excellent stress relief.
The Windowpane Test
How do you know when you knead enough? The dough should look smooth and elastic. It shouldn’t tear easily.
Perform the “Windowpane Test.” Pinch off a small piece of dough. Gently stretch it between your fingers into a square. If you can stretch it thin enough to see light through it without it tearing, you developed the gluten perfectly. If it snaps immediately, keep kneading.
Trust me, under-kneaded dough leads to flat, dense rolls. You want that structure to hold the air bubbles the yeast creates.
The First Rise: Patience is Key
Grease a large bowl. Place your dough inside and turn it once to coat it in oil. This prevents a crust from forming on top. Cover it with plastic wrap or a warm towel.
Now, walk away. Put the laundry in. Watch an episode of your favorite show. You need the dough to double in size. This usually takes about 60 to 90 minutes, depending on how warm your house is.
FYI: If your kitchen feels like an icebox in winter, turn your oven on for one minute, turn it off, and place the bowl inside. It creates a perfect little proofing box.
Shaping: The Claw Technique
Okay, your dough doubled. It looks puffy and smells amazing. Now you punch it down. Literally, make a fist and punch the center to release the gas. It feels satisfying.
Divide the dough into 12 or 15 equal pieces. I use a kitchen scale because I possess a slight obsessive need for uniformity. If you eyeball it, you might end up with some giant rolls and some tiny nuggets.
To shape them into perfect spheres, use the “claw” method:
- Place a piece of dough on a clean counter (no flour!).
- Cup your hand over the dough like a claw.
- Move your hand in a circular motion, keeping your fingertips touching the counter.
The friction against the counter pulls the dough tight, creating a smooth surface tension on top. If you skip this, your Dinner Rolls will look lumpy and sad. We want smooth, taut domes.
The Second Rise: Do Not Skip This!
This is the step most people rush. You shaped the rolls, put them in the pan, and threw them in the oven. Big mistake.
When you manipulate the dough, you knock the air out of it. You must let the rolls rise again in the pan. They need to puff up and touch each other. This “second proof” gives you that airy, fluffy texture. If you bake them immediately, they turn out dense.
Let them sit for another 30–45 minutes until they look swollen and pillowy. It tests your patience, but the result justifies the wait.
Baking to Golden Perfection
Preheat your oven to 375°F. You want a burst of heat to help them spring up.
Bake them for 15 to 20 minutes. You look for a deep golden brown color on top. Don’t be afraid of color! Pale bread lacks flavor. The caramelization of the crust adds a nutty, rich taste that defines a good roll.
The Finish Line
Here is the secret to bakery-style rolls: The Butter Bath.
The second you pull the pan out of the oven, brush the tops generously with melted butter. The bread absorbs the butter, softening the crust and adding that glossy sheen. Sprinkle a little flaky sea salt on top if you feel fancy. It adds a nice crunch.
Serving Suggestions
Now that you have these masterpieces, what do you do with them?
Obviously, you can eat three of them standing at the counter while they burn your fingers. That is the chef’s tax. But they also elevate any meal.
They pair perfectly with comfort food. Imagine dipping a fluffy roll into a bowl of hearty beef stew. The bread soaks up the savory broth, and frankly, it changes your life.
For holiday dinners, these are non-negotiable. You can pile them high in a basket next to the turkey. They also work incredibly well for “slider” style leftovers. Slice them open, add some meat and cranberry sauce, and you have the perfect day-after lunch.
If you really want to impress, serve them alongside garlic mashed potatoes. The combination of starch-on-starch might make your doctor frown, but your soul will smile.
Troubleshooting Your Dough
Things happen. Let’s troubleshoot common disasters so you can avoid them.
Problem: The rolls are heavy and dense.
- Cause: You added too much flour.
- Fix: When kneading, the dough should stick slightly to the bottom of the bowl. If it forms a dry, hard ball, you went overboard. Add a tablespoon of water or milk next time.
Problem: They taste like alcohol.
- Cause: You let them rise too long (over-proofing).
- Fix: Watch the size, not the clock. Once they double, move to the next step immediately.
Problem: They spread out flat instead of rising up.
- Cause: You didn’t create enough surface tension during shaping.
- Fix: Practice the “claw” hand motion. You need that tight skin on top of the dough ball to hold the shape.
Make-Ahead Options for Stress-Free Holidays
Hosting a big dinner creates enough stress without worrying about yeast timing. You can prep these ahead of time.
The Fridge Method
Make the dough, let it do the first rise, and shape the rolls. Place them in the baking pan. Cover them tightly and put the pan in the refrigerator overnight.
The cold slows down the yeast but doesn’t stop it completely. In the morning, take the pan out about 3 hours before dinner. Let them come to room temperature and finish rising. Then bake. Fresh rolls, zero mess on the big day.
The Freezer Method
You can bake the rolls fully, let them cool, and freeze them in a Ziploc bag. When you want to eat, wrap them in foil and reheat them in a 350°F oven for 10 minutes. They taste 95% as good as fresh.
Why Homemade Bread is a Flex
Bringing a basket of homemade Dinner Rolls to a potluck creates a statement. It says, “I didn’t just stop at the store; I crafted this nourishment with my own hands.” It evokes a sense of nostalgia that people crave.
Plus, the smell. Oh man, the smell. Your house smells like a French bakery. That aroma alone makes the effort worth it IMO.
If you enjoy the process of working with yeast, you should definitely try making a full loaf of homemade bread next. It uses similar principles but gives you great slices for sandwiches throughout the week.
A Note on Flours
I mentioned All-Purpose flour earlier, but let’s get nerdy for a second. Flour contains protein. Protein becomes gluten.
- Bread Flour: 12-14% protein. Chewy, tall rise. Great for bagels.
- All-Purpose: 10-12% protein. Softer, moderate rise. Best for rolls.
- Cake Flour: 6-8% protein. Very soft, no chew. Bad for yeast bread.
Stick to the middle ground. All-purpose flour strikes the perfect balance between structure and tenderness.
Final Thoughts
Don’t let the fear of yeast stop you. Baking bread connects us to history. Humans have mixed flour and water for thousands of years. You can do this.
Start with this recipe. Follow the steps. Trust your hands. Even if they don’t look perfect on the first try, they will still taste better than anything that comes in a tube.
So, check your pantry. Check your yeast date. Get some butter softening on the counter. Your kitchen is about to become the most popular room in the house.
For more science on how gluten works and why kneading matters, check out this fantastic guide from King Arthur Baking. They explain the chemistry better than I ever could.
Now, go get messy. Happy baking
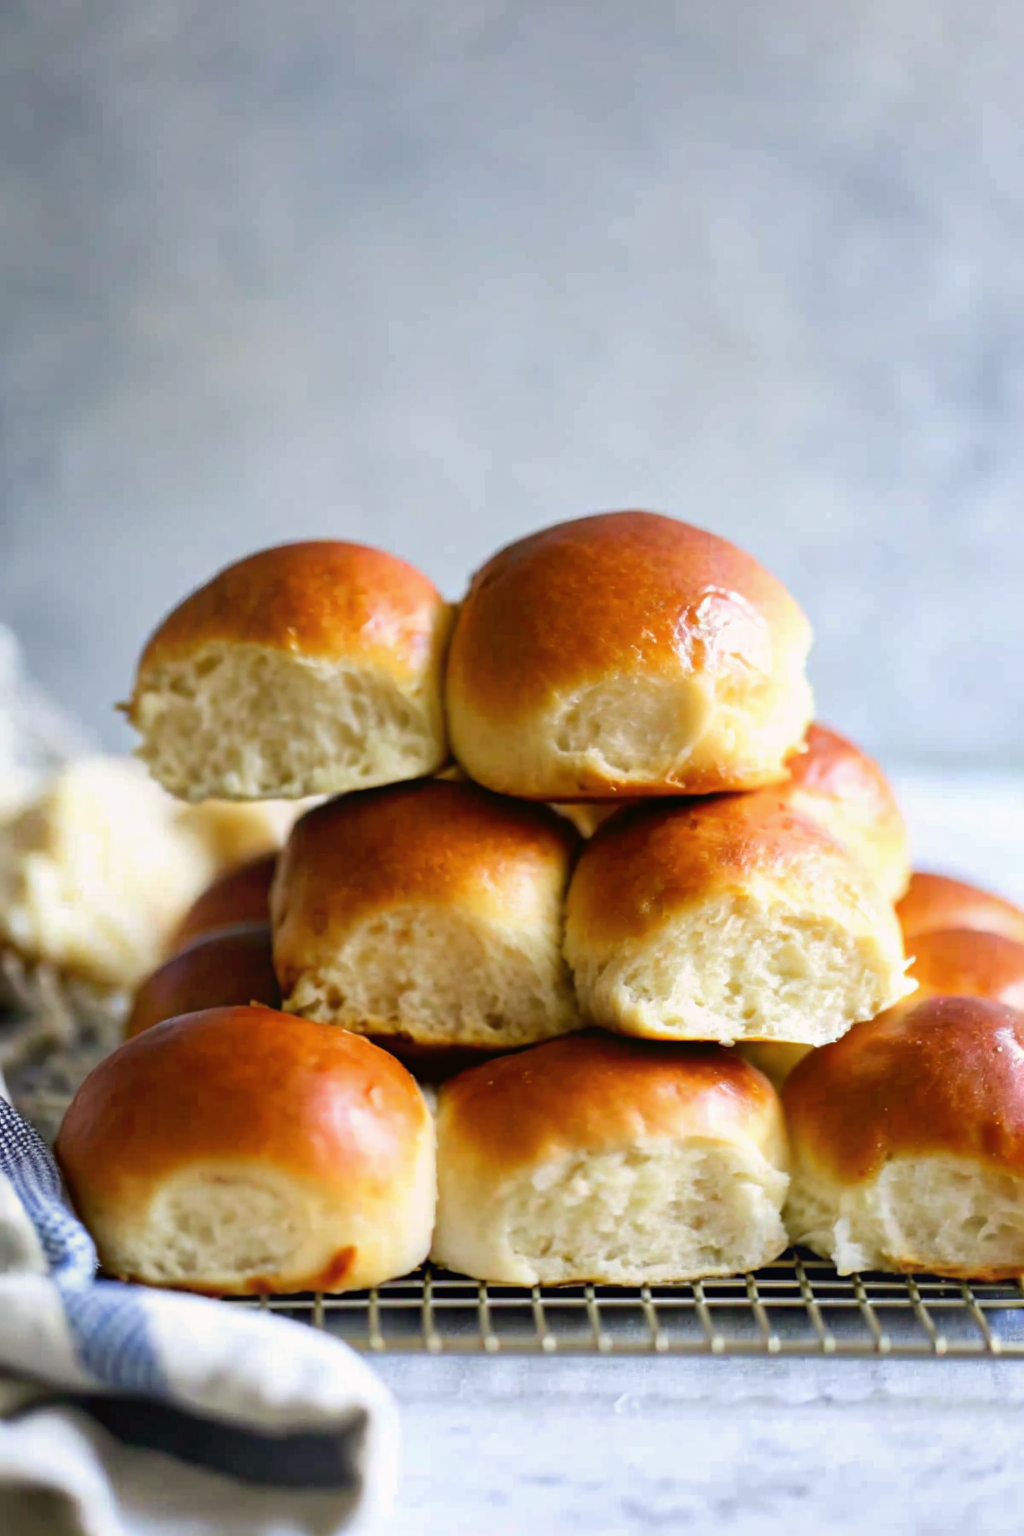
Fluffy Homemade Dinner Rolls
Author: Prep: 25 minutes Cook: 20 minutes Total: 2 hours 45 minutesEquipment
- Stand Mixer (optional, but helpful)
- 9×13 Baking Pan
- Large mixing bowl
- Pastry brush
- Kitchen Scale
Ingredients
The Dough
- 1 cup Warm Milk about 110°F/45°C
- 1 packet Active Dry Yeast 2 1/4 tsp
- 2 tbsp Granulated Sugar divide in half
- 1/4 cup Unsalted Butter melted and slightly cooled
- 1 large Egg room temperature
- 3 1/2 cups All-Purpose Flour spooned and leveled
- 1 tsp Salt
The Finish
- 2 tbsp Unsalted Butter melted
- 1 tsp Flaky Sea Salt optional
Instructions
- Activate the Yeast: In the bowl of a stand mixer (or a large bowl), combine the warm milk and 1 tablespoon of the sugar. Sprinkle the yeast on top and stir gently. Let it sit for 5–10 minutes until it looks foamy and bubbly. If it doesn't bubble, the yeast is dead—start over!
- Mix the Dough: Add the remaining tablespoon of sugar, melted butter, egg, salt, and 2 cups of the flour to the yeast mixture. Mix on low speed until combined.
- Knead for Structure: Add the remaining flour gradually. Switch to the dough hook and knead on medium-low speed for 5–7 minutes. The dough should be smooth and elastic. The Windowpane Test: Pinch a piece of dough and stretch it; if you can see light through it without it tearing, it’s ready. If it sticks to the bowl, add a little more flour (1 tbsp at a time).
- First Rise: Grease a large bowl with oil. Place the dough inside, turning it once to coat. Cover with plastic wrap or a warm towel. Let it rise in a warm spot until doubled in size (about 60–90 minutes).
- Shape the Rolls: Punch the dough down to release the air. Divide the dough into 15 equal pieces (use a scale for perfection!).
- The Claw Technique: To shape, place a piece of dough on a clean counter. Cup your hand over it like a claw and move in a circular motion to create a tight, smooth ball.
- Second Rise: Place the shaped balls into a greased 9×13 baking pan. Cover and let them rise again for 30–45 minutes until they are puffy and touching each other.
- Bake: Preheat your oven to 375°F (190°C). Bake the rolls for 15–20 minutes until the tops are a deep golden brown.
- The Butter Bath: Remove from the oven and immediately brush the hot Dinner Rolls with the melted butter. Sprinkle with flaky sea salt if desired. Serve warm.
Notes
- Make Ahead (Fridge): You can let the dough do the second rise in the fridge overnight. Just cover the pan tightly. Take them out about 2-3 hours before dinner to let them come to room temperature and finish rising before baking.
- Freezing: Bake the rolls fully, let them cool, and freeze them in a airtight bag. Reheat in a 350°F oven for 10 minutes wrapped in foil.
- Flour Tip: Don’t scoop the flour directly with the measuring cup, as this packs it down and leads to dry rolls. Spoon the flour into the cup and level it off with a knife.
Nutrition


