
Let’s address the elephant in the room: Prime Rib Roast is expensive. You stand at the butcher counter, staring at that price tag, and your palms start to sweat. You do the mental math. You realize this piece of meat costs more than your first car. The pressure is on. If you ruin a hot dog, nobody cares. If you ruin a Prime Rib, you ruin Christmas.
But here is the good news. Despite its high price and fancy reputation, Prime Rib is actually one of the easiest cuts of beef to cook. Seriously. It’s easier than a turkey. It’s easier than a brisket. You just need to follow a few specific rules and ignore the bad advice your uncle gives you about “searing the juices in.”
I used to be terrified of cooking this roast. The first time I tried, I stared at the oven door for three hours like a nervous guard dog. But once I understood the technique, I realized the oven does 95% of the work. You just need a thermometer and some patience. So, take a deep breath. We are going to nail this.
Buying the Right Hunk of Meat
You need to know what you are looking for before you open your wallet. The terminology confuses people.
“Prime” vs. “Prime Rib”
Here is where it gets tricky. “Prime Rib” usually refers to the cut of meat (the standing rib roast), not necessarily the USDA grade. You can buy a “Choice” grade standing rib roast, and people will still call it Prime Rib.
FYI: USDA Prime is the top tier. It has the most marbling (intramuscular fat). Choice is the next step down. IMO, Choice is perfectly fine for a home cook. It tastes amazing and saves you a chunk of change. Just look for the piece with the most white flecks of fat in the red muscle. Fat equals flavor.
Bone-In vs. Boneless
Always go bone-in. The bones act as a natural roasting rack. They insulate the meat, cooking it more gently. Plus, gnawing on a beef rib is a primal joy you shouldn’t deny yourself.
Ask your butcher to “cradle” the roast. This means they cut the bones off the meat and then tie them back on with twine. This gives you the flavor benefits of cooking on the bone, but when you carve it, you just snip the string and the bones fall off. No wrestling with a knife required.
The Prep: The Dry Brine Secret
If you take the roast out of the plastic and immediately throw it in the oven, you are making a mistake. You need to dry brine it.
Salt does two things. First, it seasons the meat deep down, not just on the surface. Second, it alters the protein structure to hold onto more moisture.
- Plan Ahead: Buy your roast 24 to 48 hours before you plan to cook it.
- Salt Heavily: use coarse Kosher salt. Cover the entire thing. It should look like it snowed on your beef.
- The Fridge Wait: Place the roast on a wire rack on a baking sheet. Put it in the fridge, uncovered.
I know, it looks weird leaving raw meat uncovered in your fridge. But the cold air circulates and dries out the surface. A dry surface browns much better than a wet one. This simple step separates the amateurs from the pros.
The Countertop Warm-Up
On the big day, take the roast out of the fridge early. I’m talking 2–3 hours before cooking.
If you put a fridge-cold roast into a hot oven, the outside cooks way faster than the frozen-feeling center. You end up with a gray band of overcooked meat around the edges and a raw middle.
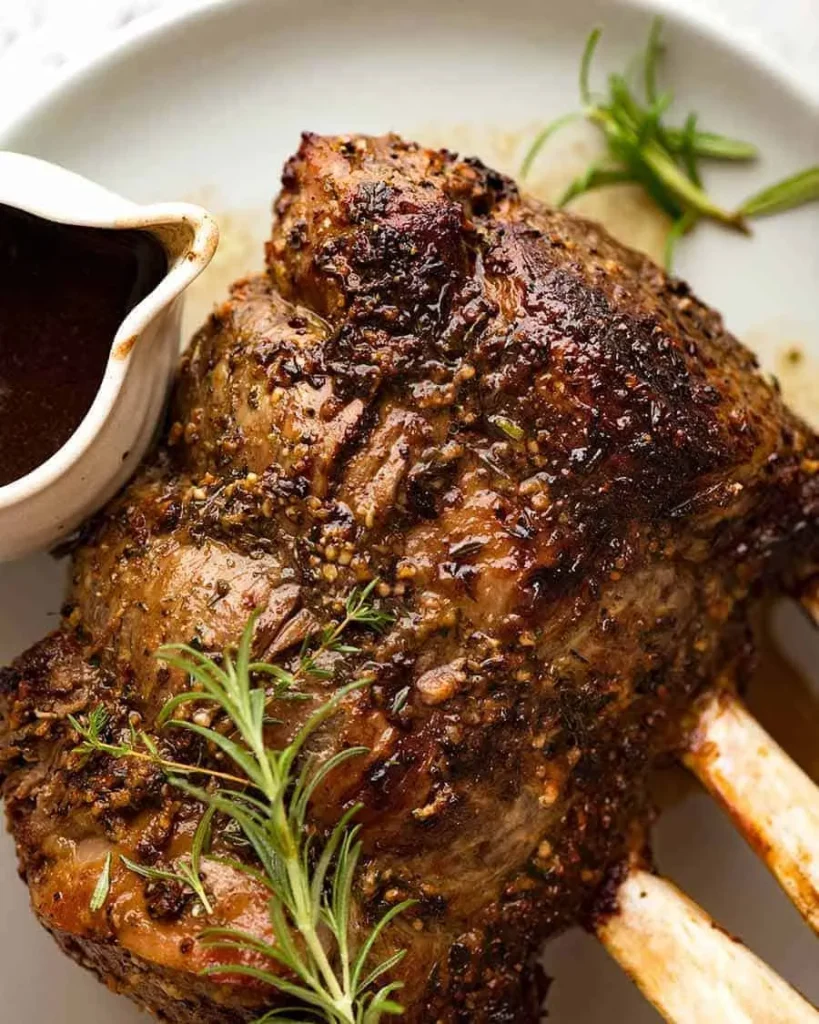
Let it sit on the counter. Let it come up to room temperature. This promotes even cooking. Use this time to rub it with your aromatics. I keep it simple: black pepper, fresh rosemary, thyme, and garlic. The salt is already in there from the dry brine, so you don’t need much more.
The Cooking Method: Reverse Sear
You might read recipes that tell you to blast the roast at 500°F first and then turn the oven down. Don’t do this.
That method creates a massive gray ring of overcooked meat. We want edge-to-edge pink perfection. We want the “Reverse Sear.”
This method flips the script. You cook it low and slow first, then blast it at the end.
- Low Temp: Preheat your oven to 250°F (or even 200°F if you have all day).
- Roast: Place the meat (bones down) in the roasting pan. Put it in the oven.
- Wait: Cook it until the internal temperature is about 10-15 degrees lower than your final target temperature.
Why does this work? The gentle heat cooks the meat evenly. It preserves the enzymes that make the beef tender. It prevents the fibers from seizing up and squeezing out all the juice.
Temperature Control: The Only Metric That Matters
Throw away the “minutes per pound” chart. It lies. It doesn’t know your oven, the shape of your roast, or the starting temperature of your meat. If you cook by time, you gamble with dinner.
You need a digital probe thermometer. Leave it in the meat while it cooks.
Here is your cheat sheet for when to pull it out of the oven (before the sear):
- Rare: Pull at 115°F.
- Medium-Rare: Pull at 120°F (This is the sweet spot).
- Medium: Pull at 130°F.
- Well Done: Please don’t do this. If you want well-done beef, save your money and buy a chuck roast :/
Remember, the temperature rises during the resting and searing phase. This is called “carryover cooking.” If you pull it out at 130°F, it will end up at 140°F+, which is solid medium.
The Rest (Part 1)
Once your Prime Rib Roast hits that target temp (say, 120°F), take it out. Tent it loosely with foil.
Now, you wait. You need to let the roast rest for at least 30 minutes, preferably 45. This serves two purposes.
- It lets the juices redistribute.
- It frees up your oven to blast the heat.
While the beef rests, crank your oven as high as it goes. I set mine to 500°F or 550°F.
The Sear: Creating the Crust
Now that your oven sounds like a jet engine, remove the foil from the roast. Put it back in for 6 to 10 minutes.
Watch it like a hawk. The sugar and fat on the exterior will caramelize rapidly. You want a dark, mahogany crust. You do not want burnt garlic.
Once it looks beautiful, pull it out. Because you rested the meat before the sear, you can carve it almost immediately. The inside is warm and pink, and the outside is sizzling hot. It’s the perfect bite.
The Essential Sauces
You cannot serve dry beef. Well, you can, but why would you? You need two things on the table: Au Jus and Horseradish Cream.
The Au Jus
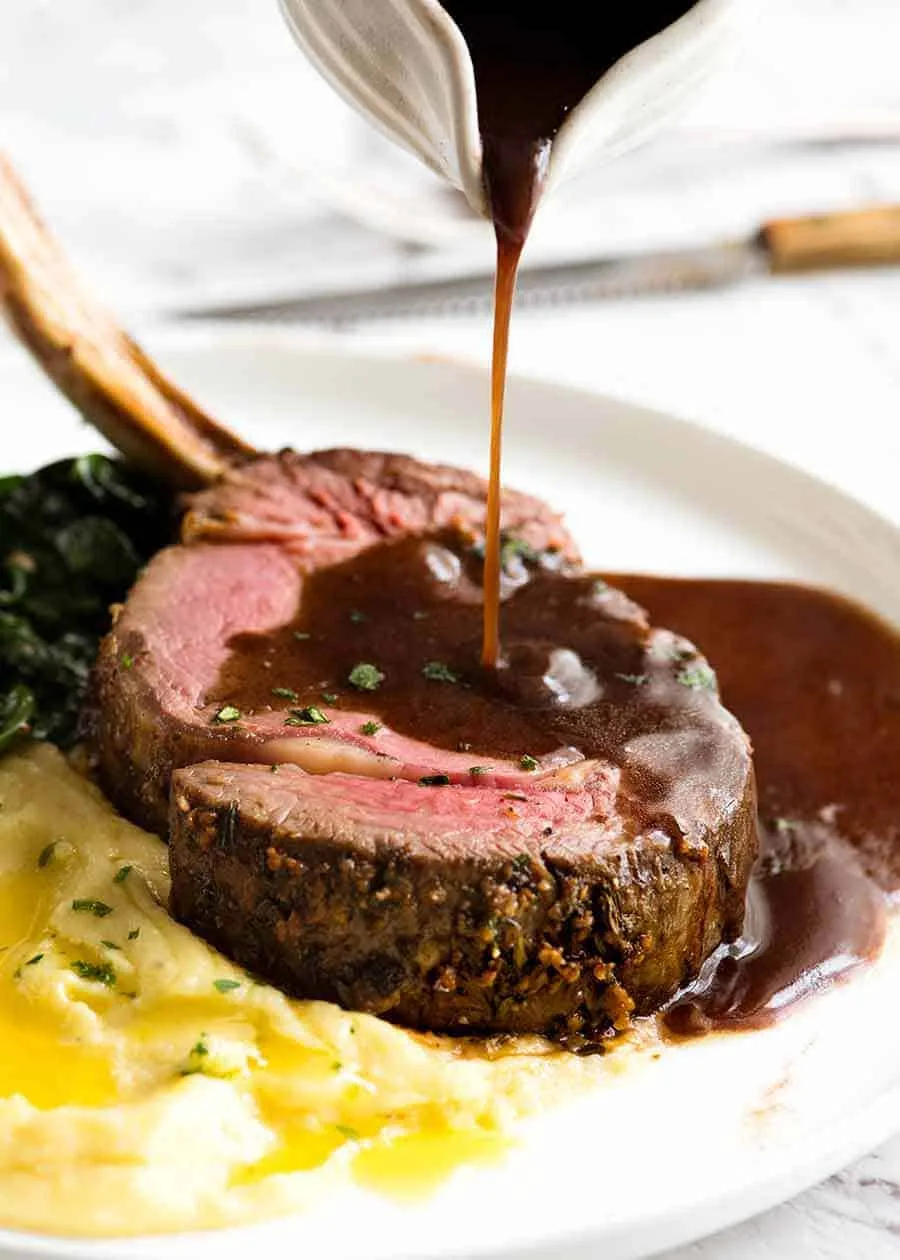
While the roast rests, look at the pan. Those brown drippings are liquid gold. Place the roasting pan on the stove (if it’s metal). Add red wine to deglaze it. Scrape up the fond. Add good quality beef stock. Simmer it until it tastes rich.
The Horseradish Cream
This cuts through the heavy fat of the ribeye.
- 1 cup Sour Cream
- 2 tbsp Prepared Horseradish (more if you want to clear your sinuses)
- 1 tsp Dijon Mustard
- Squeeze of Lemon Juice
- Chives
Mix it up and let it sit in the fridge for an hour. It transforms the meal.
What to Serve on the Side
You have the main star, but you need supporting actors. You don’t want anything too complex that distracts from the beef.
You absolutely need garlic mashed potatoes. There is a rule somewhere that says you cannot eat prime rib without mashed potatoes. You need a vehicle for that extra gravy and blood-rare juice. The creamy texture contrasts perfectly with the crust of the beef.
You also need bread. A soft roll is fine, but I prefer something with a bit of chew. Grab some crusty french bread. Use it to mop up the plate. It’s polite to lick the plate in spirit, but using bread is more socially acceptable.
For a vegetable, keep it simple. Roasted asparagus, glazed carrots, or creamed spinach are steakhouse classics for a reason. They work.
Dealing with Leftovers
Unless you feed a football team, you will have leftovers. Do not microwave them! Microwaving leftover prime rib turns it into gray shoe leather immediately.
Cold Slices
Eat it cold. Slice it thin and put it on sourdough with mayo and horseradish. It’s the best sandwich you will ever eat.
The Reheat Method
If you want it warm, use the “warm bath” method. Heat up your leftover au jus or beef stock until it steams. Place slices of beef in the liquid for 30 seconds. It warms the fat without cooking the protein.
The Bones
Don’t throw away those rib bones! They still have meat and connective tissue on them. Toss them into a pot to make a stock, or use them as a base for a hearty beef stew later in the week. You squeeze every penny of value out of that expensive roast.
Common Pitfalls to Avoid
Even with the best instructions, things happen. Let’s look at where people usually mess up.
Opening the Oven Door:
Every time you open the door to peek, you lose heat. The temperature fluctuates. Just trust the thermometer. Keep the door closed until the alarm beeps.
Trusting the “Pop-Up” Timer:
If your roast came with a plastic timer stuck in it, pull it out and throw it in the trash. Those things pop at 165°F. That is culinary homicide.
Cutting Too Soon:
If you cut into the roast without resting it, the juice runs out all over the board. Your meat ends up dry. Be patient. Drink some wine. Wait the full 30 minutes.
Why This Meal is Worth the Stress
Cooking a Prime Rib Roast feels like an event. It marks the occasion as special. It shows your friends and family that you love them enough to buy the good meat and spend four hours tending to it.
Plus, it looks spectacular. Placing that massive, crusty, bone-in roast in the center of the table creates a moment of awe. You grab the carving knife, slice off that first slab of pink, juicy meat, and everyone goes quiet. That silence? That’s the sound of success.
So, don’t fear the roast. Respect it, sure. But don’t fear it. You have the tools. You understand the heat. You know about the dry brine.
Go buy that big, beautiful piece of beef. Salt it like you mean it. And get ready to receive some serious compliments.
For a deeper look into the science of why salting early makes such a massive difference in moisture retention, check out this experiment by Serious Eats. It changes how you cook everything, not just beef.
Now, go preheat that oven. You’ve got this.
Perfect Reverse Sear Prime Rib Roast
Author: Prep: 20 minutes Cook: 3 hours 30 minutes Total: 4 hours 35 minutesEquipment
- Roasting Pan with Wire Rack
- Digital Probe Thermometer (Essential!)
- Carving Board
- Sharp Carving Knife
- Kitchen twine
Ingredients
The Beef
- 1 6-8 lb Bone-in Standing Rib Roast (3 to 4 bones), Choice or Prime grade
- 1/4 cup Coarse Kosher Salt for dry brining
The Herb Crust
- 6 cloves Garlic minced
- 2 tbsp Fresh Rosemary chopped finely
- 2 tbsp Fresh Thyme chopped finely
- 1 tbsp Coarse Black Pepper
- 2 tbsp Olive Oil
Optional Au Jus
- 1 cup Red Wine Cabernet or Merlot
- 2 cups Beef Stock
Instructions
- The Day Before (Dry Brine): At least 24 hours before cooking, unwrap your roast. Cover it generously with the coarse Kosher salt on all sides. Place it on a rack in a baking sheet and put it in the fridge uncovered. This dries out the surface for a better crust later.
- The Warm Up: On cooking day, take the Prime Rib Roast out of the fridge 2 to 3 hours before you plan to cook. Let it sit on the counter to come to room temperature. This promotes even cooking.
- Season: Preheat your oven to 250°F (120°C). In a small bowl, mix the minced garlic, rosemary, thyme, black pepper, and olive oil to make a paste. Rub this all over the roast.
- The Slow Roast: Place the roast (bone-side down) on a rack in a roasting pan. Insert your digital thermometer into the thickest part of the meat (away from the bone). Roast until the internal temperature reaches 115°F (46°C) for rare or 120°F (49°C) for medium-rare. Note: This can take 3 to 4 hours depending on the size, so watch the temp, not the clock!
- The Long Rest: Remove the roast from the oven and transfer it to a cutting board. Tent loosely with foil. Let it rest for 30 to 45 minutes. The temperature will continue to rise about 5–10 degrees while it sits.
- The Blast: While the meat rests, crank your oven up to 500°F (260°C). Once the oven is scorching hot and the meat has finished resting, put the roast back in for 6–10 minutes. Watch closely! You want a dark, sizzling mahogany crust, but don’t let the garlic burn.
- Serve: Remove from the oven. Since you already rested the meat, you can carve immediately. Cut the twine, remove the bones, slice thick slabs, and serve with the pan drippings or au jus.
Notes
- The Thermometer Rule: Do not cook this by time (minutes per pound). Ovens vary too much. The only way to guarantee a perfect Prime Rib Roast is by internal temperature.
- Au Jus: While the roast rests, place your roasting pan on the stove over medium heat. Pour in the wine to deglaze the brown bits (fond), add the beef stock, and simmer for 10 minutes.
- Don’t Overcook: Remember “carryover cooking.” If you want medium-rare (130°F finished), pull it from the oven at 120°F. It will heat up while it rests.
- Leftovers: Do not microwave! Reheat slices gently in warm beef broth to keep them pink and tender
Nutrition


