
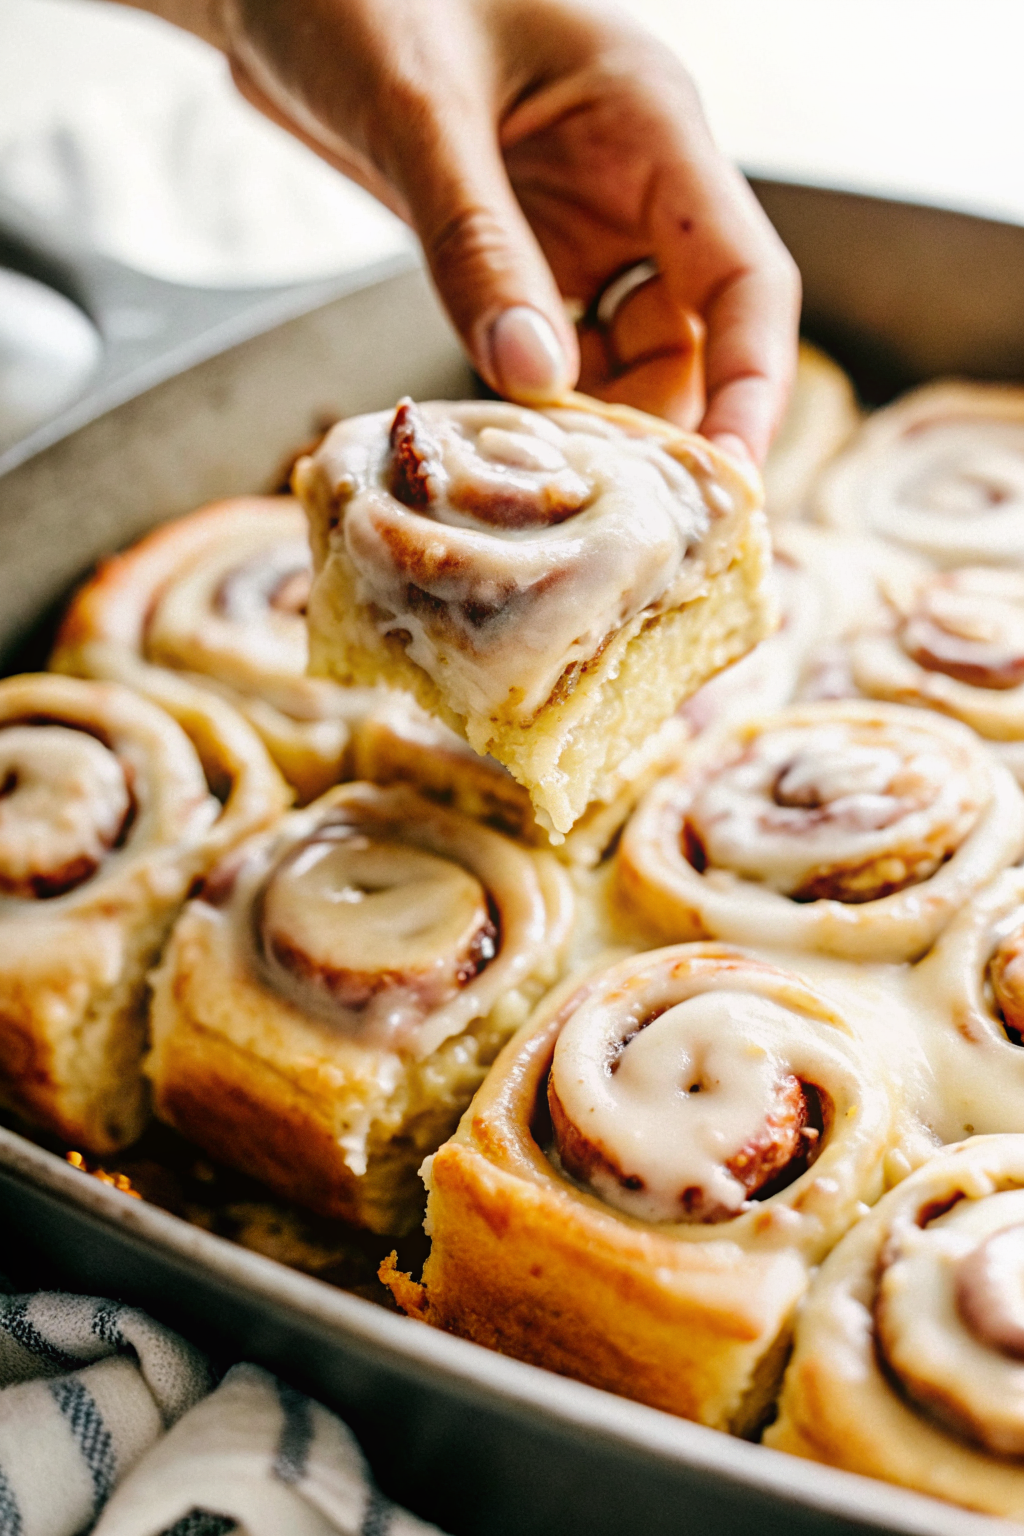
Let’s be real for a second. Is there any scent on this planet better than Cinnamon Rolls baking in the oven? I don’t think so. That smell basically grabs you by the nose and floats you into the kitchen like a cartoon character. It promises warmth, comfort, and a sugar coma that I am personally very willing to accept.
But we need toaddress the elephant in the room. I’m talking about that pressurized tube of dough from the grocery store. You know the one. It pops with the force of a small explosion, scaring the cat and half the neighborhood. Those things are… fine. They are edible. But they are not cinnamon rolls. They are biscuit dough masquerading as dessert. You deserve better. You deserve the gooey, fluffy, yeasty spiraled masterpieces that make people think you attended pastry school in Paris.
Making these from scratch intimidates a lot of people. I get it. Yeast feels like a science experiment that could go wrong at any moment. But guess what? It’s actually incredibly hard to mess up if you just follow a few simple rules. So, grab your apron and let’s conquer this dough.
conquering the Yeast Fear Factor
Why does yeast scare everyone? It’s just a fungus that likes to eat sugar and burp carbon dioxide. That’s it. That’s the whole magic trick. If you can keep a houseplant alive (or even if you can’t), you can manage yeast.
Check Your Dates
First things first: check the expiration date on your yeast packet. I have tried to bake with expired yeast before. I ended up with dense, hard pucks that could double as hockey equipment. If your yeast is dead, your rolls won’t rise. Period.
The Water Temperature Test
You need warm liquid to wake the yeast up. But here is the catch: if the liquid is too hot, you kill the yeast. If it’s too cold, the yeast hits the snooze button and refuses to work.
How do you know it’s right? Dip your finger in the milk or water. It should feel like a nice, warm bath. Not a hot tub, not a lukewarm puddle. Just pleasantly warm. If you burn your finger, you will burn the yeast. Aim for around 105°F to 110°F.
Also, FYI, I always add a pinch of sugar to the yeast and water mixture. It gives the yeast a snack immediately. After five minutes, it should look foamy and bubbly. If it looks like murky pond water with zero bubbles, throw it out and start over. Do not pass Go. Do not collect $200.
The Dough: Fat is Your Friend
We aren’t making a baguette here. We are making Cinnamon Rolls. This requires an “enriched dough.” That means we add fat—milk, butter, and eggs—to the flour mixture.
Fat inhibits gluten formation slightly. This gives you that tender, soft-as-a-pillow texture rather than a chewy, crusty bread.
Stickiness is Good
Here is where most people ruin their rolls. They see sticky dough, panic, and dump in two more cups of flour. Stop doing that!
You want the dough to feel tacky, like the back of a Post-it note. It should pull away from the sides of the bowl but still stick slightly to the bottom. If you add too much flour, you get dry, tough rolls. I would rather deal with slightly sticky dough and get a moist roll than have an easy-to-handle dough that tastes like cardboard.
If you enjoy working with yeast doughs, you might also want to try your hand at homemade bread, which follows similar principles but requires a bit more structure.
The Kneading Game
You have two choices here: the stand mixer or the arm workout.
The Stand Mixer Route
I love my stand mixer. I throw everything in, attach the dough hook, and let the machine do the heavy lifting for about 5–7 minutes. It’s efficient, and it keeps my hands clean for coffee drinking.
The Hand Kneading Route
If you don’t have a mixer, or if you just had a really stressful week and need to punch something, knead by hand. Dust your counter lightly with flour. Push the dough away with the heel of your hand, fold it back over, and turn. Repeat this for about 10 minutes. It takes effort, but you earn those calories you’re about to eat.
How do you know when you’re done? poke the dough. If it springs back slowly, it’s ready. If the dent stays there looking sad, keep kneading.
The Filling: Ratio Matters
Let’s talk about the inside. The filling makes or breaks the cinnamon roll. You need three things: butter, cinnamon, and brown sugar.
Butter: Soft vs. Melted
This is a hill I will die on. Use room-temperature soft butter, not melted butter.
When you brush melted butter on the dough, it tends to leak out during the rolling process. It pools at the bottom of the pan and burns. Soft butter, however, stays put. You smear it on like frosting. It holds the sugar and cinnamon in place exactly where you want them.
The Sugar Choice
Use brown sugar. White sugar is fine, but brown sugar has molasses. That molasses creates the caramel-like goo that sits at the bottom of the spiral. That goo is the best part. Don’t deprive yourself of the goo.
The Cinnamon
Be generous. I’m talking a full two tablespoons at minimum. You want that spicy kick to cut through the sweetness of the sugar and the frosting. If you can find Saigon cinnamon, buy it. It has a stronger, punchier flavor than the standard stuff.
Rolling and Cutting: The Dental Floss Hack
Okay, you let your dough rise until it doubled. You punched it down (satisfying, right?). You rolled it out into a big rectangle and slathered on the filling. Now you have a log of dough.
If you take a knife and slice that log, you will squish the rolls. The beautiful round spiral turns into a sad oval. You lose the layers.
Use dental floss. Unflavored dental floss, obviously. Unless you want minty cinnamon rolls, which sounds like a toothpaste disaster :/
Slide a piece of floss under the log. Cross it over the top and pull quickly. It cuts through the dough cleanly without squishing it. You get perfect, round spirals every time. It’s one of those kitchen hacks that actually works better than the specialized tools.
The Secret Ingredient for Gooeyness
I learned this trick a few years ago, and I haven’t looked back. Before you put the rolls in the oven, pour warm heavy cream over them.
I know, it sounds insane. You just spent all that time making dough, and now I want you to drown it? Yes. Pour about half a cup of warm heavy cream into the gaps between the rolls right before baking.
The dough absorbs the cream as it bakes. This creates the softest, most tender crumb imaginable. It tastes like the center of the roll all the way through. It essentially mimics the texture of those famous mall cinnamon rolls (Cinnabon, I’m looking at you).
Baking: Watch the Clock
Do not walk away and watch a 30-minute sitcom episode. Ovens lie. Your 350°F might be my 375°F.
Start checking your Cinnamon Rolls at the 20-minute mark. You want them golden brown, not dark brown. If the tops are browning too fast but the centers still look raw, throw a piece of aluminum foil loosely over the top. This protects the crust while the inside finishes baking.
Underbaking is better than overbaking IMO. A slightly doughy center is delicious. A dry, crunchy roll is a tragedy.
The Frosting: Cream Cheese or Bust
Some people use a simple vanilla glaze—just powdered sugar and milk. Those people are wrong.
A cinnamon roll needs the tang of cream cheese. The richness of the dough and the sweetness of the filling need an acidic counterpoint. Cream cheese provides that balance.
My go-to frosting ratio:
- 4 oz Cream Cheese (softened)
- 1/4 cup Butter (softened)
- 1 cup Powdered Sugar
- Splash of Vanilla
- Pinch of Salt
Whip the butter and cream cheese until they are fluffy. Add the sugar slowly so you don’t create a snowstorm in your kitchen.
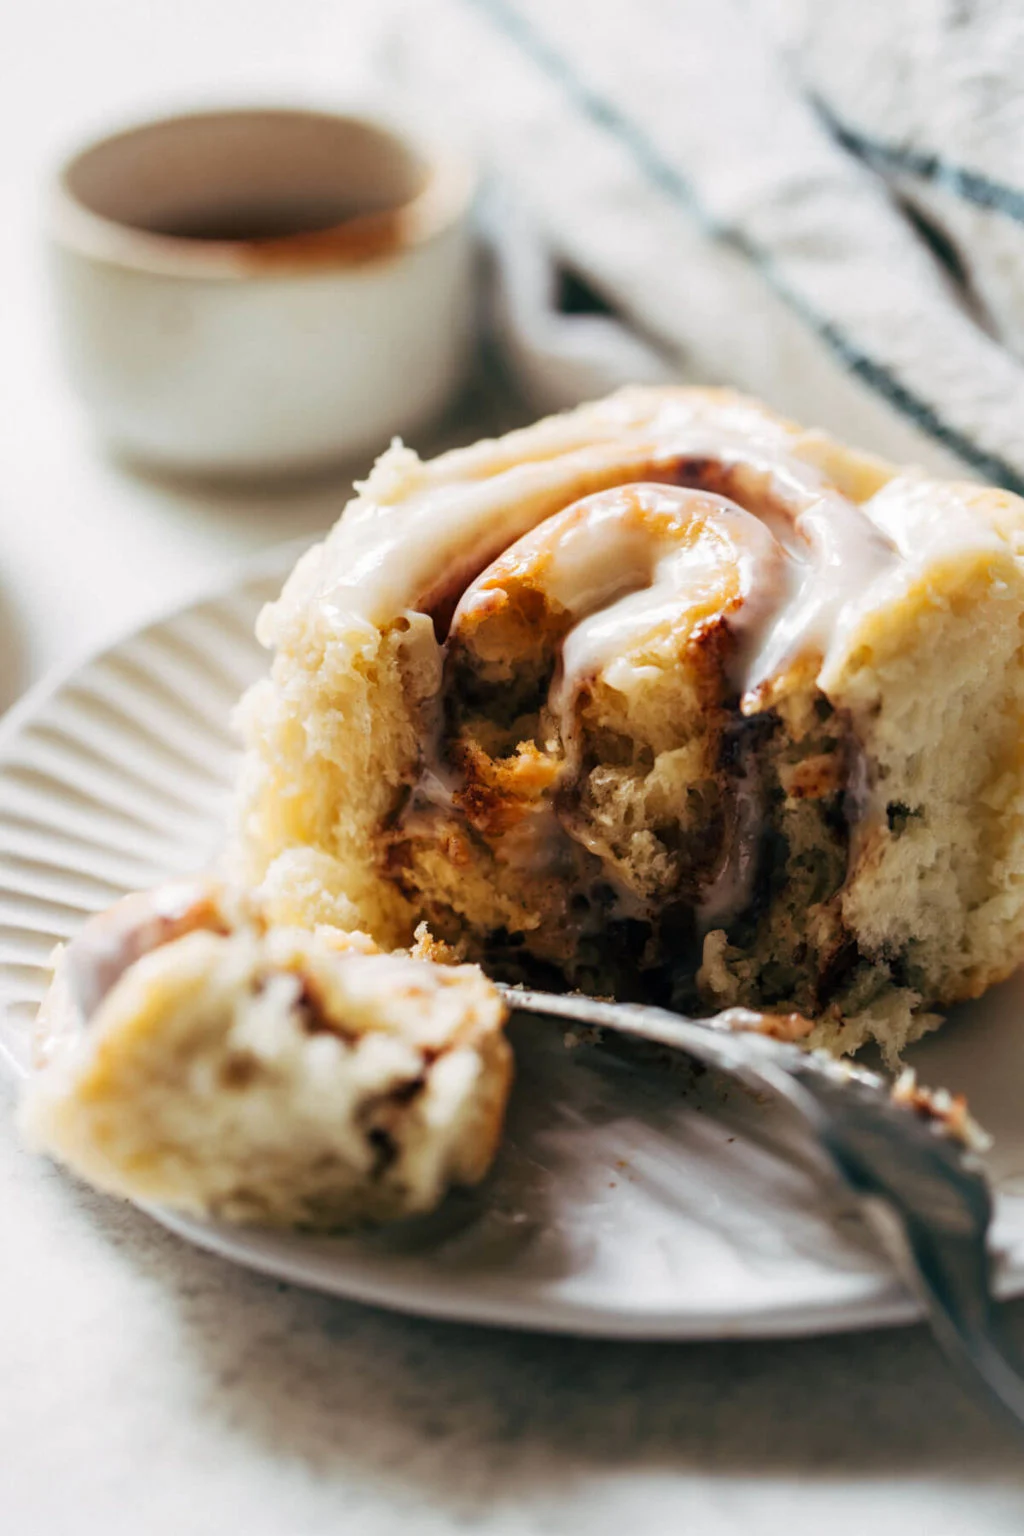
Pro Tip: Frost the rolls while they are still warm. Not piping hot, but warm. The frosting melts slightly and seeps into the spirals. If you wait until they are cold, the frosting just sits on top like a hat. We want integration, not separation.
While you are in a baking mood, you might consider making a breakfast casserole to serve alongside these. The savory eggs and cheese balance out the sugar rush perfectly.
Overnight Option (Because Mornings are Hard)
Who wants to wake up at 6:00 AM to knead dough? Not me. I barely function before coffee.
You can do all the work the night before.
- Make the dough.
- Fill it and roll it.
- Cut the rolls and put them in the pan.
- Stop here. Cover the pan tightly with plastic wrap and put it in the fridge.
The cold slows down the yeast. The rolls will rise slowly overnight. In the morning, pull them out about an hour before you want to bake them. They need to come to room temperature and finish rising. Then bake as usual. You look like a hero, but you slept until 9:00 AM. Win-win.
Troubleshooting Your Buns
Sometimes things go sideways. Let’s figure out why.
Problem: The dough didn’t rise.
- Cause: Dead yeast or your kitchen is too cold.
- Solution: Move the bowl to a warmer spot. I like to turn my oven on for one minute, turn it off, and then put the bowl inside. It creates a cozy little proofing box.
Problem: The filling leaked out and burned.
- Cause: You rolled them too loosely or used melted butter.
- Solution: Roll that log tight! And remember, use soft butter next time.
Problem: The rolls are tough.
- Cause: Too much flour during kneading or over-baking.
- Solution: Trust the sticky dough. Put the flour bag away.
Why Homemade Beats the Mall
There is a sense of accomplishment that comes from pulling a pan of bubbling, golden rolls out of the oven. You made these. You tamed the yeast. You rolled the spiral.
Plus, you control the ingredients. No weird preservatives. No chemicals you can’t pronounce. Just butter, sugar, flour, and love.
These cinnamon rolls make perfect gifts, too. If you bring a pan of these to a new neighbor or a sick friend, you essentially buy their loyalty for life. Food is a love language, and cinnamon rolls are practically a marriage proposal.
If you have a sweet tooth that just won’t quit, you can also try making a classic apple pie for dessert later. It uses similar spices but offers a completely different texture profile.
Final Thoughts
Don’t let the process scare you. It’s just baking. The worst-case scenario? You get slightly imperfect rolls that still taste like cinnamon and sugar. That’s not a bad day.
So, go check your pantry. Buy some fresh yeast. Commit to the butter. Your kitchen is about to smell better than any candle you could ever buy.
For a deep dive into the science of why enriched doughs behave the way they do, check out this guide from King Arthur Baking. They explain the chemistry far better than I ever could.
Now, go get messy with some flour. Happy baking!
The Best Soft Homemade Cinnamon Rolls
Author: Prep: 20 minutes Cook: 25 minutes Total: 2 hours 43 minutesEquipment
- Stand Mixer (optional, but helpful)
- 9×13 Baking Dish
- Rolling Pin
- Unflavored Dental Floss (for cutting)
- Pastry brush
Instructions
The Dough
- cup Warm milk (about 110°F/45°C)
- 1 packet Active dry yeast (2 1/4 tsp)
- 1 tbsp Granulated sugar (for the yeast)
- 1/2 cup Granulated sugar (for the dough)
- 1/3 cup Unsalted butter, melted and cooled
- 1 large Egg, room temperature
- 4 cups All-purpose flour (plus more for dusting)
- 1 tsp Salt
The Filling
- 1/2 cup Unsalted butter, widely softened (not melted!)
- 1 cup Brown sugar, packed
- 2 tbsp Ground cinnamon (Saigon cinnamon is best)
The Secret Ingredient
- 1/2 cup Heavy cream (warm)
Cream Cheese Frosting
- 4 oz Cream cheese, softened
- 1/4 cup Unsalted butter, softened
- 1 1/2 cups Powdered sugar
- 1 tsp Vanilla extract
- 1 pinch Salt
Notes
- Wake Up the Yeast: In the bowl of your stand mixer (or a large bowl), combine the warm milk and 1 tablespoon of sugar. Sprinkle the yeast on top and stir gently. Let it sit for 5–10 minutes until it looks foamy and bubbly. If it doesn’t bubble, your yeast is dead—start over!
- Make the Dough: Add the remaining sugar, melted butter, egg, salt, and 2 cups of flour to the yeast mixture. Mix on low speed until combined. Gradually add the remaining flour until a dough forms.
- Knead It: Switch to the dough hook and knead on medium-low speed for 5–7 minutes. The dough should be tacky (slightly sticky like a Post-it note) but shouldn’t stick messily to your fingers. If kneading by hand, turn it out onto a floured surface and knead for 8–10 minutes.
- First Rise: Lightly grease a large bowl with oil. Place the dough inside, turning it once to coat it in oil. Cover with a warm, damp towel or plastic wrap. Place in a warm spot and let it rise until doubled in size (about 1–1.5 hours).
- Roll and Fill: Punch the dough down to release the air. On a lightly floured surface, roll the dough into a large 12×18 inch rectangle. Spread the softened butter all over the dough, leaving a thin margin at the top. In a small bowl, mix the brown sugar and cinnamon, then sprinkle it evenly over the butter. rub it in slightly with your hand.
- Roll and Cut: Tightly roll the dough up, starting from the long edge, until you have a log. Use unflavored dental floss to cut the log into 12 even rolls. (Slide the floss under, cross over the top, and pull quickly—it prevents squishing!).
- Second Rise: Place the cut rolls into a greased 9×13 baking dish. Cover and let them rise again for 30–45 minutes. They should look puffy and touch each other.
- The Cream Trick: Preheat your oven to 375°F (190°C). right before baking, warm the heavy cream slightly (don’t boil it) and pour it over the rolls, getting in between the gaps. This makes them incredibly moist.
- Bake: Bake for 20–25 minutes until golden brown. If they brown too quickly, tent them loosely with foil around the 15-minute mark.
- Make the Frosting: While they bake, beat the cream cheese and butter together until fluffy. Add the powdered sugar, vanilla, and salt. Beat until smooth.
- Frost and Eat: Let the cinnamon rolls cool for about 10 minutes, then spread the frosting generously over them while they are still warm. This allows some frosting to melt into the spirals. Serve immediately.
Nutrition


