
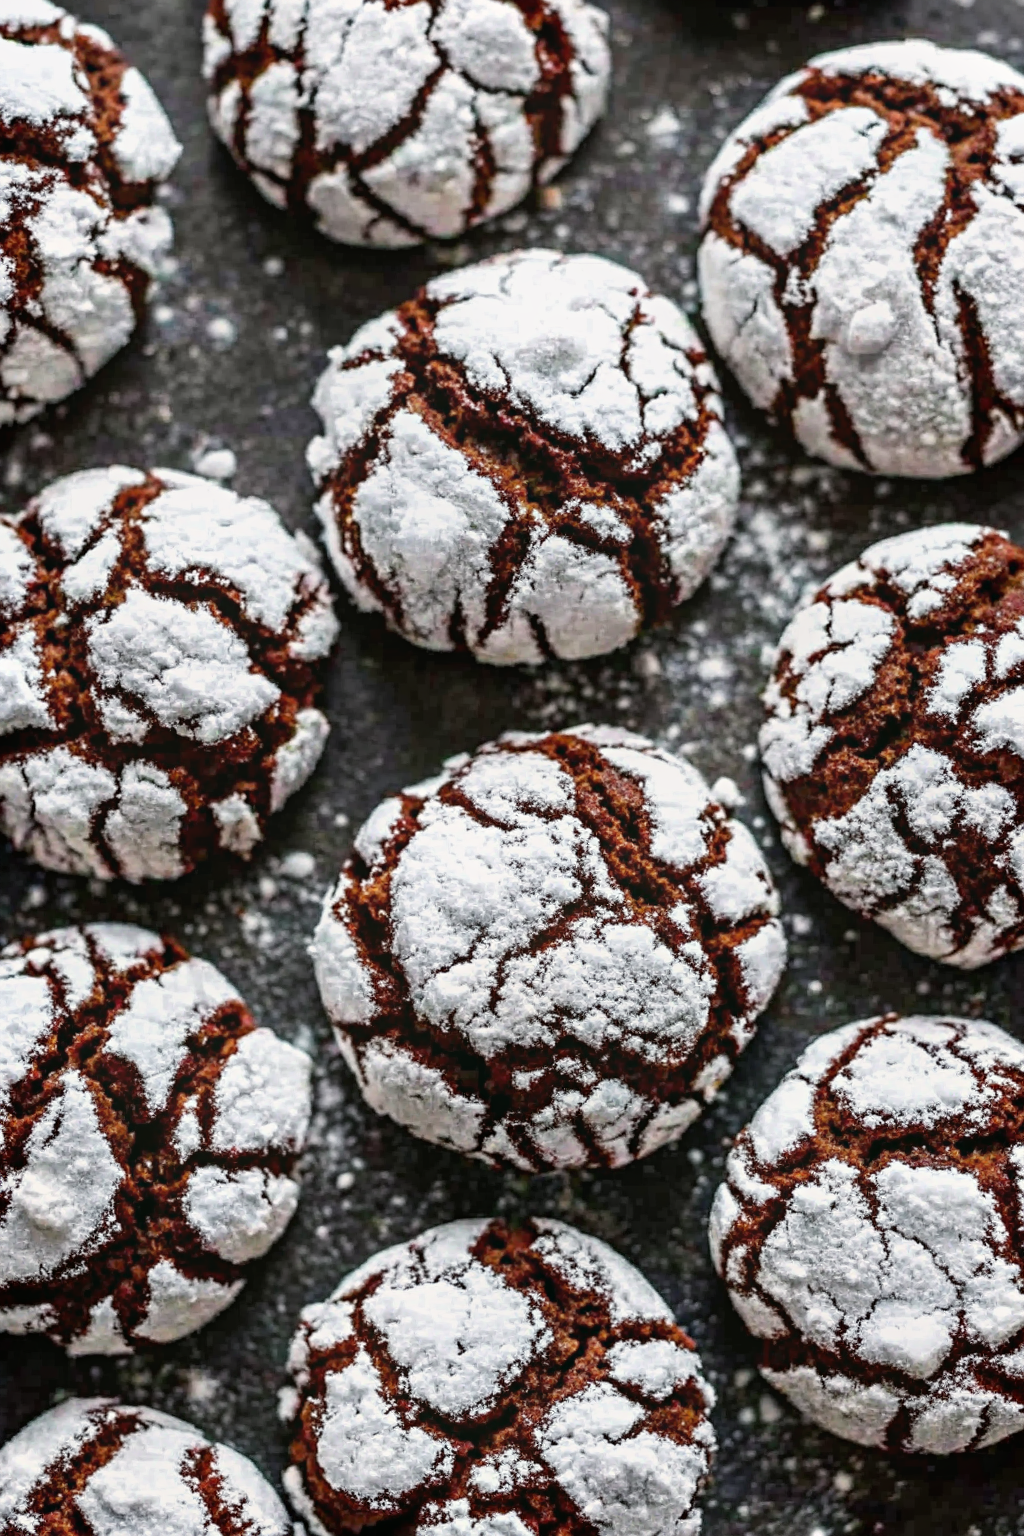
Let’s be honest for a second. Is there anything more festive than a cookie that looks like it just took a walk through a blizzard? I don’t think so. Chocolate crinkle cookies are the undisputed champions of the holiday cookie swap. They boast that dramatic black-and-white contrast, they possess a texture that lands perfectly between a cookie and a brownie, and they practically beg you to eat three of them in one sitting.
If you have ever bitten into a dry, cakey chocolate cookie that tasted like cardboard dust, I apologize on behalf of bakers everywhere. That is not what we are doing today. We are aiming for a fudgy, dense center with a crisp, sugary shell. We want a cookie that requires a glass of milk simply because it is so rich. Grab your mixing bowl and let’s get messy. And I do mean messy—you will get powdered sugar on your shirt. Consider it a badge of honor. 🙂
Why This Cookie Deserves Your Attention
You might ask, “Why make these when I could just make brownies?” Fair question. But can you hold a brownie in one hand while gesturing wildly at a holiday party without crumbling it all over the carpet? Probably not. These cookies offer the portability of a cookie with the soul of a fudge brownie.
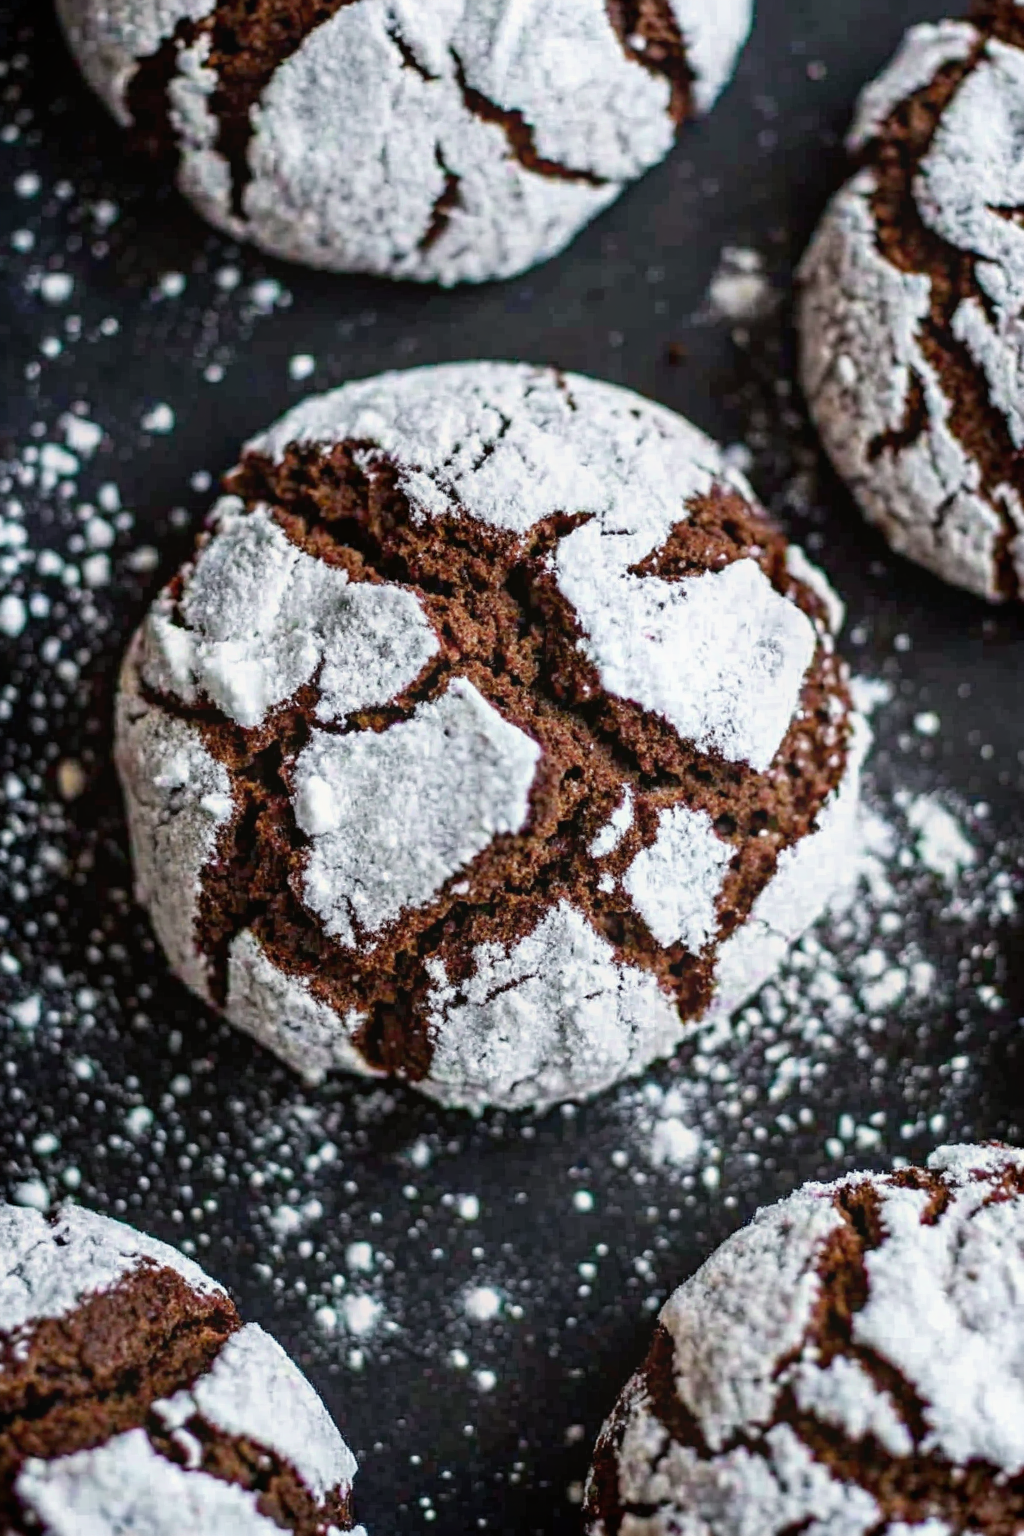
Plus, they look impressive with zero decorating skills required. You don’t need a piping bag. You don’t need royal icing. You just need a ball of dough and a bowl of sugar. The oven does the decorating for you. As the cookies bake and spread, that white coating cracks apart to reveal the dark chocolate fissures underneath. It’s culinary magic, and it makes you look like a professional baker even if you burned toast this morning.
The Ingredients: It’s All About the Cocoa
Since chocolate acts as the primary flavor here, you cannot hide behind sprinkles or frosting. The quality of your cocoa powder matters.
Natural vs. Dutch-Process Cocoa
This recipe works best with Dutch-process cocoa powder. Why? Because it has lower acidity and a darker color. It gives you that deep, Oreo-like look and a smoother, earthier chocolate flavor. Natural cocoa powder (like the standard Hershey’s tub) works too, but your cookies will appear lighter in color and taste slightly tangier.
If you want a flavor profile that rivals a rich classic cheesecake recipe, splurge on the good cocoa. It makes all the difference.
Oil vs. Butter
Here is where I might stir up some controversy. I prefer using vegetable oil instead of butter for crinkles. Butter contains water, which creates steam and leads to a puffier, cakier cookie. Oil is 100% fat. It ensures the center stays dense, moist, and chewy for days. If you absolutely crave that buttery flavor, you can swap it, but don’t say I didn’t warn you when they come out fluffy.
The Dough: Sticky Business
I need to warn you right now: this dough is sticky. Like, “glued to your fingers” sticky. When you first mix the flour, cocoa, oil, and eggs, it will resemble a thick, glossy brownie batter more than a cookie dough.
You must chill the dough.
This is not a suggestion; it is a command. If you try to roll warm dough into balls, you will end up with a chocolate mess, and they will spread into flat pancakes in the oven. You need to refrigerate the dough for at least 4 hours, or ideally overnight. The flour needs time to hydrate, and the fat needs time to solidify. This chilling step makes the dough manageable and ensures those beautiful, distinct cracks form during baking.
The Rolling Technique: The Two-Sugar Method
Have you ever baked crinkle cookies only to have the white sugar melt and disappear, leaving you with a sad, gray-looking blob? That happens because the moisture in the dough dissolves the powdered sugar.
I have a secret weapon for you. It’s the double-roll method.
- Roll in Granulated Sugar First: Take your chilled dough ball and roll it lightly in regular white granulated sugar.
- Roll in Powdered Sugar Second: Then drop it into the powdered sugar and coat it generously.
Why this works: The granulated sugar creates a barrier. It prevents the moisture in the dough from reaching the powdered sugar. This keeps your white coating bright, snowy, and crisp. It adds a lovely little crunch to the exterior, too. Try this trick, and you will never go back.
Baking: The Sweet Spot
Preheat your oven to 350°F (175°C). Line your baking sheets with parchment paper. Trust me, you do not want to scrub caramelized sugar off your pans later.
Scoop the dough into balls—I usually aim for about a tablespoon in size. Roll them in your sugars and place them on the sheet. Give them room to breathe; place them about 2 inches apart.
Bake them for 10 to 12 minutes.
The Touch Test
How do you know they are done? This is tricky because they are dark, so you can’t see them browning. Look at the edges. They should feel set and firm. The centers should still look slightly soft and underbaked. Pull them out now. They will continue to cook on the hot baking sheet for a few minutes. If you wait until the center feels firm in the oven, you will end up with crunchy rocks once they cool. We want fudgy, remember?
Serving Suggestions
These cookies command attention on any dessert table. However, they are rich. I suggest serving them alongside lighter options to balance the palate. If you are hosting a party, you might start with savory finger foods like loaded nachos to get the salty cravings out of the way before hitting the guests with this chocolate bomb.
They also pair exceptionally well with coffee or a cold glass of milk. The slight bitterness of coffee cuts right through the sweetness of the powdered sugar coating.
Troubleshooting: Why Do My Cookies Look Weird?
Even simple recipes can go sideways. Let’s troubleshoot some common chocolate crinkle cookie disasters.
“They didn’t crack!”
This usually means your oven wasn’t hot enough or you added too much flour. If the oven is too cool, the cookies spread slowly and the top doesn’t dry out fast enough to crack. If you added too much flour, the dough is too stiff to spread at all. Measure your flour by spooning it into the cup and leveling it off, rather than scooping directly from the bag.
“They are flat as a pancake.”
You probably didn’t chill the dough long enough. Or, your baking powder and baking soda are expired. Check your leavening agents! Also, never put cold dough on a hot baking sheet. If you are baking in batches, let the cookie sheet cool down completely before loading up round two.
“The sugar turned yellow/gray.”
You skipped the granulated sugar step, didn’t you? :/ Or, you put the cookies in an airtight container while they were still warm. The trapped steam melts the sugar. Let them cool completely on a wire rack before storing them.
Variations to Try
Once you master the classic, you can start experimenting. The base dough is robust enough to handle mix-ins.
- Peppermint Crunch: Add a teaspoon of peppermint extract to the dough. Fold in some crushed candy canes. This screams “Christmas.”
- Mocha: Add a tablespoon of instant espresso powder to the dry ingredients. It intensifies the chocolate flavor without making the cookies taste distinctly like coffee.
- Spicy Mexican Chocolate: Add a teaspoon of cinnamon and a pinch of cayenne pepper. The heat hits you at the end and warms you up.
- Chocolate Orange: Zest a whole orange into the sugar before creaming it with the oil/eggs. Citrus and chocolate are a sophisticated pair.
Storage: Keep Them Fresh
These cookies actually taste better the next day. The flavors meld, and the texture softens slightly.
Store them in an airtight container at room temperature for up to 5 days. If you need to stack them, place a sheet of wax paper between the layers so the snow-white tops don’t get smudged.
Freezing Instructions
You have two options for freezing.
- Freeze the Dough: Roll the dough into balls (without sugar) and freeze them on a tray. Once solid, transfer them to a freezer bag. When you want a treat, roll the frozen balls in sugar and bake. You just need to add an extra minute or two to the baking time.
- Freeze Baked Cookies: Bake them, cool them, and freeze them. They thaw quickly on the counter. IMO, eating them slightly frozen is a delicious experience in itself.
The Nostalgia Factor
For many of us, baking these cookies is a tradition. I remember standing on a chair in my grandmother’s kitchen, covered in flour, trying to roll perfectly round balls. Mine always looked like lumpy potatoes, but she baked them anyway.
That is the beauty of this recipe. It is forgiving. Even if your crinkles aren’t symmetrical, or your sugar coating is uneven, they will still taste amazing. It is a great recipe to make with kids because they love the tactile experience of rolling the dough in the “snow.”
A Note on Texture
I want to emphasize the texture one last time because it defines this cookie. You are looking for that contrast. If you serve these at a gathering where you also have a charcuterie board, watch how people gravitate toward the textures. They go from the crunch of a cracker to the soft creaminess of brie, and then they want that same satisfaction in dessert. The crunch of the sugar shell giving way to the soft center provides that exact sensory satisfaction.
Final Thoughts
Stop overthinking your holiday baking list. You don’t need to make intricate gingerbread houses or perfectly piped macarons. You need a reliable, delicious, chocolate-packed crowd-pleaser. Chocolate crinkle cookies fit that bill perfectly.
They use pantry staples. They freeze well. They look dramatic. And most importantly, they taste like a brownie and a cookie had a beautiful baby.
So, check your pantry for cocoa powder. Make sure you have enough eggs. Clear a spot in your fridge for the dough. Get baking. And when you inevitably inhale powdered sugar while laughing at how good they taste, just remember I told you so.
According to the baking scientists at King Arthur Baking, the secret to that dramatic appearance really does come down to the science of evaporation and surface drying, so trust the process and let the oven do the work!
Fudgy Chocolate Crinkle Cookies
Author: Prep: 20 minutes Cook: 10 minutes Total: 4 hours 30 minutesEquipment
- Electric hand mixer (or stand mixer)
- Large Baking Sheets
- Parchment paper
- Small Cookie Scoop (1 tablespoon size)
- Wire Cooling Rack
Ingredients
The Chocolate Dough:
- 1 cup unsweetened cocoa powder Dutch-process preferred for darker color
- 2 cups granulated sugar
- ½ cup vegetable oil makes them fudgier than butter!
- 4 large eggs room temperature
- 2 tsp vanilla extract
- 2 cups all-purpose flour
- 2 tsp baking powder
- ½ tsp salt
The Coating (The Double-Roll Method):
- ½ cup granulated sugar
- 1 cup powdered sugar confectioners’ sugar
Instructions
- Mix the Base: In a large bowl, mix the cocoa powder, 2 cups of granulated sugar, and vegetable oil. It will look gritty and sandy—that is normal!
- Add Wet Ingredients: Beat in the eggs one at a time, followed by the vanilla extract. The mixture should transform into a glossy, smooth batter.
- Add Dry Ingredients: In a separate small bowl, whisk together the flour, baking powder, and salt. Gradually stir this into the wet mixture just until no white streaks remain. Warning: The dough will be extremely sticky and soft, almost like brownie batter. Do not panic!
- The Big Chill: Cover the bowl tightly with plastic wrap and refrigerate for at least 4 hours (or overnight). This step is non-negotiable; if you skip it, your chocolate crinkle cookies will spread into flat pancakes.
- Preheat: When you are ready to bake, preheat your oven to 350°F (175°C). Line two baking sheets with parchment paper.
- Prep the Sugars: Set up two small bowls: one with the ½ cup granulated sugar and one with the powdered sugar.
- Scoop and Roll: Scoop the chilled dough into 1-inch balls (about a tablespoon).
- The Double Coating: Roll each ball lightly in the granulated sugar first, then roll it generously in the powdered sugar until it looks like a white snowball. This secret step keeps the white coating from melting away!
- Bake: Place the balls on the baking sheet spaced 2 inches apart. Bake for 10–12 minutes.
- Cool: The cookies are done when the edges look set but the centers still look soft and slightly underbaked. Let them cool on the baking sheet for 5 minutes before transferring to a wire rack.
Notes
- Oil vs. Butter: This recipe uses vegetable oil specifically to ensure the center stays fudgy and moist. Butter contains water and can make the cookies cakier.
- Don’t Overbake: These are dark cookies, so it’s hard to see them brown. Trust the timer! If you bake them until the center feels hard, they will be dry rocks once cooled. They should be soft when you pull them out.
- Dutch-Process Cocoa: For that deep, dark “Oreo” look, use Dutch-process cocoa. Regular natural cocoa works fine but will result in a lighter brown cookie.
- Storage: Store in an airtight container at room temperature for up to 5 days.
- Freezing: You can freeze the dough balls (without sugar) for up to 3 months. When the craving strikes, roll them in sugar and bake—just add an extra minute to the bake time.
Nutrition


