
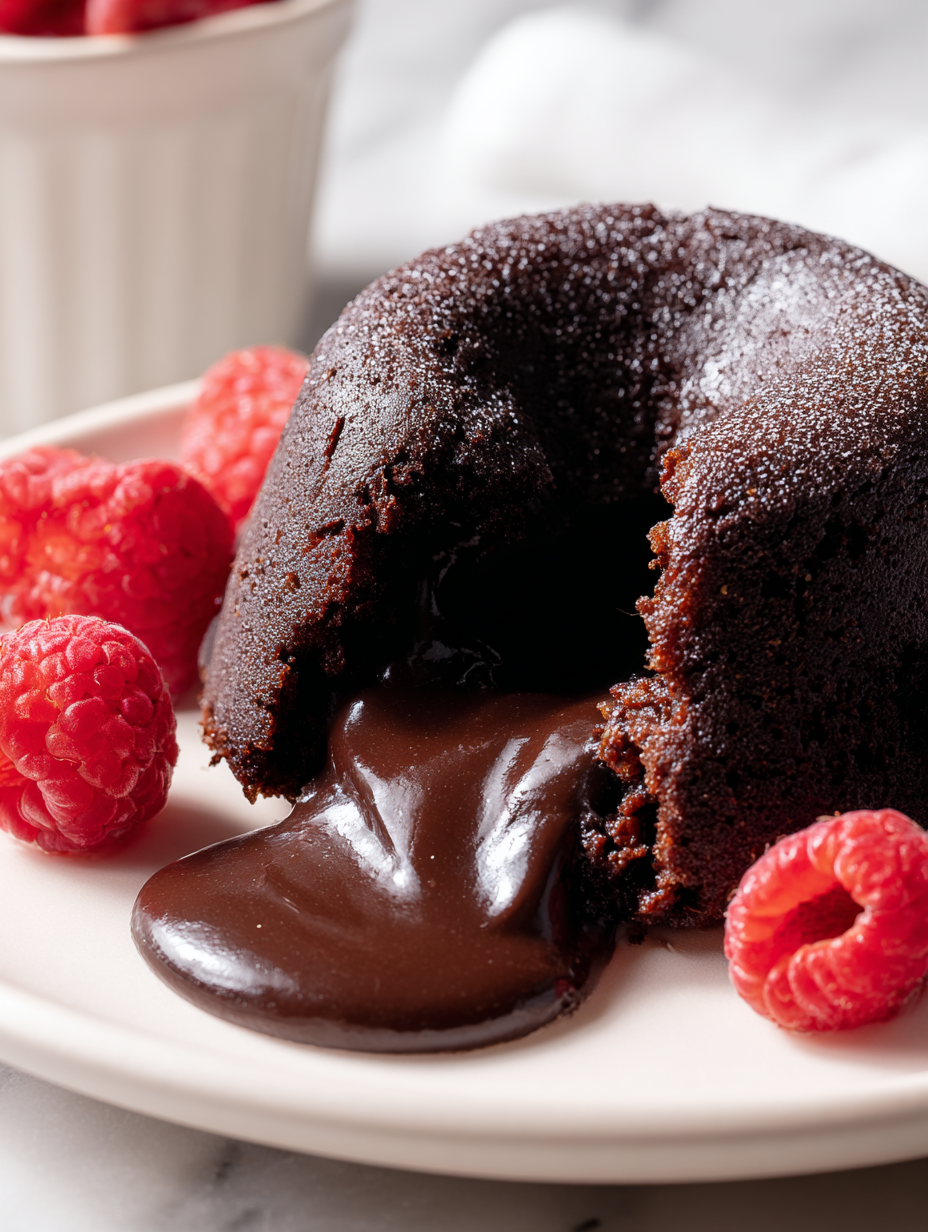
Let’s be real for a second. Is there anything more stressful yet incredibly satisfying than cutting into a Chocolate Fondant? You have that split second of panic where you think, “Did I just bake a dry muffin?” followed immediately by the relief of seeing that river of molten chocolate lava ooze out onto the plate. It is the culinary equivalent of defusing a bomb, but with a much tastier outcome.
I remember the first time I tried to make these. I watched a cooking show where a very angry British chef yelled at people for serving “raw cake.” I was terrified. I sat in front of my oven door like a guard dog, watching the timer count down. When I finally flipped one onto a plate and cut it open, I felt like a magician.
Here is the good news: Chocolate Fondant is actually one of the easiest high-end desserts you can make. It relies on timing and temperature, not complex skills. If you can melt chocolate and set a timer, you can do this. Forget the restaurant markup. We are doing this at home, and we are doing it better.
What Exactly Is a Chocolate Fondant?
You might hear people call this “Molten Lava Cake” or “Moelleux au Chocolat.” Essentially, it is a hybrid. It sits right in the sweet spot between a soufflé and a dense chocolate cake.
Unlike a soufflé, which relies on whipped egg whites to rise to teetering heights, a fondant relies on whole eggs and sugar for structure. The center stays liquid not because we inject it with sauce, but because we undercook it just enough. It sounds risky, I know. But when you nail that texture, nothing else compares.
The Ingredients: Quality Over Quantity
Since this recipe uses so few ingredients, there is nowhere to hide. If you use bad chocolate, you will have a bad fondant. It really is that simple.
The Chocolate Strategy
Put down the bag of semi-sweet chocolate chips. Those contain stabilizers meant to hold their shape in cookies. We want the opposite here. We want the chocolate to melt into a silky puddle.
Go for bar chocolate with a cocoa percentage between 60% and 70%. This gives you that deep, sophisticated chocolate flavor without being too bitter. If you go too dark (like 85%), the filling might seize up or taste chalky. If you go for milk chocolate, it becomes sickly sweet.
The Butter and Eggs
Use unsalted butter. This allows you to control the sodium level. You want to add a specific amount of flaky sea salt later to pop the flavor, rather than guessing how much salt the factory put in your butter stick.
For the eggs, room temperature works best. Cold eggs can shock the warm chocolate mixture, causing it to harden instantly. If you forgot to take them out of the fridge (we have all been there), just submerge them in a bowl of warm water for five minutes.
The Flavor Boosters
You need a pinch of salt. Salt makes chocolate taste more like chocolate. Also, a splash of vanilla rounds out the bitterness. If you keep a bottle of homemade vanilla extract in your pantry, use the good stuff here. It adds a floral back-note that elevates the whole dish.
Preparing Your Molds: The Most Crucial Step
I cannot stress this enough: Grease your ramekins.
Imagine pulling perfectly baked fondants out of the oven, smelling the rich cocoa air, and then realizing they are cemented to the ceramic. It is a tragedy :/. You end up eating it out of the ramekin with a spoon, which is delicious, but it lacks the dramatic presentation we want.
The Cocoa Dusting Trick:
- Brush softened butter (not melted!) all over the inside of your ramekins. Use vertical strokes up the sides. This guides the batter to rise evenly.
- Instead of dusting with flour, dust with cocoa powder.
- Why? Because flour leaves a white, dusty residue on your beautiful dark cake. Cocoa powder disappears into the surface.
Tap out the excess cocoa over the sink. You want a thin, even coating.
The Method: Step-by-Step
Let’s break down the process. We aren’t just mixing things; we are building an emulsion.
Melting the Base
Start by melting your butter and chocolate together. You can do this in a microwave in short 30-second bursts, stirring in between. Or, use a heatproof bowl set over a pot of simmering water (a bain-marie).
Warning: Do not let the water touch the bottom of the bowl. If the chocolate gets too hot, it burns and turns grainy. Once it melts, take it off the heat immediately. You want it warm, not piping hot.
The Egg Foam
While the chocolate cools slightly, grab another bowl. Whisk your eggs and sugar together. You don’t need to go crazy here, but you want the sugar to dissolve. Whisk until the mixture looks pale yellow and slightly thickened. This incorporates a little bit of air, giving the fondant its cake-like exterior.
The Marriage
Pour the chocolate mixture into the egg mixture. IMO, this is the best part visually. Watching the dark chocolate swirl into the pale eggs is mesmerizing. Whisk them together until you have a smooth, glossy, uniform batter.
Folding the Dry Ingredients
Sift your flour over the batter. Sifting removes lumps, and nobody wants a pocket of dry flour in their lava cake. Gently fold the flour in with a spatula.
Stop mixing the second you see no more white streaks. Over-mixing activates the gluten in the flour. Gluten makes things chewy. We want tender. If you over-mix, you get a rubbery muffin instead of a delicate fondant.
Baking: The Zone of Anxiety
Here is where nerves of steel come in handy. Preheat your oven to 400°F (200°C). Yes, high heat. We need the outside to set quickly while the inside remains liquid.
Divide the batter between your prepared ramekins. You can bake them immediately, or put them in the fridge for later. Note that if you bake from the fridge, you need to add a minute or two to the baking time.
The Visual Cues
Every oven is different. My oven runs hot; yours might run cool. So, rely on your eyes, not just the timer.
- 8 minutes: The top looks set but very jiggly. Too early.
- 10-12 minutes: The sides look firm and have pulled away slightly from the ramekin. The top has a dry crust but the center jiggle is roughly the size of a quarter. This is the sweet spot.
- 14+ minutes: The jiggle is gone. Congratulations, you made a very nice brownie.
Pro Tip: Bake one “tester” fondant first. Since ramekin sizes vary, sacrificing one cake to figure out the exact timing for your specific batch saves the rest of the dinner party.
The Flip: The Moment of Truth
Take the ramekins out of the oven. Let them rest for exactly one minute. This allows the structure to settle just enough that it won’t collapse, but keeps the center molten.
Now, the scary part.
- Place your serving plate upside down over the ramekin.
- Grab the ramekin with a towel (it’s hot!).
- Flip everything over in one confident motion.
- Wait five seconds.
- Gently lift the ramekin.
If you greased it well, it slides right out. If it sticks, give it a gentle tap. If it really sticks, serve it in the ramekin and pretend that was the plan all along. Confidence sells the dish.
Serving Suggestions
A Chocolate Fondant on a plate by itself looks a bit lonely. It needs a contrast. The fondant is hot, rich, and dark. You need something cold, creamy, and light to balance it.
Vanilla Bean Ice Cream is the classic choice for a reason. The way the cold ice cream melts into the warm chocolate sauce creates a sauce of its own. It rivals the richness of a classic cheesecake but brings that temperature contrast that cheesecake lacks.
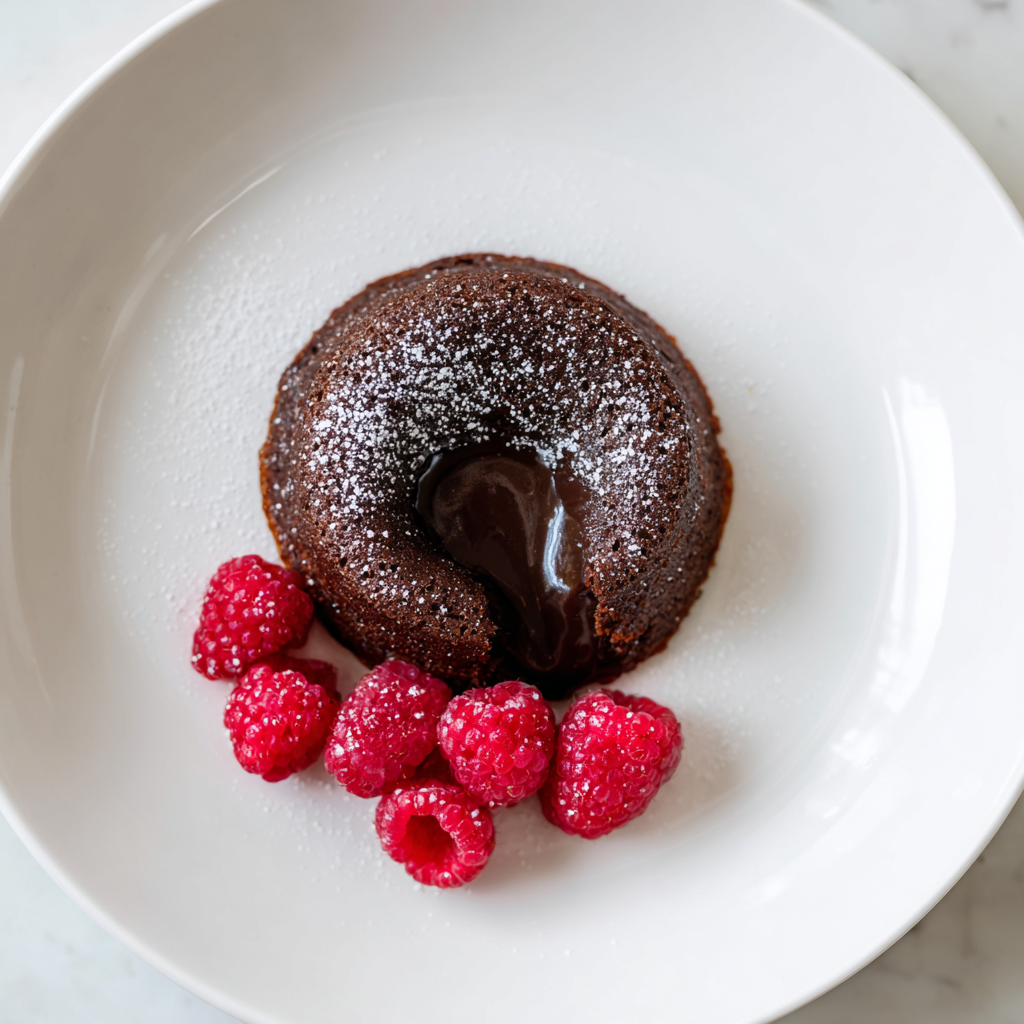
Fresh Berries: Raspberries or strawberries work best. The acidity cuts through the fat and sugar. Plus, the red berries look stunning against the dark chocolate.
Texture: Add a little crunch. A hazelnut praline, some crushed pistachios, or even a tuile cookie adds a necessary textural break from the softness.
Troubleshooting Common Disasters
Did things go wrong? Let’s diagnose the autopsy.
Problem: The center is cooked through.
Cause: You baked it too long, or your oven was too hot.
Solution: Serve it anyway. It’s still delicious warm chocolate cake. Next time, shave 2 minutes off the timer.
Problem: It collapsed into a puddle when I flipped it.
Cause: Under-baked. The outer shell wasn’t thick enough to support the liquid weight.
Solution: Scoop it into a bowl and call it “Deconstructed Chocolate Pudding.” It still tastes amazing.
Problem: It tastes like scrambled eggs.
Cause: You added the eggs while the chocolate butter mix was too hot. You literally cooked the eggs in the batter.
Solution: Be patient. Let the chocolate cool until it is just warm to the touch before adding eggs.
Make-Ahead Magic
Here is why restaurants love this dish: you can prep it in advance.
You can make the batter, fill the ramekins, and put them in the fridge up to 24 hours before you plan to bake. This is perfect for dinner parties. You do the hard work in the afternoon, clean up the mess, and then just pop them in the oven while you clear the dinner plates.
Can you freeze them?
Yes! You can freeze the unbaked batter in the ramekins. When the craving hits, bake them straight from frozen. Just add about 3 to 5 minutes to the baking time. It is dangerous knowledge to have, realizing you can have a fresh Chocolate Fondant on a Tuesday night in 15 minutes.
Variations on the Classic
Once you master the basic dark chocolate version, you can start playing with flavors.
- Peanut Butter Core: Fill the ramekin halfway, drop a teaspoon of peanut butter in the center, and cover with more batter. You get a molten peanut butter chocolate explosion.
- Salted Caramel: Same technique as above, but with a frozen ball of caramel sauce.
- Mocha: Add a teaspoon of espresso powder to the melting chocolate.
- Spicy: Add a pinch of cayenne pepper or cinnamon. It warms the throat and highlights the cocoa notes.
Why We Love It
There is something undeniably romantic about this dessert. It feels personal. You have your own individual cake. It isn’t a slice cut from a larger whole; it was made specifically for you.
Also, chocolate contains compounds that trigger endorphins. According to BBC Good Food, dark chocolate can actually improve your mood. So, really, eating this is just good mental hygiene.
Final Thoughts
Do not let the reputation of the Chocolate Fondant scare you. It is just ingredients in a bowl. The worst-case scenario is a delicious chocolate mess, and that is not a bad problem to have.
Invite some friends over. Make the batter ahead of time. Pop a bottle of wine. When you serve these, and everyone goes silent as they take that first bite, you will know it was worth the effort. You could even drizzle some chocolate ganache on top if you want to go absolutely overboard with the chocolate factor.
Get your ramekins ready. Preheat that oven. You are about to make the best dessert of your life.
The Ultimate Chocolate Fondant
Author: Prep: 15 minutes Cook: 12 minutes Total: 28 minutesIngredients
The Molds
- 1 tablespoon unsalted butter softened (for greasing)
- 1 tablespoon cocoa powder for dusting
The Fondant Batter
- 1/2 cup 113g unsalted butter
- 4 oz 113g high-quality dark chocolate (60–70% cocoa), chopped
- 2 large eggs
- 2 large egg yolks
- 1/4 cup 50g granulated sugar
- 1 teaspoon vanilla extract
- 1 pinch fine sea salt
- 2 tablespoons all-purpose flour
Instructions
- Prep the Oven and Ramekins:
- Preheat your oven to 400°F (200°C). Thoroughly grease 4 ramekins with the softened butter. Pro Tip: Use upward brush strokes to help the cakes rise! Dust the insides with cocoa powder and tap out the excess. Place the ramekins on a baking sheet.
- Melt the Chocolate Base:
- In a heatproof bowl set over simmering water (or in the microwave in 30-second bursts), melt the butter and chopped Chocolate Fondant base together. Stir until glossy and smooth. Remove from heat and let it cool slightly for about 5 minutes.
- The Egg Mixture:
- In a separate medium bowl, whisk the whole eggs, egg yolks, sugar, vanilla, and salt. Beat them vigorously until the mixture is pale and slightly thickened. This incorporates air for that cakey exterior.
- Combine:
- Pour the melted chocolate mixture into the egg mixture. Whisk gently until fully combined and uniform.
- Add the Flour:
- Sift the flour directly over the batter. Gently fold it in with a spatula just until the white streaks disappear. Do not over-mix, or the texture will become rubbery!
- Bake:
- Divide the batter evenly among the prepared ramekins. Bake for 10–12 minutes.
- The Check: The sides should be firm, but the center (about the size of a quarter) should still jiggle when you shake the pan. If it’s solid, it’s a brownie. If it’s liquid all over, it’s raw soup.
- The Flip:
- Remove from the oven and let them rest for exactly 1 minute. Run a thin knife around the edge if needed. Place a serving plate upside down over the ramekin, flip tight, and gently lift the ramekin off.
- Serve:
- Serve immediately while hot! Top with a scoop of vanilla ice cream or fresh berries
Notes
- Make Ahead: You can fill the ramekins and refrigerate them for up to 24 hours before baking. Just add 1–2 minutes to the baking time since the batter is cold.
- Freezer Friendly: Freeze the unbaked fondants in the ramekins. Bake straight from frozen at 400°F for about 15–17 minutes.
- Chocolate Choice: Since there are so few ingredients, use the best bar chocolate you can find. Avoid chocolate chips as they contain stabilizers that affect the melt.
- Oven Variance: All ovens are different. If you are making these for a dinner party, bake one “test” fondant first to nail the timing for your specific oven


