
Let’s get one thing straight immediately. You do not need a degree from a French culinary school to make Chocolate Truffles. You do not even need a thermometer, a marble slab, or those fancy little dipping forks that professional chocolatiers use to make us feel inferior.
If you can boil cream and chop a chocolate bar, you can make truffles. That is the honest truth.
I remember the first time I bought a box of artisan truffles for a dinner party. I spent an embarrassing amount of money—basically the equivalent of a car payment—for twelve small spheres of chocolate. I took one bite, looked at the bill, and thought, “I could probably figure this out.”
And I did. Now, I am going to show you exactly how to do it. We are going to demystify the process, banish the fear of “seizing” chocolate, and get your kitchen smelling like a heaven made of cocoa.
What Exactly Is a Truffle?
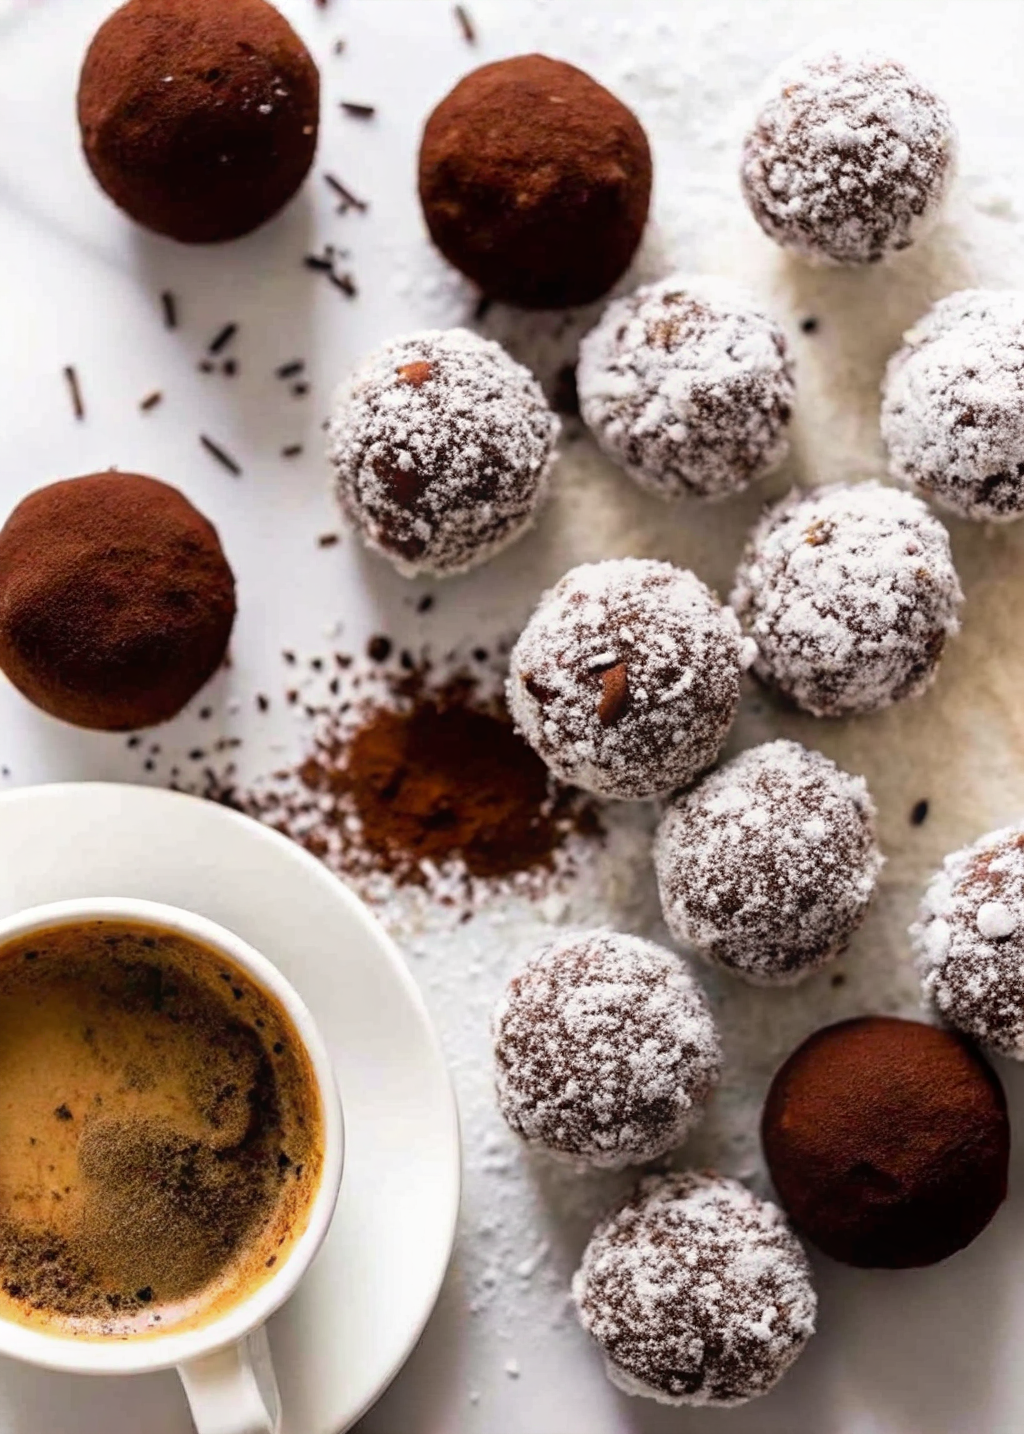
Before we start melting things, let’s define what we are making. A classic truffle consists of ganache—a mixture of chocolate and heavy cream—rolled into a ball and coated in cocoa powder. That’s it.
Why do we call them truffles? They supposedly resemble the expensive savory fungus that pigs dig up in the French countryside. Personally, I think these taste much better than mushrooms, but I respect the history.
The beauty of this recipe lies in its simplicity. Because you only use two main ingredients, the quality of those ingredients matters immensely. You cannot hide behind cups of sugar or flour here.
The Chocolate: Do Not Skimp
I need you to listen closely because this is the hill I will die on. Do not use chocolate chips.
I know, they are convenient. They are sitting in your pantry right now. But chocolate chips contain stabilizers designed to help them hold their shape in the oven. You want your truffle to melt in your mouth, not chew like a candle.
Go to the baking aisle and buy high-quality chocolate bars. I usually grab brands like Ghirardelli, Lindt, or Guittard.
Choosing Your Percentage
Which chocolate should you pick? This depends on your palate.
- Semi-Sweet (around 60% cocoa): This is the gold standard. It balances sweetness with deep chocolate flavor.
- Bittersweet (70% and up): If you love dark chocolate, go for this. It yields a rich, intense truffle that pairs perfectly with coffee.
- Milk Chocolate: You can use it, but it’s tricky. It contains more dairy and sugar, so you need to adjust your cream ratios, or the truffles won’t set. For beginners, I recommend sticking to semi-sweet or dark.
The Cream: Fat is Your Friend
This is not the time to look at calories. You need heavy whipping cream. Half-and-half or milk simply won’t work because they lack the fat content required to emulsify with the cocoa butter.
The fat gives the truffle that luxurious, velvety texture that makes your eyes roll back in your head. If you try to cut corners here, you will end up with chocolate soup. :/
The Method: Step-by-Step Success
Let’s break this down. The process is fast, but it requires patience during the cooling phase.
1. The Chop
Take your chocolate bars and chop them finely. I mean finely. You want shards, not chunks. If you leave big pieces, the hot cream won’t melt them completely, and you will end up with lumpy ganache. A serrated knife works wonders for this. Place the chopped chocolate in a heat-proof glass or metal bowl.
2. The Simmer
Pour your heavy cream into a small saucepan. If you want a glossy finish, add a tablespoon of butter. Heat it over medium heat just until it starts to simmer.
You want to see little bubbles around the edges. Do not let it come to a rolling boil. If the cream gets too hot, it can scorch the chocolate or cause the fat to separate later.
3. The Pour and Wait
Pour the hot cream over your chopped chocolate. Make sure all the chocolate is submerged.
Now, do the hardest thing: do nothing.
Let it sit for five minutes. Do not touch it. Do not stir it. If you stir immediately, you cool the mixture down too fast, and the chocolate won’t melt evenly. Just walk away.
4. The Emulsion
After five minutes, grab a whisk or a rubber spatula. Start stirring gently in small circles in the center of the bowl.
At first, it will look like a muddy mess. You might panic. Keep stirring. Suddenly, like magic, the cream and chocolate will come together into a dark, glossy, thick liquid. It is one of the most satisfying sights in the kitchen.
FYI, if you want to add flavorings like vanilla extract or a splash of liqueur, do it now.
5. The Chill
Your ganache needs to firm up before you can roll it. Cover the bowl with plastic wrap. Press the plastic directly onto the surface of the chocolate to prevent a “skin” from forming.
Place the bowl in the fridge. You need to chill it for about 1 to 2 hours. It should feel firm like clay, not rock-hard.
Rolling: Embrace the Mess
Here is where things get tactile. You need to scoop the ganache and roll it into balls.
I use a small melon baller or a teaspoon to get consistent sizes. Scoop out a mound, drop it into your hand, and roll it quickly into a sphere.
Pro Tip: Your hands are warm. Chocolate melts. If you hold the truffle for too long, it will melt all over your palms. Roll quickly and set it down. If the mixture gets too soft, pop the bowl back in the fridge for 10 minutes.
After rolling, I like to let them sit for a minute before coating. This makes them slightly tacky so the toppings stick better.
Flavor Variations: Get Creative
Plain chocolate is delicious, but customizing your truffles is where the fun begins. You can really show off your personality here.
- The Purist: Add a pinch of sea salt to the ganache. Salt wakes up the cocoa flavor.
- The Coffee Lover: Steep whole coffee beans in your cream while heating it, then strain them out before pouring over the chocolate. This pairs amazingly well with gingerbread biscotti for an afternoon pick-me-up.
- The Holiday Twist: Add a drop of peppermint extract. If you love chocolate peppermint brownies, this variation will be your new favorite thing.
- Boozy Truffles: Stir in a tablespoon of bourbon, rum, or Baileys after the ganache comes together. Just don’t add too much liquid, or they won’t set.
The Coating: The Finishing Touch
The traditional coating is unsweetened cocoa powder. It provides a bitter contrast to the sweet center and makes them look rustic.
But why stop there?
- Toasted Nuts: Roll them in finely chopped hazelnuts, pistachios, or pecans. The crunch adds a fantastic texture contrast.
- Sprinkles: Festive and fun. Use red and white sprinkles if you want them to match a batch of candy cane cookies on a holiday platter.
- Freeze-Dried Fruit: Pulverize freeze-dried raspberries or strawberries into a powder. The bright red dust looks stunning against the dark chocolate.
- Coconut: Roll them in shredded coconut for a tropical vibe.
Troubleshooting: Why Did My Ganache Fail?
Even with a simple recipe, things can go sideways. Let’s troubleshoot common disasters so you don’t have to cry over spilled milk (or cream).
“My ganache is grainy.”
This usually means the chocolate seized. This happens if a tiny bit of water got into the bowl (steam is the enemy) or if you overheated the chocolate. Unfortunately, you cannot un-seize chocolate easily. You might have to start over.
” The oil separated from the chocolate.”
This creates a greasy, slick pool on top of your ganache. It means the emulsion broke, usually because the mixture got too hot or you stirred too aggressively.
The Fix: Add a teaspoon of cold heavy cream and stir gently. often, this brings the emulsion back together.
“It won’t harden.”
You likely used too much cream or didn’t use chocolate with a high enough cocoa butter content.
The Fix: Melt more chocolate and stir it into the warm ganache. If it’s already cold, you might just have a delicious chocolate dip instead of truffles. Grab some strawberries and enjoy your mistake.
Tempering: Do You Need To?
You might see recipes calling for dipping truffles in tempered chocolate to create a hard shell.
Here is my honest opinion: Skip it.
Tempering chocolate is a precise scientific process that involves heating and cooling chocolate to specific temperatures to align crystal structures. If you mess it up, the chocolate looks dull and streaky.
For a home baker, rolling them in cocoa or nuts is easier, faster, and honestly, just as delicious. We are going for “rustic elegance,” not “factory precision.”
Storage and Gifting
Chocolate Truffles are essentially dairy products, so you need to treat them with care.
- Fridge: They will last for up to two weeks in an airtight container in the refrigerator.
- Freezer: Yes, you can freeze them! They keep for up to three months. Just let them thaw in the fridge overnight before eating.
- Room Temperature: If you leave them out on the counter, eat them within 2-3 days. Also, if your house is warm, they will get soft.
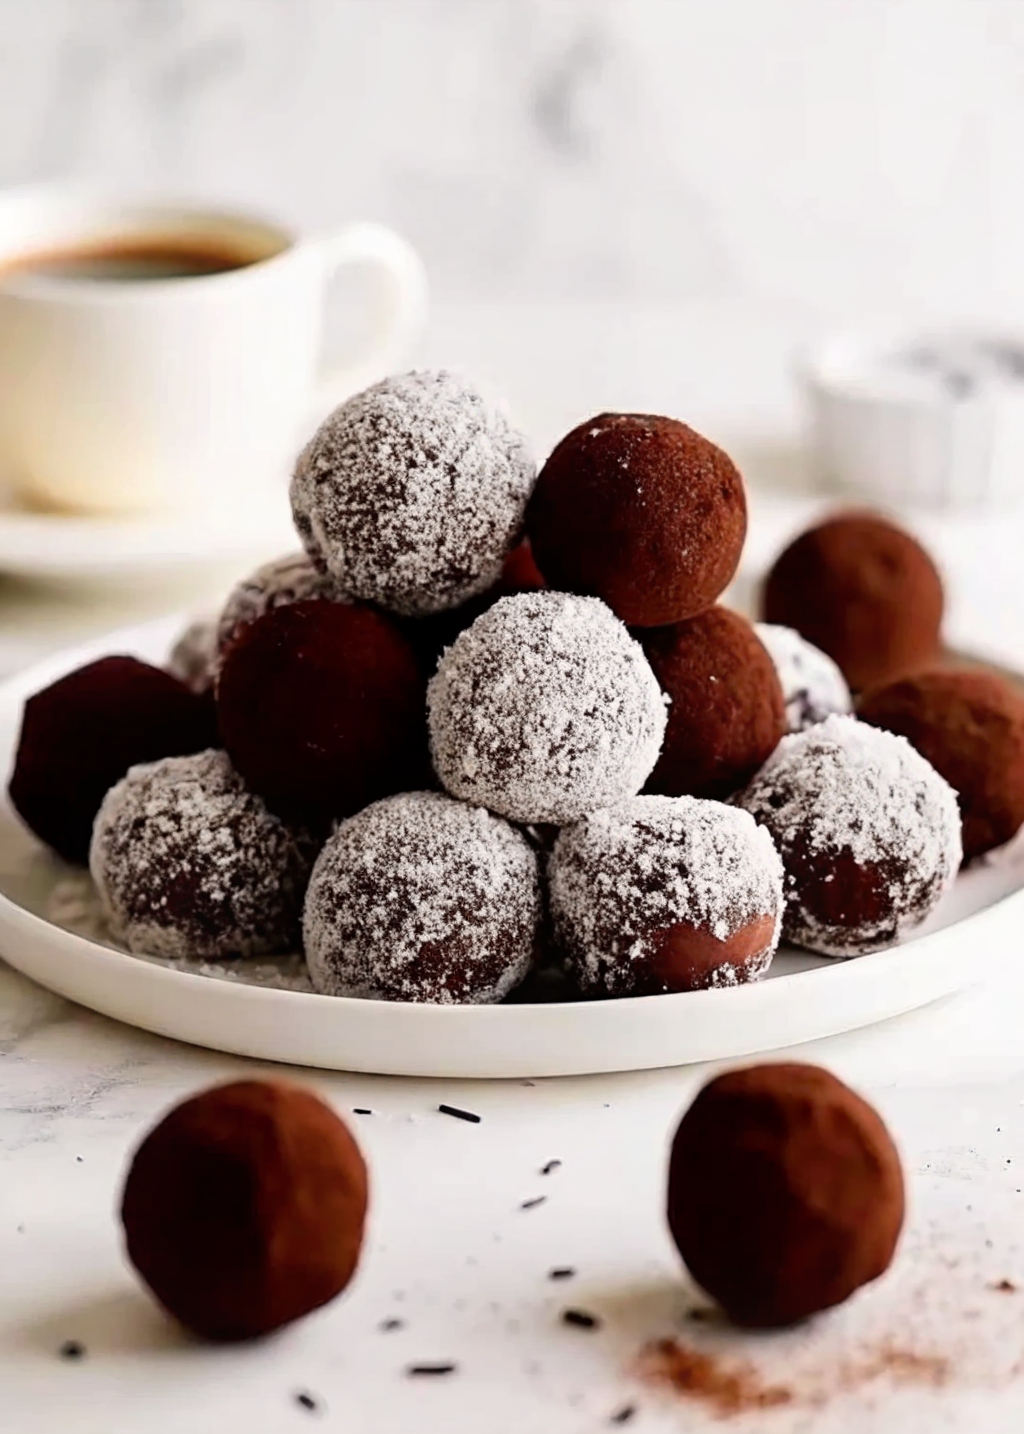
For gifting, place each truffle in a mini paper liner (like a tiny cupcake wrapper). It makes them look professional and keeps them from sticking together. Put them in a tin or a small box tied with a ribbon. I give these away every Christmas, and people act like I handed them gold bullion.
Why Homemade Beats Store-Bought
When you buy mass-produced truffles, check the label. You will see vegetable oils, corn syrup, and artificial flavors. Manufacturers use these to extend shelf life and cut costs.
When you make them at home, you taste the difference immediately. The mouthfeel is cleaner. The chocolate flavor is purer. Plus, you control the sweetness.
I also love the meditative quality of making them. The stirring, the rolling, the coating—it forces you to slow down. In a world that moves a mile a minute, taking an hour to focus on chocolate is a form of self-care. IMO, the cleanup is worth the mental break.
A Quick Note on Science
If you are a nerd like me and want to understand the deep chemistry of why cream and chocolate form a stable emulsion, Serious Eats has a fantastic breakdown of the ratios and science behind ganache. It’s fascinating stuff if you want to geek out, but absolutely not required to make a tasty treat.
Final Thoughts
I hope you feel ready to tackle this. Don’t let the fancy name scare you. Chocolate Truffles are just a fancy way of saying “delicious balls of chocolate and cream.”
Start with a small batch. Experiment with the coatings. Maybe eat half the ganache with a spoon before you even get to the rolling stage (I won’t judge).
Once you master this basic technique, you will have a secret weapon in your dessert arsenal that works for birthdays, anniversaries, or just a random Tuesday when you need a chocolate fix.
So, go buy the good chocolate. You deserve it.
Happy rolling!
Easy Homemade Chocolate Truffles
Author: Prep: 20 minutes Cook: 5 minutes Total: 2 hours 25 minutesEquipment
- Sharp serrated knife
- Heat-proof glass or metal bowl
- Small saucepan
- Small saucepan
- Small melon baller or teaspoon
- Parchment paper
Ingredients
The Ganache
- 8 oz high-quality semi-sweet or bittersweet chocolate bar do not use chips!
- ½ cup heavy whipping cream
- ½ teaspoon pure vanilla extract optional
- 1 pinch sea salt optional, but recommended
- 1 tablespoon unsalted butter softened (optional, for extra shine
The Coatings
- ¼ cup unsweetened cocoa powder classic choice
- ¼ cup finely chopped nuts hazelnuts, pistachios, or pecans
- ¼ cup sprinkles or crushed candy canes
- ¼ cup freeze-dried fruit powder raspberry or strawberry
Instructions
- Chop the Chocolate: Take your chocolate bar and chop it into very fine shards using a serrated knife. The finer you chop it, the more evenly it will melt. Place the chocolate in a medium heat-proof bowl.
- Heat the Cream: Pour the heavy whipping cream into a small saucepan over medium heat. Watch it closely. You want it to reach a gentle simmer where small bubbles appear around the edges. Do not let it come to a rolling boil.
- Combine and Wait: Pour the hot cream immediately over the chopped chocolate. Ensure all the chocolate is submerged. Now, step away! Let the mixture sit undisturbed for 5 minutes. This allows the heat to penetrate the chocolate gently.
- Emulsify: After 5 minutes, add the vanilla, salt, and butter (if using). Using a whisk or spatula, gently stir the mixture in small circles starting from the center. It will look messy at first, but keep stirring until it transforms into a glossy, smooth, dark ganache.
- Chill: Cover the bowl with plastic wrap, pressing the plastic directly onto the surface of the chocolate to prevent a skin from forming. Refrigerate for 1 to 2 hours, or until the mixture is firm enough to scoop (like the texture of clay).
- Scoop and Roll: Line a baking sheet with parchment paper. Use a melon baller or teaspoon to scoop out small mounds of ganache. Roll them quickly between your palms to form spheres. (If the mixture gets too sticky, wash your hands with cold water or pop the bowl back in the fridge).
- Coat: Immediately roll the sticky truffle in your topping of choice—cocoa powder, nuts, or sprinkles.
- Set: Place the finished Chocolate Truffles back in the fridge for 10 minutes to firm up before serving
Notes
- Chocolate Quality: Since there are so few ingredients, the quality really matters. Avoid chocolate chips as they contain stabilizers that prevent them from melting smoothly. Use bars like Ghirardelli, Lindt, or Guittard.
- Seizing: Ensure your bowl and utensils are completely dry. Even a single drop of water can cause the chocolate to “seize” and become grainy.
- Flavor Twists: Feel free to stir in 1 tablespoon of liqueur (like Baileys, rum, or bourbon) when you add the vanilla for a boozy kick.
- Storage: Store these truffles in an airtight container in the refrigerator for up to 2 weeks. For the best flavor and texture, let them sit at room temperature for 10 minutes before eating.
Nutrition


