
Let’s be real for a moment. You didn’t click on this because you want a kale smoothie. You are here because you crave the creamy, savory, bite-sized perfection that is the deviled egg. There is something almost magical about them. You walk into a party, spot that dimpled platter, and suddenly you’ve eaten four of them before you’ve even said hello to the host. It’s a phenomenon.
I have a serious obsession with deviled eggs. They are the first thing I look for at a potluck and the first thing I judge if they taste store-bought. A truly great deviled egg requires more than just mashing yolks with mayonnaise. It requires technique, the right balance of acid, and a little bit of love.
If you have ever struggled with shells that refuse to peel or filling that tastes like bland paste, you are in the right place. We are going to break down the science, the art, and the secrets to making the absolute best eggs of your life. Grab a pot of water, because we have some cooking to do.
The Foundation: Boiling the Perfect Egg
You cannot build a house on a shaky foundation, and you cannot make great deviled eggs with rubbery whites and green, chalky yolks. We need to talk about the boil. Or rather, the lack of boiling.
The “Green Ring of Death”
We have all seen it. That gray-green ring surrounding the yolk looks unappetizing and smells like sulfur. That ring screams “overcooked!” It happens when the iron in the yolk reacts with the sulfur in the white due to prolonged high heat. We want sunny, bright yellow yolks with a creamy texture.
My “Hot Start” Method
Through years of trial and error (and many mangled eggs), I have found the “hot start” method works best for easy peeling.
- Boil the water first. Fill a pot with an inch or two of water and bring it to a rolling boil.
- Lower the heat. Drop it to a simmer so the eggs don’t crack when they hit the water.
- Add the eggs. Gently lower them in.
- Crank it back up. Cover the pot and set a timer for exactly 11 minutes for hard-boiled (but still tender) yolks.
Why does this work? Dropping cold eggs into hot water shocks the membrane, separating it from the shell. If you start with cold water and let them boil up together, the membrane fuses to the shell, and you end up peeling away half the egg white. IMO, the hot start is the only way to go.
The Ice Bath is Non-Negotiable
The moment your timer goes off, you must transfer those eggs into a bowl of ice water. Do not just run them under the tap. You need to shock them cold immediately. This stops the cooking process instantly, ensuring that yolk stays yellow and creamy. Leave them in the ice bath for at least 15 minutes.
The Peeling Nightmare
We need to address the elephant in the room. Peeling eggs can drive a sane person to madness. You pick at a tiny corner, and suddenly the shell takes a chunk of the white with it. Now your egg looks like the surface of the moon.
Here is the secret: Use old eggs.
Fresh farm eggs are delicious for frying, but they are terrible for boiling. As an egg ages, the air pocket inside expands, and the pH of the white changes, making it less sticky. I buy my eggs a week before I plan to make deviled eggs. Let them sit in the fridge and age gracefully.
If you end up with a few ugly ducklings despite your best efforts, don’t panic. Those mangled whites become the chef’s snack. Or, you can chop them up and turn them into an egg salad. Waste not, want not! 🙂
The Filling: The Magic Ratio
Now that we have smooth, peeled whites, we slice them in half. Wipe your knife between cuts to keep the yolks from smearing all over the whites. Pop the yolks into a bowl and get ready to mix.
Texture Matters
Do not just mash the yolks with a fork. I mean, you can, but do you want lumps? No. You want a filling so smooth it looks like silk. I use a hand mixer or even a food processor to whip the yolks. It introduces air, making the filling light and fluffy rather than dense and heavy.
The Holy Trinity of Ingredients
You can get fancy later, but you need to master the classic base first.
- Mayonnaise: Use the real stuff. Full fat. This is not the time for “light” versions or, heaven forbid, that sweet salad dressing spread. You need the richness.
- Mustard: Yellow mustard gives you that classic tang. Dijon adds a bit of sophistication and spice. I usually do a mix of both.
- The Secret Acid: This is where most people fail. Mayonnaise and yolks are pure fat. You need acid to cut through that richness. A splash of white vinegar, lemon juice, or my personal favorite—pickle juice—wakes up the flavor.
Start with less mayo than you think you need. You can always add more, but you can’t take it out. You want a structure that holds its shape when piped, not a runny soup.
Leveling Up Your Flavor Game
Once you nail the classic recipe, you can start experimenting. Deviled eggs are essentially a blank canvas for flavor.
The Bacon & Jalapeño Kick
Everything tastes better with bacon. Fry up some crispy bacon and crumble it finely. Mix half into the filling and save the rest for a garnish. Add some finely diced pickled jalapeños for heat. The crunch of the bacon against the creamy filling creates a texture contrast that keeps people coming back for more. If you serve these alongside other easy appetizer recipes, I guarantee the eggs will disappear first.
The “Everything Bagel” Egg
This trend took over the internet for a reason. Mix some cream cheese into your yolk mixture for extra stability and tang. Then, top the finished eggs with a generous sprinkle of Everything Bagel seasoning. It adds crunch, garlic, and onion notes without the hassle of chopping veggies.
The Smoky Chipotle
Swap the yellow mustard for a little adobo sauce from a can of chipotles. Add a dash of smoked paprika and a squeeze of lime. It gives the eggs a southwestern flair that pairs perfectly with tacos or BBQ.
Presentation: Piping vs. Spooning
How you get the filling back into the egg matters. We eat with our eyes first.
If you use a spoon, you inevitably get filling on the rim of the egg white, and it looks a bit messy. It tastes fine, but we want these to look impressive.
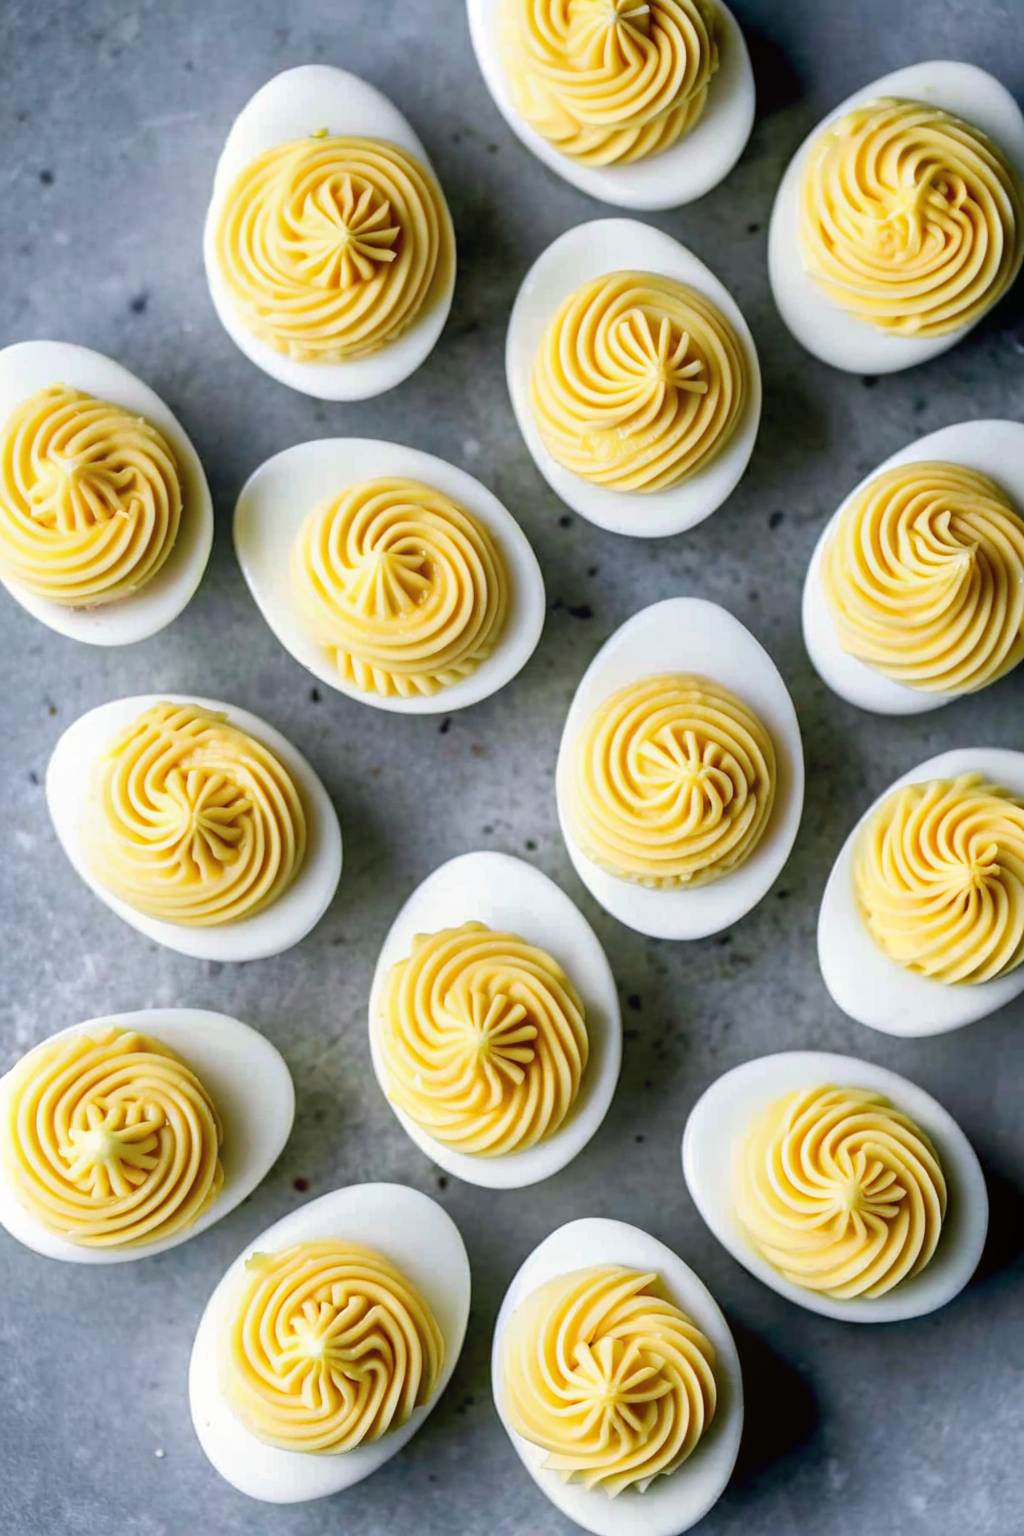
Use a piping bag. You don’t need a professional pastry set. Grab a gallon-sized Ziploc bag. Scoop your filling into one corner. Twist the top to push the filling down, and snip about half an inch off the corner. Voila! You have a disposable piping bag.
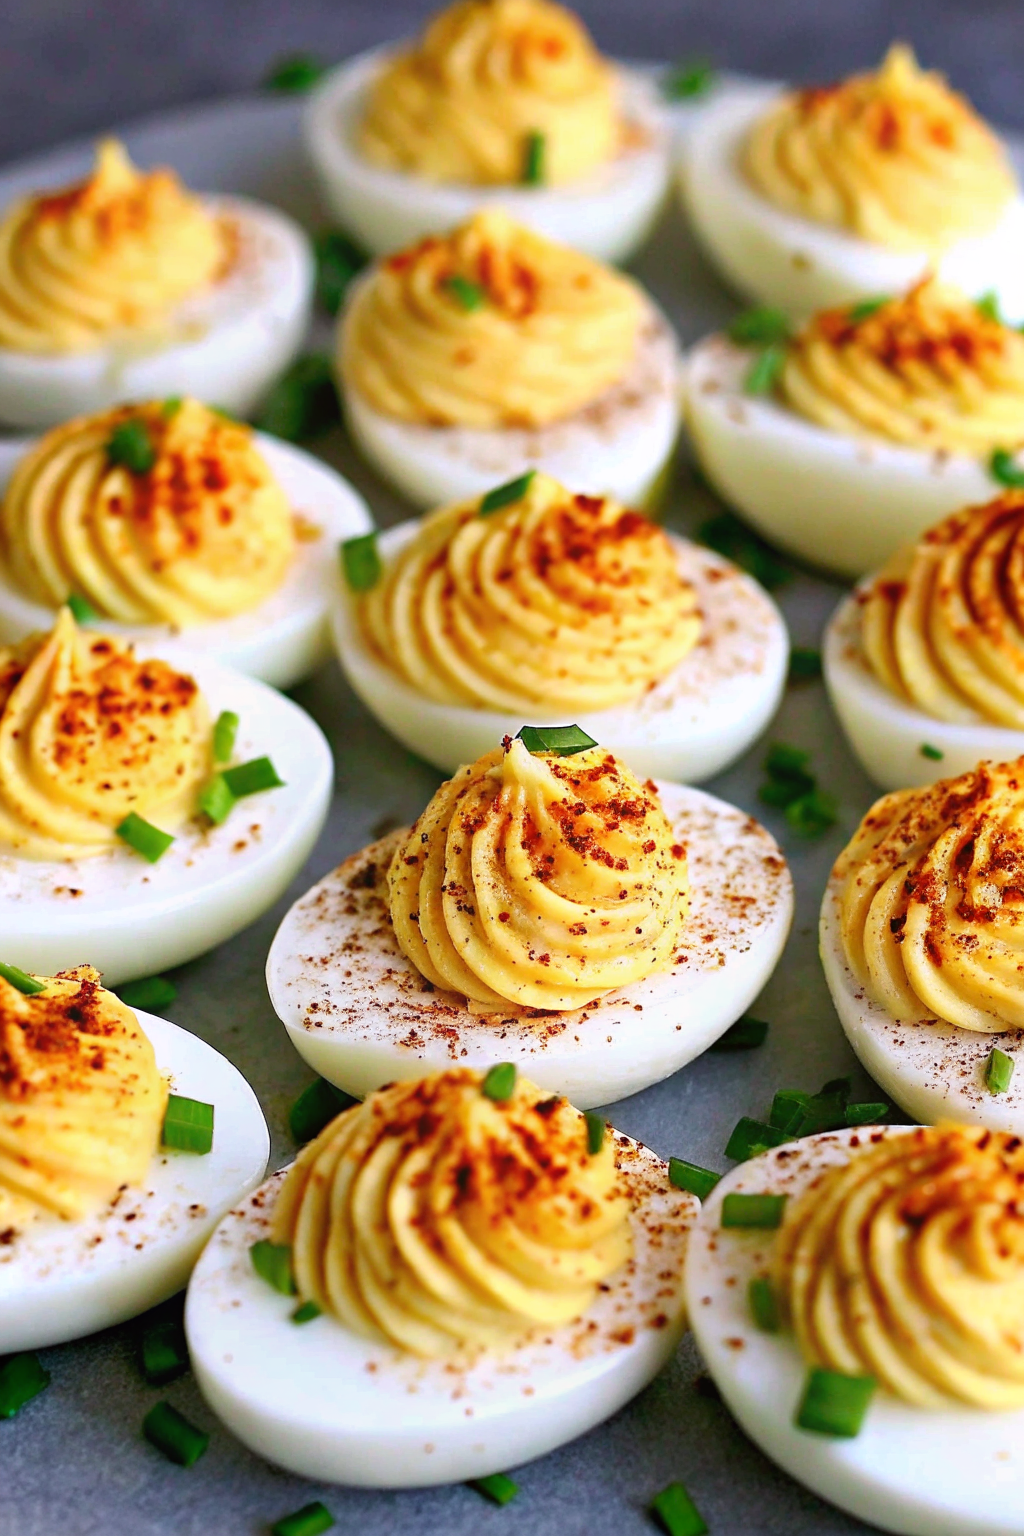
Pipe the filling in a circular motion, building a little tower of yolk. It looks professional and takes zero extra time. If you want to get fancy, drop a star tip into the bag before you fill it. Those ridges catch the paprika garnish beautifully.
The Final Garnish
Paprika is non-negotiable. It adds a pop of red against the yellow filling. But does it add flavor? Honestly, standard paprika is mostly for looks. Smoked paprika, however, adds a wonderful aroma. Just sprinkle it from high up so it dusts the eggs evenly rather than leaving red clumps.
Fresh herbs also elevate the look. A tiny sprig of dill or a slice of chive signals freshness. It tells your guests, “I didn’t just buy these at the deli counter.”
Transporting Your Precious Cargo
You made the perfect deviled eggs. Now you have to get them to the party. This is the most stressful part of the process. Eggs are slippery. They like to slide around and smash into each other.
If you make these often, invest in a dedicated egg carrier. They have little indentations that cradle each egg securely. If you don’t have one, here is a hack: take a mini muffin tin and line each cup with a paper towel or a cupcake liner. The eggs sit snugly in the holes and won’t tip over in the car.
Keep them cold! This is a dairy and egg-based dish. Do not leave them sitting in a hot car or on a sunny picnic table for hours. Food safety is cool. 😛
Troubleshooting: Why Do My Eggs Look Sad?
Let’s troubleshoot some common disasters so you can avoid them.
Problem: The filling is runny.
You added too much pickle juice or mayo.
The Fix: You can try adding a bit of instant mashed potato flakes (weird, but it works) or boiling an extra egg yolk to mash in. In a pinch, mixing in a little cream cheese can firm it up. For those who love creamy textures, this trick is similar to how you stabilize a good cream cheese dip.
Problem: The whites are rubbery.
You overcooked them.
The Fix: There is no fixing this batch. Chop them up for salad and start over. Next time, set a timer and use the ice bath!
Problem: The filling is bland.
You forgot the salt.
The Fix: Eggs need salt. Taste your filling before you pipe it. If it tastes flat, add salt. Then add a little more acid. Keep tasting until your taste buds zing.
Making Them Ahead of Time
Can you make these in advance? Yes, but with a caveat.
I recommend boiling and peeling the eggs a day or two before. You can even make the filling a day ahead. Store the whites in an airtight container and store the filling in a sealed Ziploc bag.
Do not fill them until the day of the party.
If you fill them too early, the surface of the yolk mixture starts to dry out and form a crust. Plus, the color can darken. Keep the components separate until you are ready to serve. This keeps everything tasting and looking fresh. This strategy is a lifesaver during the holidays when you are juggling a million other Christmas recipes and oven times.
Nutrition: The Good and The Bad
Are they healthy? Well, eggs are a powerhouse of protein. They contain essential vitamins and choline. However, we just mixed them with a cup of mayonnaise.
Let’s call them a “balanced” indulgence. They are low carb and keto-friendly, which makes them a popular choice for many diets. If you want to lighten them up, you can swap half the mayo for Greek yogurt. It adds tang and protein while cutting the fat. Just know that the texture will be slightly less silky.
Final Thoughts: The Egg and You
There is a reason deviled eggs have graced tables since ancient Roman times (yes, really). They are the perfect bite. They are creamy, salty, tangy, and satisfying.
Mastering this simple dish gives you a superpower. You become the person everyone looks for at the gathering. You bring the comfort food.
So, go buy your eggs today and let them sit in the fridge for a week. Boil them with confidence. Whip that filling until it’s lighter than air. And when you finally set that platter down, watch the magic happen. Just make sure you grab one for yourself immediately, or you’ll be left with nothing but an empty plate and some paprika dust.
For more on the science behind why peeling can be such a nightmare, check out this article from The Food Lab. It explains the pH levels in detail!
Now, get cracking!
The Best Classic Deviled Eggs
Author: Prep: 20 minutes Cook: 11 minutes Total: 46 minutesEquipment
- Large pot
- Large Bowl (for ice bath)
- Sharp knife
- Electric Hand Mixer or Food Processor (for ultra-smooth filling)
- Piping Bag (or a Ziploc bag with the corner snipped)
Instructions
The Eggs:
- 12 large eggs (older eggs are easier to peel!)
- Water (for boiling)
- Ice (for the ice bath)
The Filling:
- ½ cup full-fat mayonnaise (Duke’s or Hellmann’s/Best Foods recommended)
- 1 tsp Dijon mustard
- 1 tsp yellow mustard
- 1–2 tsp pickle juice (or white vinegar/lemon juice)
- ⅛ tsp salt (plus more to taste)
- ⅛ tsp black pepper
The Garnish:
- Smoked paprika (for dusting)
- Fresh chives or dill, finely chopped
- Crispy bacon bits (optional)
Notes
- The “Hot Start” Boil: Fill a large pot with about an inch or two of water and bring it to a rolling boil over high heat. Once boiling, reduce the heat to low so the water is just simmering (this prevents cracking). Gently lower the eggs into the water using a slotted spoon.
- Cook: Increase the heat back to medium-high to maintain a gentle boil. Cover the pot and set a timer for exactly 11 minutes for perfectly set, bright yellow yolks.
- ** The Ice Bath:** While the eggs cook, fill a large bowl with cold water and plenty of ice. As soon as the timer beeps, immediately transfer the eggs into the ice bath. Let them sit for at least 15 minutes. This stops the cooking process and shrinks the egg slightly inside the shell, making peeling easier.
- Peel & Slice: Gently tap the eggs on the counter to crack the shell all over. Peel under cool running water. Slice each egg in half lengthwise. Wipe your knife with a paper towel between cuts to keep the whites clean.
- Make the Filling: Gently pop the yolks out into a mixing bowl and place the whites on a serving platter. Mash the yolks with a fork first, then add the mayonnaise, Dijon mustard, yellow mustard, pickle juice, salt, and pepper.
- Whip It: For the best deviled eggs, use a hand mixer or food processor to whip the yolk mixture until it is light, fluffy, and completely lump-free. Taste and adjust salt or acid if needed.
- Fill the Eggs: Transfer the filling to a piping bag (or a Ziploc bag with the corner snipped off). Pipe a generous swirl of filling into each egg white cavity.
- Garnish & Serve: Dust the tops with smoked paprika and sprinkle with fresh chives. Serve immediately or store in the fridge until the party starts!
Nutrition


