
Let’s be real for a second. Is there anything more comforting than a bowl of hot, savory broth topped with toasted bread and enough melted cheese to choke a horse? I don’t think so. French Onion Soup is the culinary equivalent of a warm hug on a cold day. It’s rich, it’s messy, and it makes your entire house smell like heaven.
But here’s the thing: most people mess it up. They rush the onions, use weak broth, or pick the wrong cheese. I’ve eaten enough disappointing, watery onion water in my life to know exactly what not to do.
Today, we’re fixing that. I’m going to walk you through exactly how to make the best French Onion Soup of your life. We aren’t cutting corners here. We’re going to respect the onion. Put on your apron and grab some tissues, because we’re about to cry a little bit (from the onions, obviously).
The History: From Peasant Food to Bougie Bowls
You might think of this soup as fancy bistro fare, but it started as peasant food. Onions were cheap, easy to grow, and lasted forever in the cellar. Poor folks in Paris needed something to keep them warm, so they boiled onions in water and threw old, stale bread on top.
Over time, chefs realized that if you treat the onions nicely and add some wine, magic happens. Now, it’s a staple in high-end restaurants. Isn’t it funny how the cheapest ingredients often make the most luxurious meals? IMO, that’s the beauty of cooking. You don’t need caviar to eat like a king; you just need patience and a lot of butter.
The Star Ingredient: It’s All About the Onions
You cannot hide bad onions in this soup. They are the star, the co-star, and the director. But which ones should you buy?
Choosing Your Weapon
Go to the store and grab yellow onions. Do not get red onions unless you want your soup to look gray and unappetizing. Do not get sweet onions (like Vidalias) because the cooking process concentrates the natural sugars, and you don’t want your dinner tasting like dessert.
Yellow onions strike the perfect balance. They have that sharp, sulfurous bite when raw but break down into a deep, savory sweetness when you cook them properly.
Quantity Matters
Here is a rule of thumb: buy more onions than you think you need. When you slice them up, it will look like a mountain. You’ll think, “There is no way all of this fits in my pot.” Trust me, it shrinks. A massive pile of raw onions turns into a humble cup or two of caramelized gold.
The Gear: What You Actually Need
You don’t need a kitchen full of gadgets, but you do need the right vessel.
- A Heavy-Bottomed Pot: You need a Dutch oven or a heavy stainless steel pot. Thin pots create hot spots, and hot spots burn onions. Burnt onions taste bitter and sad.
- A Sharp Knife: You have a lot of slicing to do. A dull knife is dangerous and makes the crying worse.
- Oven-Safe Bowls: If you want that classic broiled cheese top, you need bowls that won’t explode under the broiler.
Speaking of pots, having the right equipment changes the game. If you’re still using a flimsy aluminum pot, you might want to look into the best Dutch ovens for retaining heat evenly. It makes a huge difference in how the onions break down.
The Patience Test: Caramelizing the Onions
This is where the magic happens. This is also where most recipes lie to you. If a recipe tells you that you can caramelize onions in 10 or 15 minutes, close that tab immediately. They are setting you up for failure.
The Process
- Slice the onions: Cut them pole-to-pole into strips. Not too thin, or they melt into mush. Not too thick, or they never break down. Aim for 1/8th of an inch.
- Melt the fats: I use a mix of butter and olive oil. Butter gives flavor; oil prevents the butter from burning.
- Add the onions: Toss them in and coat them in the fat.
- Wait.
You need to cook these onions over medium-low heat for at least 45 minutes. Honestly? I usually go for an hour. You want them to turn a deep, rich mahogany color. This is the Maillard reaction at work—browning proteins and sugars to create flavor.
Stir them every few minutes. If they start sticking too much, add a splash of water to loosen the fond (the brown sticky bits) from the bottom. That stuff is pure flavor gold. Do not let it burn!
The Deglaze: Adding the Booze
Once your onions look like dark, sticky jam, it’s time to wake them up. You need acid to cut through that sweetness.
I prefer dry sherry. It has a nutty, complex flavor that pairs perfectly with the onions. White wine works too, but make sure it’s a dry one like Sauvignon Blanc. Avoid cooking wines from the supermarket shelf; they contain loads of salt and taste like regret.
Pour in about half a cup of sherry. Scrape the bottom of the pot vigorously. You want every single bit of that caramelized goodness incorporated into the liquid. Let the alcohol cook off for a minute or two.
The Broth: Beef is King
While you can use chicken or vegetable stock, traditional French Onion Soup demands beef stock. It provides that deep, dark backbone that stands up to the intense onion flavor.
If you have the time to make homemade beef stock, do it. The gelatin from the bones gives the soup a velvety mouthfeel you just can’t get from a carton.
However, I know we all have lives. If you buy store-bought broth, buy the high-quality stuff. Look for “bone broth” on the label for extra body.
Pro Tip: I like to add a splash of Worcestershire sauce and a sprig of fresh thyme to the broth. It adds an umami punch that makes people wonder, “What is that secret ingredient?”
The Simmer
Pour in your stock and bring it to a simmer. Let it bubble gently for about 30 minutes. You want the flavors to marry. The onions should soften further and become one with the broth. Taste it. Does it need salt? Pepper? Maybe a splash of balsamic vinegar for depth? Trust your tongue.
The Crouton: Building the Raft
You cannot just throw raw bread on top of soup. It will disintegrate into a soggy mess instantly :/ . You need to build a structural raft for the cheese.
Grab a French baguette. Slice it into rounds about an inch thick. Arrange them on a baking sheet and brush them with a little olive oil or melted butter.
Toast them in the oven at 350°F (175°C) until they are hard and golden brown. You want them basically to be giant crackers. This structural integrity ensures the bread stays crunchy in the center even after it soaks up some broth.
The Cheese: The Gooey Crown
Now for the controversial part. What cheese belongs on French Onion Soup?
Tradition dictates Gruyère. It’s a Swiss cheese that melts beautifully and has a nutty, slightly funky flavor. It is the gold standard.
However, Gruyère can be expensive. If you can’t find it or don’t want to spend the money, Comté or Emmental work well too.
My Secret Blend:
I like to mix Gruyère with a little bit of Mozzarella. Why? Because Mozzarella gives you that ridiculous, cartoon-style cheese pull. Just don’t tell the French police I said that.
Grate your own cheese. Pre-shredded cheese comes coated in starch (like potato starch) to keep it from clumping in the bag. That starch prevents the cheese from melting properly. Grab a block and use your muscles.
Assembly and Broiling
We are in the home stretch.
- Ladle the soup: Fill your oven-safe bowls about 3/4 full.
- Place the raft: Float one or two of your toasted baguette slices on top.
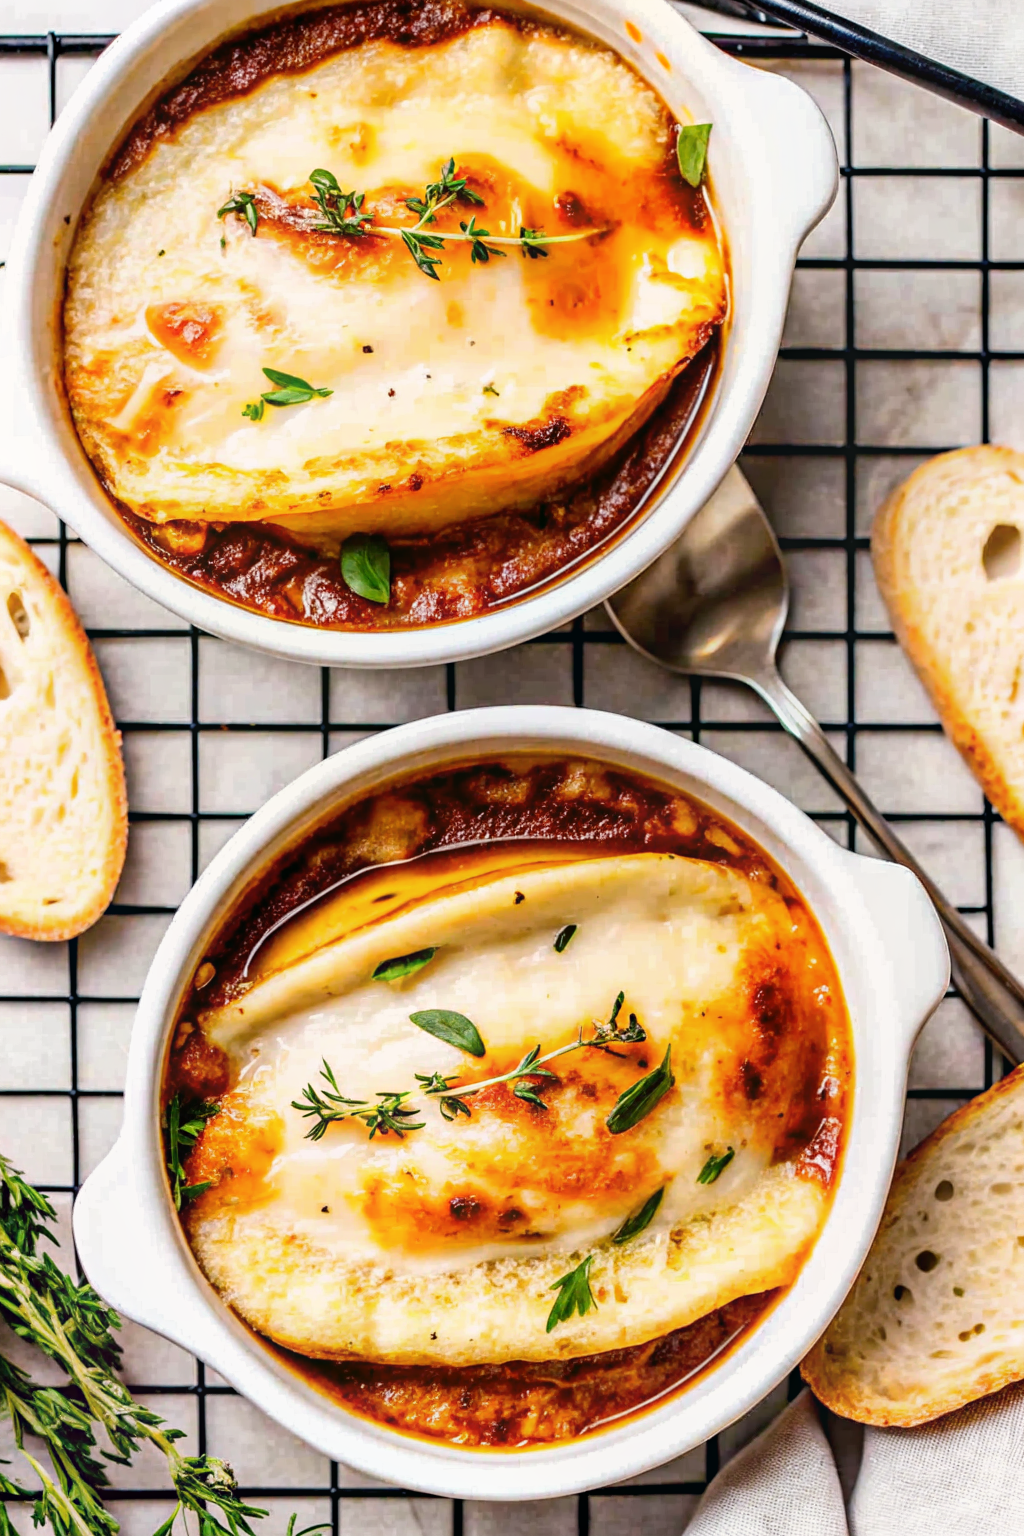
- The Avalanche: Cover the bread and the rim of the bowl with a mountain of cheese. Yes, let it hang over the sides. That crispy, burnt cheese on the side of the bowl is the chef’s treat.
Turn your oven broiler on high. Place the bowls on a baking sheet (to catch drips) and slide them under the heat.
Watch it like a hawk. Cheese goes from “perfectly golden” to “black charcoal” in about 30 seconds. You want the cheese to bubble and brown in spots.
Serving: The Hazard Zone
Remove the baking sheet carefully. These bowls are now approximately the temperature of the sun. Warn your guests!
Let it sit for five minutes. I know you want to dive in, but if you eat it now, you will burn the roof of your mouth and taste nothing for a week. FYI, patience pays off here.
Pair this masterpiece with a simple green salad with a vinaigrette to cut the richness. If you need ideas for other starters to serve alongside this for a bigger meal, check out these appetizers for a crowd.
Troubleshooting Your Soup
Even the best of us hit snags. Here is how to fix common issues.
- It’s too sweet: You probably used sweet onions or didn’t cook the onions long enough to develop the savory notes. Add a teaspoon of cider vinegar or a little more salt to balance it.
- It’s too thin: This soup isn’t meant to be thick like chowder, but if it feels like water, simmer it longer with the lid off to reduce the liquid.
- It lacks depth: Add a splash of soy sauce. It sounds weird, but the soy sauce adds color and savory depth without tasting like Asian food.
- The bread sank: You didn’t toast the bread enough, or you let the soup sit too long before serving. Next time, toast that bread until it’s rock hard.
My Favorite Recipe
Here is the breakdown of exactly how I make it on a Sunday afternoon.
Ingredients:
- 5 large yellow onions (about 3 lbs)
- 3 tbsp butter
- 1 tbsp olive oil
- 1 tsp salt (plus more to taste)
- 1/2 tsp sugar (helps caramelization)
- 1/2 cup dry sherry
- 6 cups beef stock (preferably high quality)
- 4 sprigs fresh thyme
- 1 bay leaf
- 1 baguette
- 8 oz Gruyère cheese, grated
Instructions:
- Prep the Onions: Slice those onions. Wipe your tears.
- Caramelize: Heat the butter and oil in your pot over medium heat. Add onions. Stir to coat. Reduce heat to medium-low. Cook for 45-60 minutes, stirring occasionally, until deep brown.
- Deglaze: Add the sherry. Scrape the bottom. Cook for 2 minutes.
- Simmer: Add broth, thyme, and bay leaf. Simmer for 30 minutes. Remove thyme stems and bay leaf. Taste and adjust salt/pepper.
- Toast Bread: Slice baguette, brush with oil, bake at 350°F until crisp.
- Broil: Ladle soup into bowls. Top with bread. Heap with cheese. Broil until bubbly and brown.
Why This Matters
Making French Onion Soup from scratch teaches you about heat, time, and transformation. You take a root vegetable that makes you cry and turn it into something luxurious.
It’s also cheap! Onions cost pennies. The most expensive part is the cheese and maybe the wine, but you get to drink the rest of the wine while you cook, so that pays for itself :).
So, invite some friends over. Tell them to bring the wine. You handle the onions. Sit around the table, break through that crust of cheese, and enjoy one of the greatest dishes ever invented.
For more deep dives into classic techniques, I highly recommend checking out Serious Eats’ guide to onions. They explain the science of why onions turn sweet better than anyone else.
Now, go chop some onions. Your stomach will thank you.
The Best French Onion Soup
Author: Prep: 20 minutes Cook: 1 hour 35 minutes Total: 2 hoursEquipment
- Large Heavy-Bottomed Pot or Dutch Oven
- Sharp chef’s knife
- Oven-Safe Soup Bowls (Ramekins)
- Box Grater
- Baking sheet
Ingredients
The Soup Base
- 5 large yellow onions approx. 3 lbs, peeled and sliced pole-to-pole (1/8 inch thick)
- 3 tbsp unsalted butter
- 1 tbsp olive oil
- 1 tsp kosher salt plus more to taste
- 1/2 tsp granulated sugar optional, helps browning
- 1/2 cup dry sherry or dry white wine
- 6 cups beef stock high quality or homemade
- 4 sprigs fresh thyme
- 1 bay leaf
- 1 dash Worcestershire sauce optional, for depth
- 1 tsp balsamic vinegar optional, to balance sweetness
The Cheesy Raft
- 1 French baguette cut into 1-inch thick rounds
- 1 tbsp olive oil for brushing bread
- 8 oz Gruyère cheese freshly grated (about 2 cups)
- 2 oz Mozzarella cheese grated (optional, for extra stretch)
Instructions
- Prep the Onions: Slice your onions about 1/8-inch thick. Don’t slice them paper-thin or they will dissolve; you want them to keep some texture.
- The Long Haul (Caramelizing): Melt the butter and olive oil in a Dutch oven over medium heat. Add the onions and toss to coat. Cook for roughly 45 to 60 minutes, stirring every few minutes. Adjust heat to medium-low if they start browning too fast. You are looking for a deep, dark mahogany color—this is where the flavor lives!
- Deglaze the Pot: Once the onions are jammy and dark, pour in the dry sherry. Scrape the bottom of the pot vigorously to release the “fond” (the brown sticky bits). Let the liquid cook off for about 2 minutes.
- Simmer the Broth: Pour in the beef stock, fresh thyme, bay leaf, and Worcestershire sauce (if using). Bring to a simmer, then reduce heat to low. Let it bubble gently for 30 minutes to marry the flavors.
- Season: Remove the thyme stems and bay leaf. Taste your soup. Does it need salt? A crack of black pepper? If it’s too sweet, add a splash of balsamic vinegar.
- Toast the Bread: While the soup simmers, preheat your oven to 350°F (175°C). Arrange baguette slices on a baking sheet, brush lightly with olive oil, and bake for 10-15 minutes until rock hard and golden.
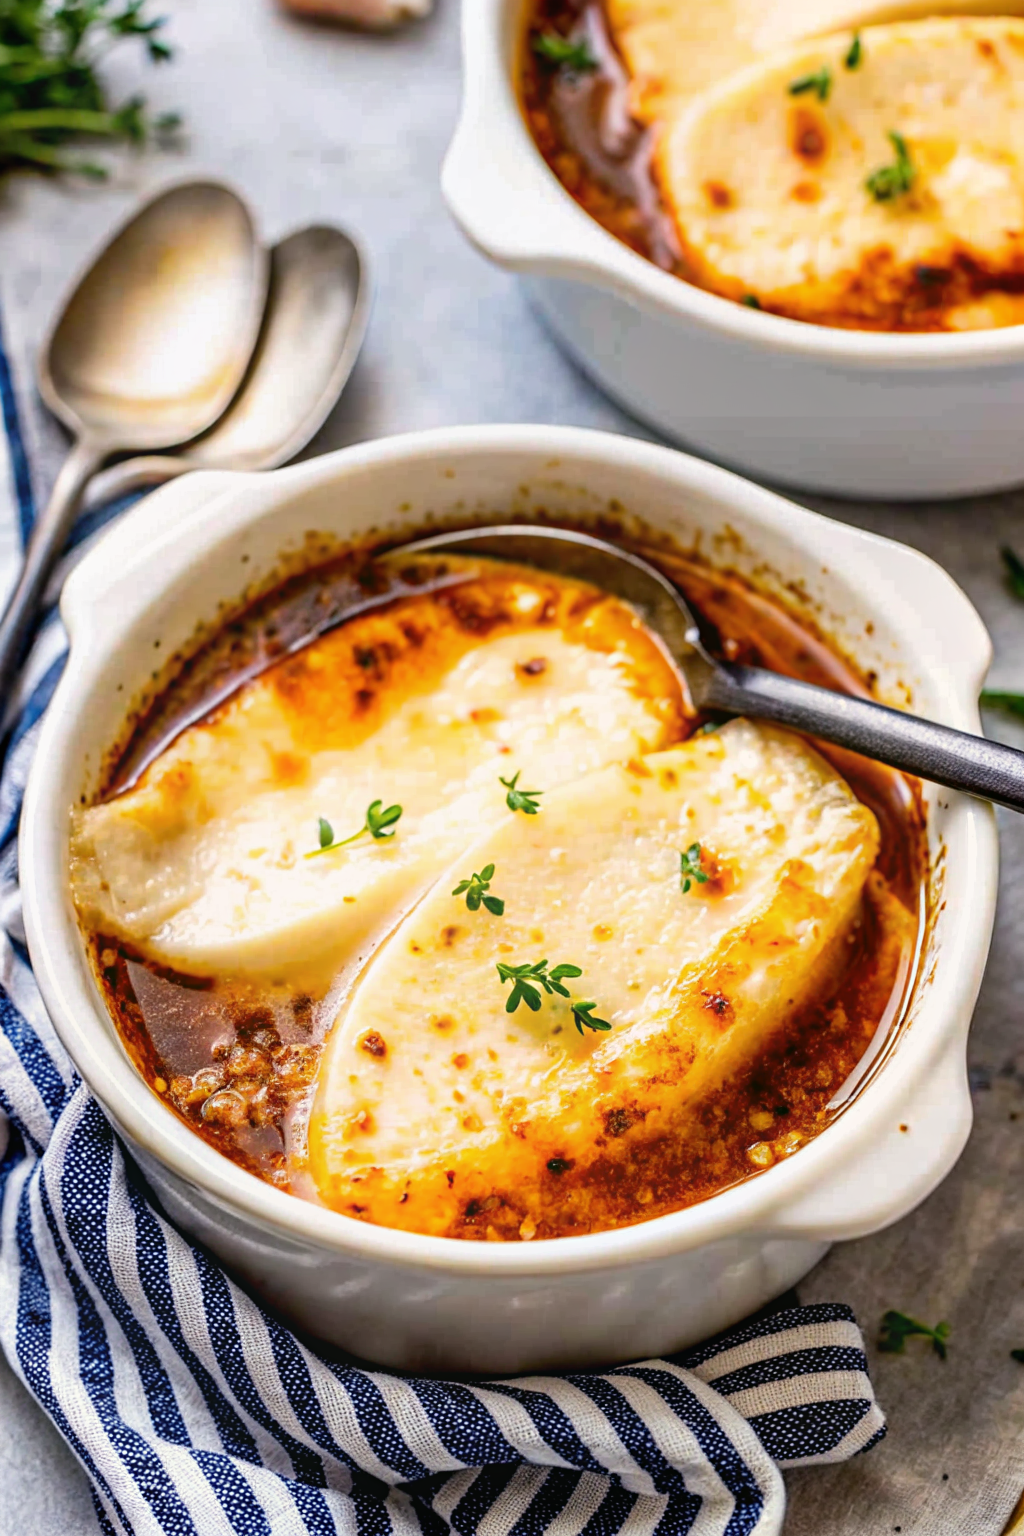
- Assemble: Switch your oven to Broil (High). Place oven-safe bowls on a baking sheet. Ladle the hot soup into the bowls, leaving about an inch of space at the top.
- The Cheesy Finale: Float one or two toasted baguette slices on top of the broth. Pile the grated Gruyère (and Mozzarella if using) generously over the bread, letting it hang over the edges of the bowl.
- Broil: Place under the broiler for 2–4 minutes. Watch it closely! Pull them out when the cheese is bubbling and spotty brown.
- Cool: Let sit for 5 minutes before serving to avoid burning your mouth. Enjoy!
Notes
- Onion Choice: Stick to yellow onions. Sweet onions (like Vidalia) make the soup too sugary, and red onions turn the broth a strange gray color.
- Patience is Key: Don’t rush the caramelization. If you stop at 20 minutes, you’ll just have boiled onion soup. Go for the full hour for that authentic French onion soup taste.
- Cheese Tip: Grate your own cheese! Pre-shredded cheese contains anti-caking agents that stop it from melting smoothly.
- Make Ahead: The soup base actually tastes better the next day. You can make the soup ahead of time, store it in the fridge, and just do the bread/cheese broiling step right before serving
Nutrition


